HEATER ASSEMBLY REMOVAL

-
DRAIN ENGINE COOLANT
CAUTION:
To avoid the danger of being burned, do not remove the reserve tank cap sub-assembly while the engine and reserve tank assembly are still hot. Thermal expansion will cause hot engine coolant and steam to blow out from the radiator assembly.
-
Loosen the radiator drain cock plug.
Tech Tips
Collect the coolant in a container and dispose of it according to the regulations in your area.
-
Remove the reserve tank cap.
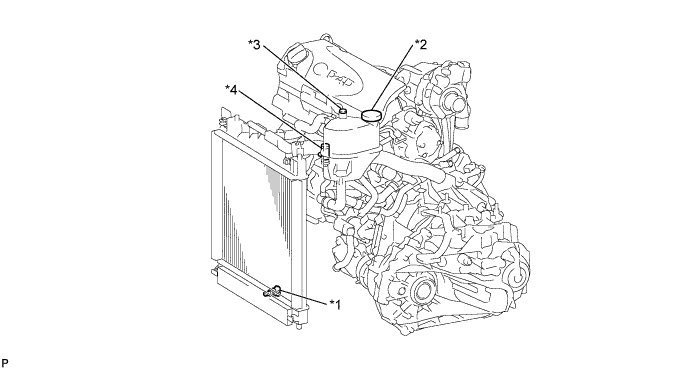
Text in Illustration *1 Radiator Drain Cock Plug *3 Air Bleed Valve 1 *2 Reserve Tank Cap Sub-assembly *4 Air Bleed Valve 2
-
-
REMOVE WINDSHIELD WIPER MOTOR AND LINK ASSEMBLY
-
Remove the windshield wiper motor and link assembly Click here.
-
-
REMOVE TAIL EXHAUST PIPE ASSEMBLY
-
Remove the tail exhaust pipe assembly Click here.
-
-
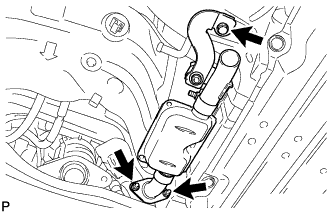
REMOVE EXHAUST PIPE SUB-ASSEMBLY
-
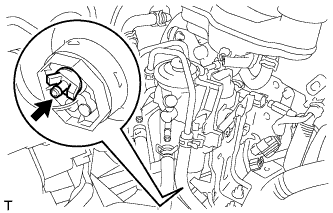
Remove the bolt, 2 nuts and exhaust pipe.
-
-
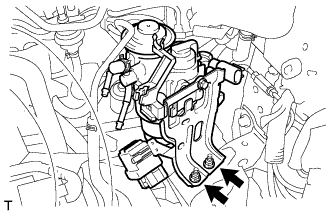
REMOVE BATTERY CLAMP SUB-ASSEMBLY
-
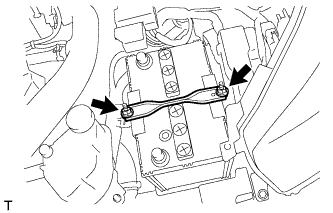
Remove the 2 nuts and the battery clamp.
-
-
REMOVE BATTERY
-
REMOVE BATTERY TRAY
-
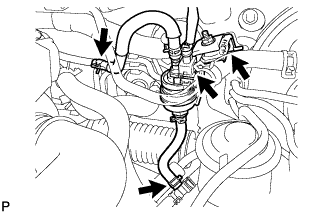
REMOVE FUEL FILTER ASSEMBLY
-
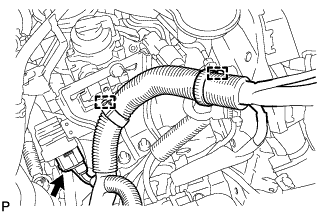
Disconnect the 2 wire harness clamps.
-
Disconnect the connector.
-
Disconnect the 2 connectors.
-

Disconnect the 2 fuel hose clamps from the fuel filter.
-
Disconnect the 2 fuel hoses.
-
Loosen the fuel filter drain plug to drain fuel.
-
Tighten the fuel filter drain plug.
-
Remove the 2 nuts and fuel filter.
-
-
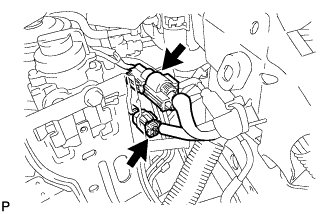
REMOVE HEATER PUMP ASSEMBLY
-
Disconnect the connector.
-
Disconnect the 2 fuel hoses.
-
Remove the nut and heater pump.
-
-
REMOVE NO. 1 HOSE TO HOSE TUBE

-
Remove the 2 bolts.
-
Disconnect the 2 vacuum hoses and remove the hose to hose tube.
-
-
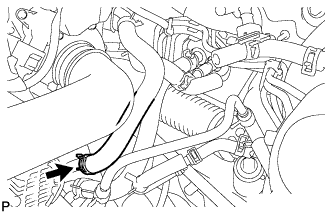
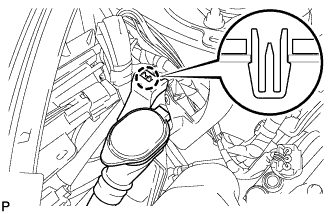
DISCONNECT HEATER WATER INLET HOSE A

-
Slide the clip and disconnect the heater water inlet hose from the air conditioning unit.
-
-
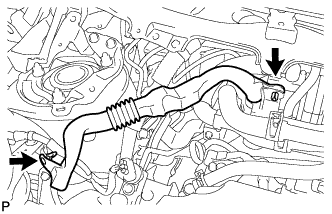
DISCONNECT HEATER WATER INLET HOSE E
-
Slide the clip and disconnect the heater water inlet hose from the engine assembly.
-
-
SEPARATE WINDSHIELD WASHER JAR ASSEMBLY
-
Disengage the claw and separate the windshield washer jar.
-
-
REMOVE AIR DUCT
-
Remove the 2 clips and air duct.
-
-
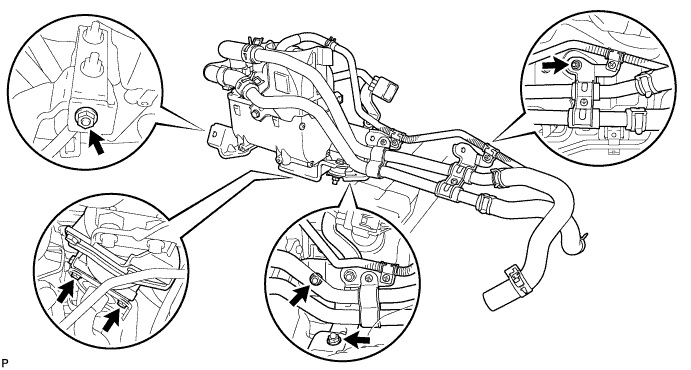
REMOVE HEATER AND ACCESSORY ASSEMBLY
-
Remove the 2 bolts and separate the heater exhaust pipe.
-
Remove the 4 nuts.
-
Remove the heater and accessory assembly.
Note
Do not damage the heater and accessory assembly when removing the heater and accessory assembly.
-