CONDENSER REMOVAL

-
RECOVER REFRIGERANT FROM REFRIGERATION SYSTEM
-
Start up the engine.
-
Switch the A/C on.
-
Turn the blower switch to on.
-
Operate the cooler compressor with an engine speed of approximately 1000 rpm for 5 to 6 minutes to circulate the refrigerant and collect the remaining compressor oil from each component, in the cooler compressor.
-
Stop the engine.
-
Remove the caps from the service valves on the refrigerant line.
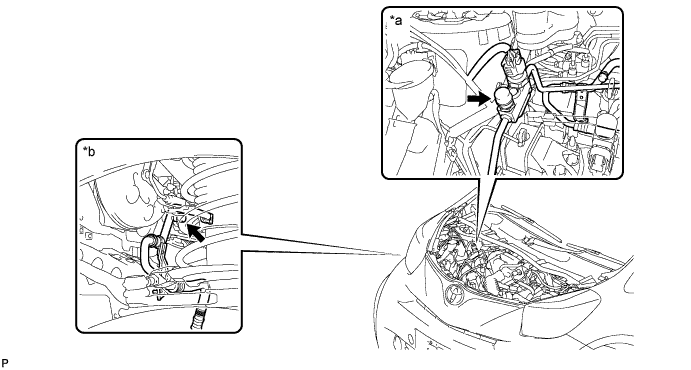
Text in illustration *a Engine room side *b Wheel house side Access to Hi Pressure Side Engine Type RHD LHD 1KR-FE Engine room Engine room 1NR-FE Engine room Engine room 1ND-TV Engine room Engine room Access to Low Pressure Side Engine Type RHD LHD 1KR-FE Wheel house Wheel house 1NR-FE Wheel house Wheel house 1ND-TV Wheel house Wheel house -
Connect the refrigerant recovery unit.
-
Recover the refrigerant from the air conditioning system using a refrigerant recovery unit.
Tech Tips
Use the refrigerant recovery unit in accordance with the manufacturer's instruction manual.
-
-
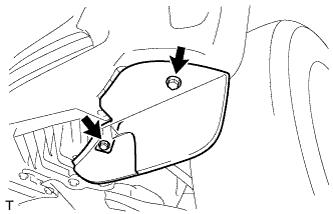
REMOVE FRONT WHEEL OPENING EXTENSION PAD LH
-
Remove the 2 screws and front wheel opening extension pad.
-
-
REMOVE FRONT WHEEL OPENING EXTENSION PAD RH
Tech Tips
Use the same procedure as for the LH side.
-
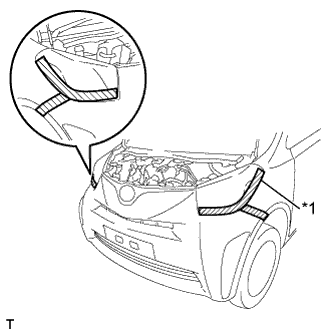
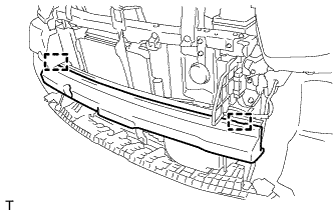
REMOVE FRONT BUMPER COVER
-
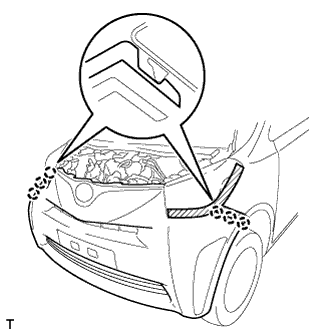
Apply protective tape, as shown in the illustration.
Text in Illustration *1 Protective tape -
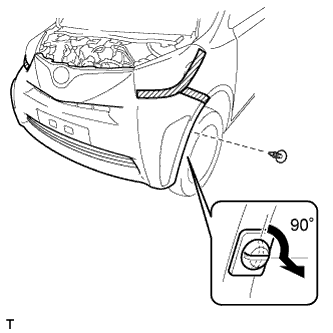
Using a screwdriver, remove the 2 pin hold clips.
Tech Tips
Use the same procedure for the RH and LH sides.
-
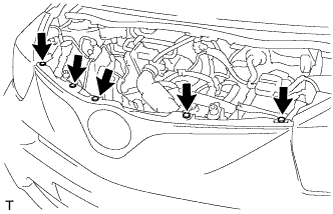
Remove the 5 clips.
-
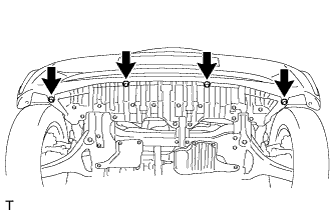
Remove the 4 screws.
-
Disengage the 6 claws and remove the front bumper cover.
-
Disconnect the connectors.
Tech Tips
If the vehicle is equipped with fog lights, disconnect the connector.
-
-
REMOVE RADIATOR SUPPORT UPPER ABSORBER
-
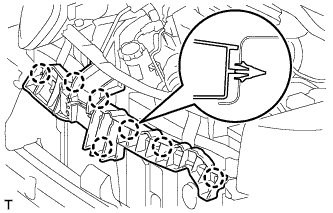
Disengage the 7 claws and remove the radiator support absorber.
-
-
REMOVE FRONT BUMPER SIDE RETAINER RH (for 1ND-TV)
Tech Tips
Use the same procedure as for the LH side Click here.
-
REMOVE FRONT BUMPER ENERGY ABSORBER
-
Remove the front bumper energy absorber.
-
-
REMOVE NO. 2 RADIATOR SIDE AIR SEAL
-
Disengage the 2 claws and remove the radiator side air seal.
-
-
REMOVE NO. 1 RADIATOR SIDE AIR SEAL
Tech Tips
Use the same procedure as for the No. 2 side.
-
REMOVE RADIATOR SUPPORT EXTENSION LH

-
Disengage the 2 claws and remove the radiator support extension.
-
-
REMOVE RADIATOR SUPPORT EXTENSION RH
Tech Tips
Use the same procedure as for the LH side.
-
REMOVE HEADLIGHT ASSEMBLY RH (for 1ND-TV)
Tech Tips
Use the same procedure as for the LH side Click here.
-
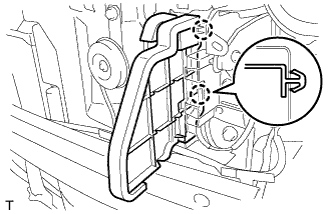
REMOVE WINDSHIELD WASHER JAR ASSEMBLY
-
Remove the 2 bolts.
-
Disengage the claw.
-
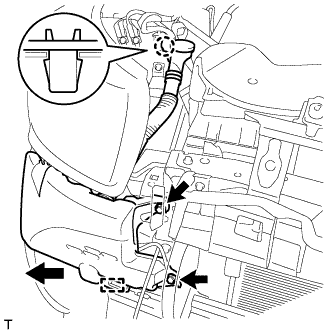
Disengage the guide and remove the windshield washer jar.
-
Disconnect the washer hose.
-
Disconnect the connectors.
-
-
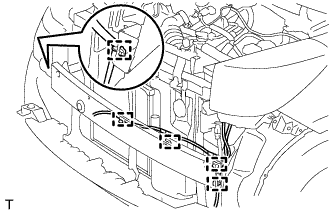
REMOVE FRONT BUMPER REINFORCEMENT SUB-ASSEMBLY
-
Disengage the 5 clamps and disconnect the wire harness.
-
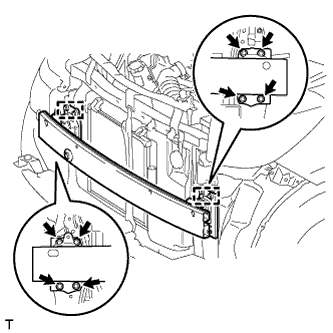
Remove the 8 bolts.
-
Disengage the 2 guides and remove the front bumper reinforcement.
-
-
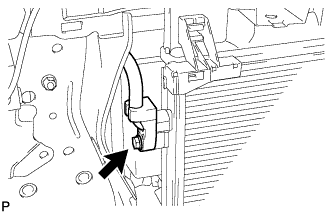
DISCONNECT COOLER REFRIGERANT DISCHARGE PIPE A
-
Remove the bolt and disconnect the cooler refrigerant discharge pipe from the cooler condenser.
-
Remove the O-ring from the cooler refrigerant discharge pipe.
Note
Seal the openings of the disconnected parts using vinyl tape to prevent the entry of moisture and foreign matter.
-
-
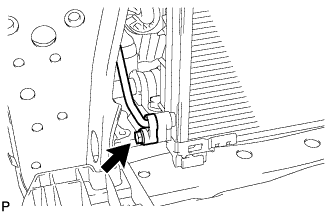
DISCONNECT AIR CONDITIONING TUBE ASSEMBLY
-
Remove the bolt and disconnect the air conditioning tube from the cooler condenser.
-
Remove the O-ring from the air conditioning tube.
Note
Seal the openings of the disconnected parts using vinyl tape to prevent the entry of moisture and foreign matter.
-
-
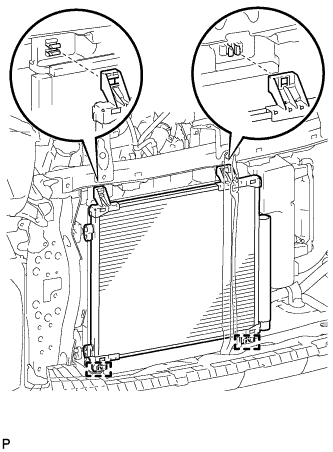
REMOVE COOLER CONDENSER ASSEMBLY
-
Disengage the 2 claws.
-
Remove the cooler condenser.
Note
Do not damage the cooler condenser when removing the cooler condenser.
-