COMPRESSOR (for 1NR-FE) REMOVAL

-
RECOVER REFRIGERANT FROM REFRIGERATION SYSTEM
-
Start up the engine.
-
Switch the A/C on.
-
Turn the blower switch to on.
-
Operate the cooler compressor with an engine speed of approximately 1000 rpm for 5 to 6 minutes to circulate the refrigerant and collect the remaining compressor oil from each component, in the cooler compressor.
-
Stop the engine.
-
Remove the caps from the service valves on the refrigerant line.
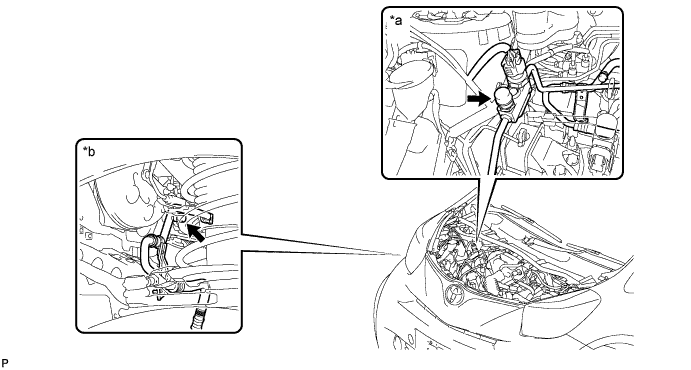
Text in illustration *a Engine room side *b Wheel house side Access to Hi Pressure Side Engine Type RHD LHD 1KR-FE Engine room Engine room 1NR-FE Engine room Engine room 1ND-TV Engine room Engine room Access to Low Pressure Side Engine Type RHD LHD 1KR-FE Wheel house Wheel house 1NR-FE Wheel house Wheel house 1ND-TV Wheel house Wheel house -
Connect the refrigerant recovery unit.
-
Recover the refrigerant from the air conditioning system using a refrigerant recovery unit.
Tech Tips
Use the refrigerant recovery unit in accordance with the manufacturer's instruction manual.
-
-
REMOVE V (COOLER COMPRESSOR TO CRANKSHAFT PULLEY) BELT NO. 1
-
Remove the V (cooler compressor to crankshaft pulley) belt No. 1 Click here.
-
-
REMOVE FRONT FRAME ASSEMBLY
-
Remove the front frame assembly Click here.
-
-
DISCONNECT DISCHARGE HOSE SUB-ASSEMBLY
-
Remove the discharge hose bracket installing bolt.
-
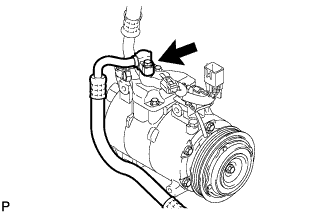
Remove the bolt and disconnect the discharge hose from the compressor.
-
Remove the O-ring from the discharge hose.
Note
Seal the openings of the disconnected parts using vinyl tape to prevent the entry of moisture and foreign matter.
-
-
DISCONNECT SUCTION HOSE SUB-ASSEMBLY
-
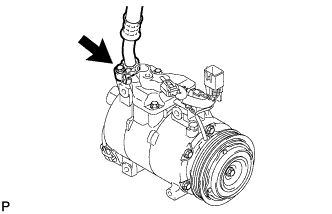
Remove the bolt and disconnect the suction hose from the compressor.
-
Remove the O-ring from the suction hose.
Note
Seal the openings of the disconnected parts using vinyl tape to prevent the entry of moisture and foreign matter.
-
-
REMOVE COOLER COMPRESSOR ASSEMBLY
-
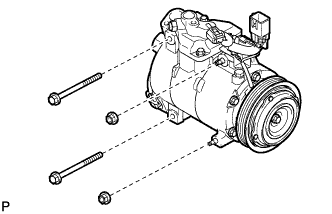
Remove the 2 bolts and the 2 nuts.
-
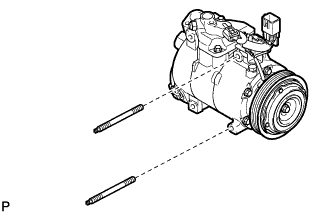
Using a "TORX" socket wrench (E8), remove the 2 stud bolts and the compressor.
-