AUTOMATIC LIGHT CONTROL SENSOR INSTALLATION

-
INSTALL RAIN SENSOR
-
Clean the installation surface of the rain sensor on the windshield glass.
-
When replacing the rain sensor with a new one:
Remove the protective cover on the rain sensor.
Note
Do not touch the silicon mixture directly with a finger.
-
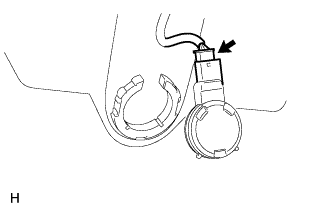
Connect the connector.
Note
Do not touch the silicon mixture directly with a finger.
-
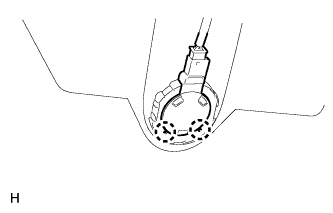
Attach the 2 claws to install the rain sensor.
Note
Be careful that air bubbles do not enter between the silicon mixture and windshield glass.
-
-
INSTALL NO. 2 RAIN SENSOR COVER
-
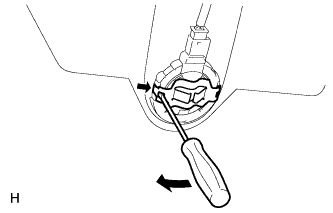
Using a screwdriver, attach the 2 claws to install the No. 2 rain sensor cover.
-
-
INSTALL NO. 1 RAIN SENSOR COVER
-
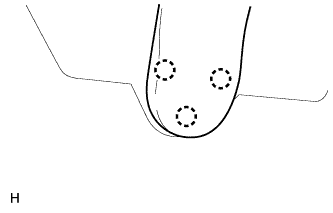
Attach the 3 claws to install the No. 1 rain sensor cover.
-
-
INSTALL FORNT ROOF TOP GARNISH
-
Attach the 2 claws and clip to install the front roof top garnish.
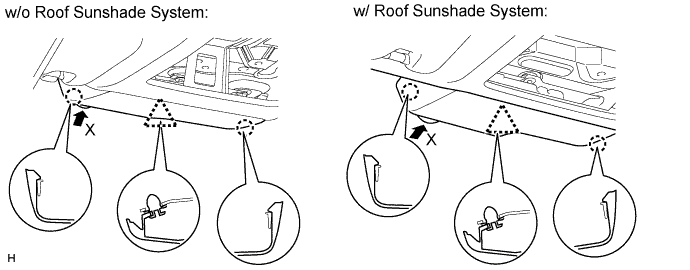
Note
When removing the rain sensor cover, do not apply force to the lane recognition camera sensor assembly areas labeled "X".
-