BACK-UP LIGHT ASSEMBLY (for Wagon) REMOVAL

Tech Tips
-
Use the same procedure for the RH and LH side.
-
The procedure listed below is for the LH side.
-
REMOVE UPPER BACK DOOR TRIM PANEL ASSEMBLY
-
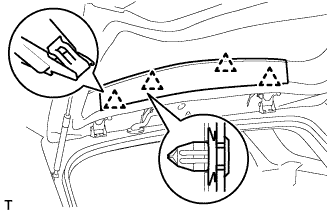
Detach the 4 clips and remove the back door trim panel.
-
-
REMOVE BACK DOOR SIDE GARNISH LH
-
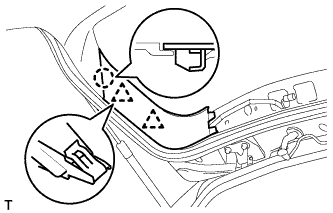
Detach the 2 clips and claw, and remove the back door side garnish.
-
-
REMOVE BACK DOOR SIDE GARNISH RH
-
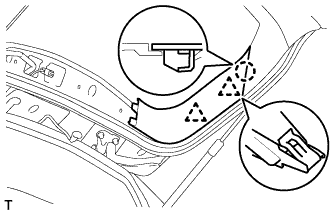
Detach the 2 clips and claw, and remove the back door side garnish.
-
-
REMOVE BACK DOOR TRIM BOARD ASSEMBLY
-
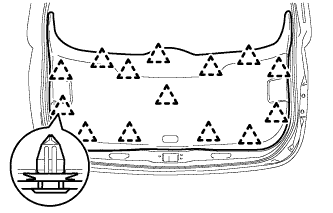
Detach the 14 clips and remove the back door trim board.
-
-
REMOVE REAR LIGHT LENS AND BODY LH
-
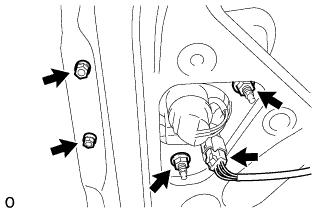
Disconnect the connector.
-
Remove the 4 nuts and rear light lens and body LH.
-
-
REMOVE REAR LIGHT PACKING LH
-
Remove the rear light packing LH.
Note
Be sure to remove the gasket completely from the body.
-
-
REMOVE NO. 1 REAR FOG LIGHT BULB (for LH Side)
-
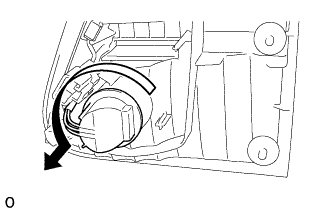
Turn the rear light socket and wire LH in the direction indicated by the arrow in the illustration and remove the socket.
-
Remove the No. 1 rear fog light bulb from the rear light socket and wire LH.
-
-
REMOVE BACK UP LIGHT BULB (for RH Side)
-
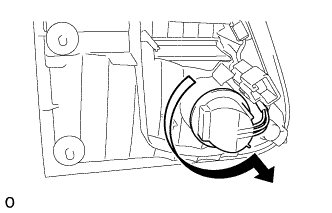
Turn the rear light socket and wire RH in the direction indicated by the arrow in the illustration and remove the socket.
-
Remove the back up light bulb from the rear light socket and wire RH.
-
-
REMOVE REAR LIGHT SOCKET AND WIRE LH
-
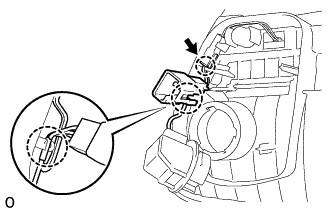
Using a screwdriver, detach the claw.
-
Detach the 3 claws and remove the rear light socket and wire LH.
-
Disconnect the connector.
-