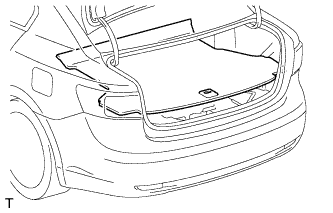
LUGGAGE DOOR HINGE TORSION BAR INSTALLATION

Tech Tips
-
The installation should be performed in the order of RH to LH.
-
After installing the torsion bar, use your hand to open and close the luggage door. Make sure the luggage door opens and closes smoothly.
-
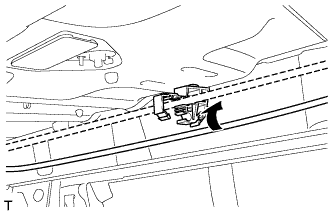
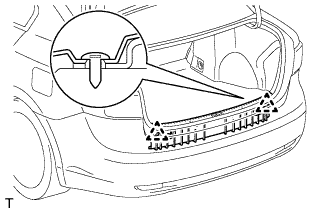
INSTALL LUGGAGE COMPARTMENT DOOR TORSION BAR SUPPORT
-
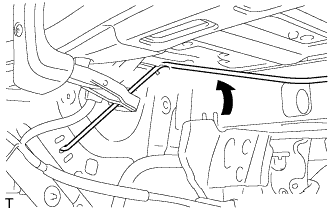
Install the luggage compartment door torsion bar support as shown in the illustration.
-
-
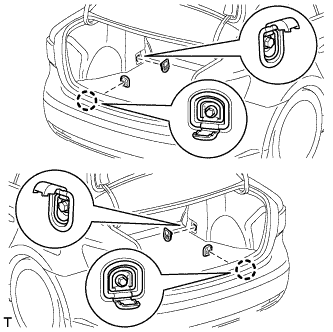
INSTALL LUGGAGE DOOR HINGE TORSION BAR RH
-
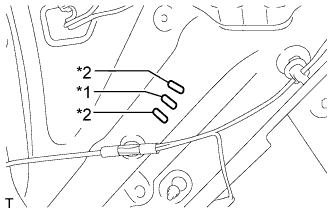
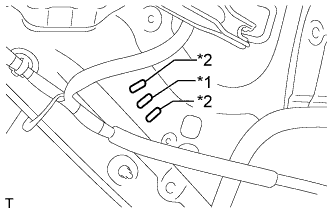
Text in Illustration *1 Installation Hole *2 Installation Hole
(for Adjustment)
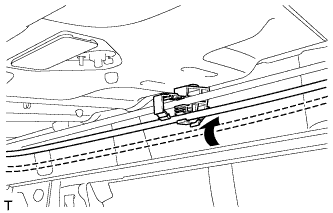
Set the tip of the luggage door hinge torsion bar RH into the installation hole in the center. The upper and lower holes are used for adjustment.
-
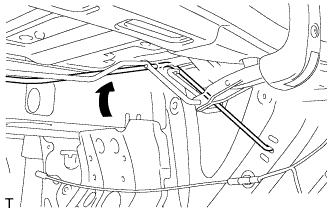
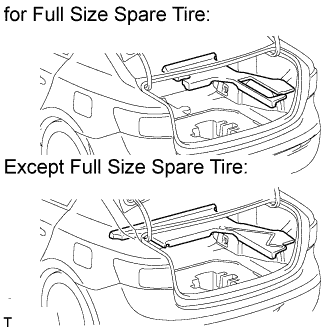
Connect the luggage door hinge torsion bar RH to the body LH side.
-
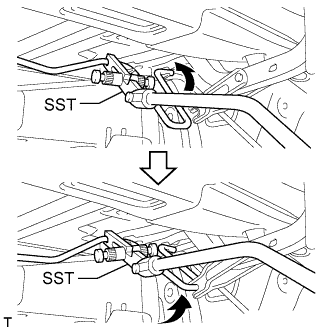
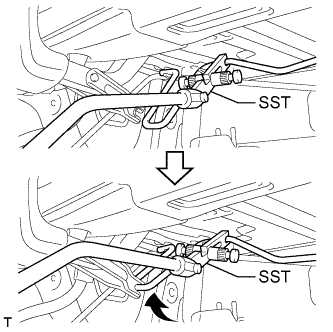
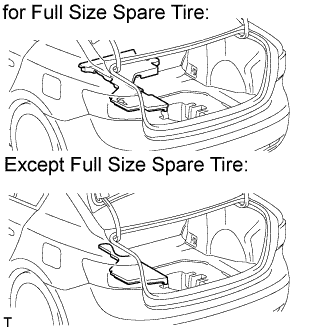
Using SST, install the luggage door hinge torsion bar RH to the luggage door hinge and body RH side.
- SST
- 09804-24010
-
Connect the luggage door hinge torsion bar RH to the luggage compartment door torsion bar support.
-
-
INSTALL LUGGAGE DOOR HINGE TORSION BAR LH
-
Text in Illustration *1 Installation Hole *2 Installation Hole
(for Adjustment)
Set the tip of the luggage door hinge torsion bar LH into the installation hole in the center. The upper and lower holes are used for adjustment.
-
Connect the luggage door hinge torsion bar LH to the body RH side.
-
Using SST, install the luggage door hinge torsion bar LH to the luggage door hinge and body LH side
- SST
- 09804-24010
-
Connect the luggage door hinge torsion bar LH to the luggage compartment door torsion bar support.
-

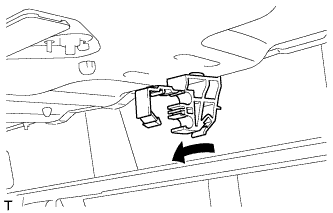
Attach the 2 claws to close the cover.
-
-
INSTALL LUGGAGE COMPARTMENT TRIM COVER ASSEMBLY LH
-
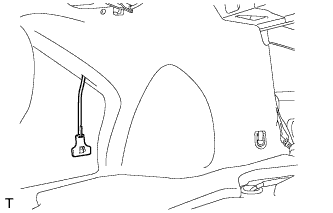
Pass the fuel lid opener cable through the trim cover.
-

Install the trim cover with the 4 clips.
-
-
INSTALL LUGGAGE COMPARTMENT TRIM COVER ASSEMBLY RH
-
Install the trim cover with the 4 clips.
-
-
INSTALL REAR FLOOR FINISH PLATE
-
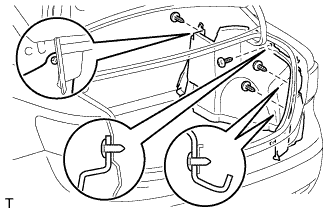
Attach the 4 clips to install the rear floor finish plate.
-
Install the 2 clips.
-
-
INSTALL ROPE HOOK ASSEMBLY
-
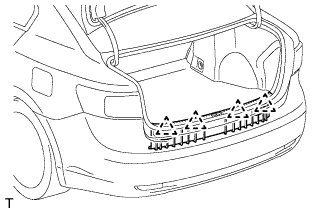
Install the 4 rope hooks with the 4 bolts.
- Torque:
- 7.8 N*m { 80 kgf*cm, 69 in.*lbf }
-
-
INSTALL REAR FLOOR BOARD SPACER
-
INSTALL REAR NO. 6 FLOOR BOARD SPACER
-
INSTALL LUGGAGE COMPARTMENT FLOOR CARPET
-
INSTALL REAR SIDE SEATBACK ASSEMBLY LH
-
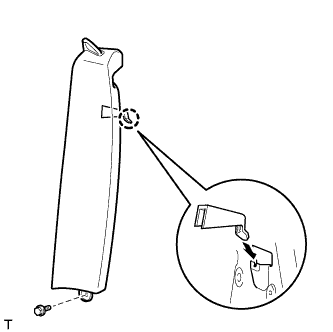
Install the claw as shown in the illustration.
-
Install the side seatback with the bolt.
- Torque:
- 7.8 N*m { 80 kgf*cm, 69 in.*lbf }
-
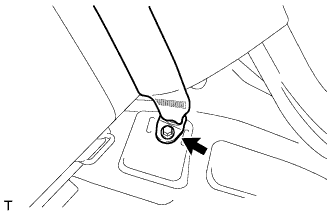
Install the rear seat 3 point type belt anchor with the bolt.
- Torque:
- 41 N*m { 418 kgf*cm, 30 ft.*lbf }
Note
Do not allow the anchor part of the rear seat 3 point type belt to overlap the protruding parts of the floor panel.
-
Install the seat belt to the belt guide.
-
Attach the claw to close the cap of the rear seat shoulder belt guide.
-
Check if the ELR locks.
Note
The check should be performed with the outer belt assembly installed.
-
With the belt assembly installed, check that the belt locks when it is pulled out quickly.
-
-
-
INSTALL REAR SIDE SEATBACK ASSEMBLY RH
Tech Tips
Use the same procedure described for the LH side.
-
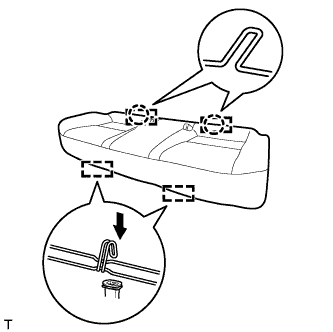
INSTALL REAR BENCH TYPE SEAT CUSHION ASSEMBLY
-
Attach the 2 rear hooks of the seat cushion to the seatback.
-
Attach the 2 front hooks to install the seat cushion.
-
Confirm that the seat cushion is firmly installed.
Note
When installing the seat cushion, make sure the seat belt buckle is not under the seat cushion.
-