SECURITY HORN ASSEMBLY (for Wagon) REMOVAL

-
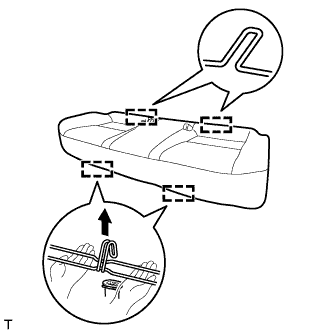
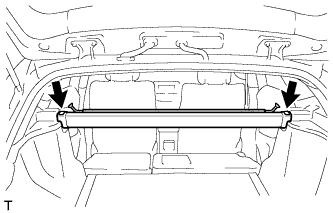
REMOVE REAR BENCH TYPE SEAT CUSHION ASSEMBLY
-
Detach the 2 front hooks of the seat cushion from the vehicle body.
Note
Follow the instructions below carefully as the cushion frame deforms easily.
-
Choose a hook to detach first. Place your hands near the hook as shown in the illustration. Then lift the seat cushion to detach the hook.
-
Repeat for the other hook.
-
-
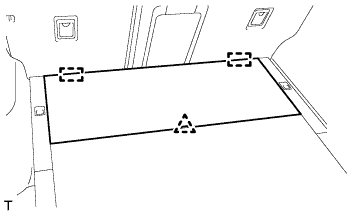
Detach the 2 rear hooks of the seat cushion from the seatback.
Note
Be careful not to damage the vehicle body.
-
-
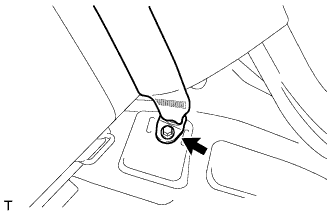
REMOVE REAR SIDE SEATBACK ASSEMBLY LH
-
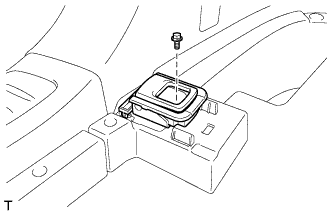
Remove the bolt and disconnect the rear seat 3 point type belt anchor.
-

Using a screwdriver, detach the claw to open the cap of the rear seat shoulder belt guide.
-
Remove the seat belt from the belt guide.
-
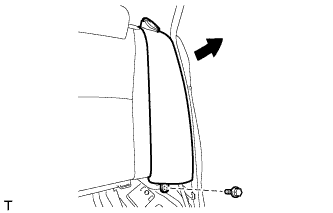
Remove the bolt, and then remove the side seatback LH as shown in the illustration.
-
-
REMOVE REAR SIDE SEATBACK ASSEMBLY RH
Tech Tips
Use the same procedure described for the LH side.
-
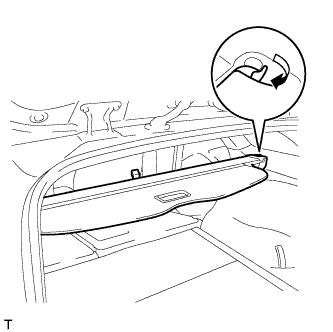
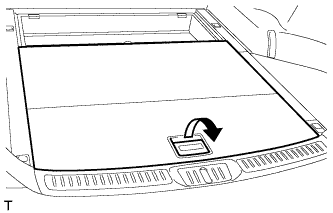
REMOVE TONNEAU COVER ASSEMBLY (w/ Tonneau Cover)
-
Pull the lever and remove the tonneau cover.
-
-
REMOVE ROOM PARTITION NET ASSEMBLY (w/ Partition Net)
-
Push the 2 buttons and remove the room partition net.
-
-
REMOVE LOWER DECK TRIM SIDE BOARD LH (w/ Partition Board)
-
Remove the lower deck trim side board.
-
-
REMOVE LOWER DECK TRIM SIDE BOARD RH (w/ Partition Board)
-
Remove the lower deck trim side board.
-
-
REMOVE DECK BOARD ASSEMBLY
-
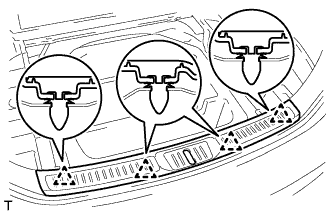
Detach the clip and 2 guides, and remove the deck board.
-
-
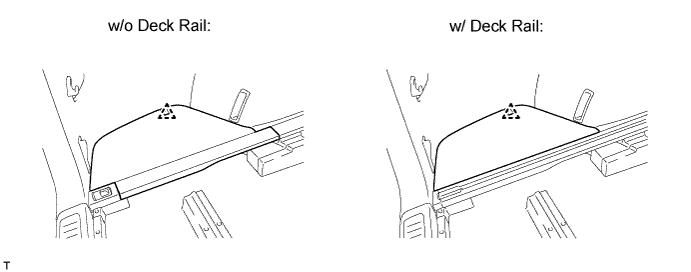
REMOVE DECK BOARD SUB-ASSEMBLY
-
Pull the lever and remove the deck board.
-
-
REMOVE NO. 3 DECK BOARD SUB-ASSEMBLY
-
Detach the clip and remove the No. 3 deck board.
-
-
REMOVE NO. 2 DECK BOARD SUB-ASSEMBLY
Tech Tips
Use the same procedure described for the No. 3 deck board.
-
REMOVE REAR DECK FLOOR BOX
-
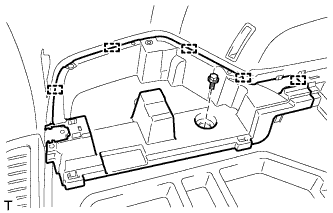
Detach the 7 guides and remove the rear deck floor box.
-
-
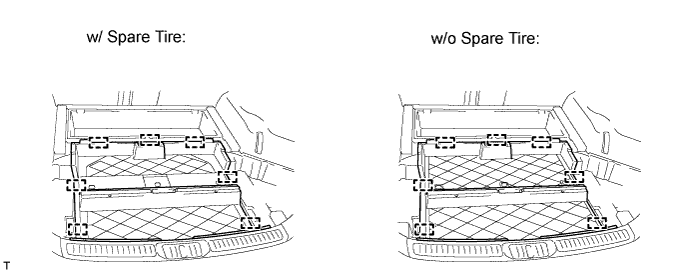
REMOVE FLOOR SIDE RAIL LH (w/ Deck Rail)
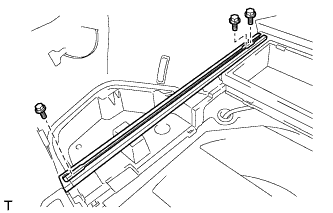
-
Remove the 3 bolts and floor side rail.
-
-
REMOVE FLOOR SIDE RAIL RH (w/ Deck Rail)
Tech Tips
Use the same procedure described for the LH side.
-
REMOVE NO. 2 DECK SIDE TRIM COVER (w/o Deck Rail)
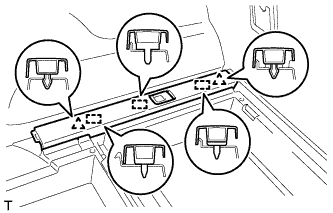
-
Detach the 2 clips and 3 guides, and remove the deck side trim cover.
-
-
REMOVE NO. 1 DECK SIDE TRIM COVER (w/o Deck Rail)
Tech Tips
Use the same procedure described for the No. 2 deck side trim cover.
-
REMOVE NO. 6 DECK SIDE TRIM COVER (w/o Deck Rail)
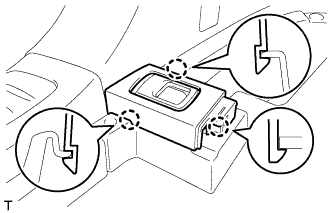
-
Detach the 3 claws and remove the No. 6 deck side trim cover.
-
-
REMOVE NO. 5 DECK SIDE TRIM COVER (w/o Deck Rail)
Tech Tips
Use the same procedure described for the No. 6 deck side trim cover.
-
REMOVE ROPE HOOK ASSEMBLY (w/o Deck Rail)
Tech Tips
Use the same procedure for all the rope hooks.
-
Remove the bolt and rope hook.
-
-
REMOVE DECK FLOOR BOX LH
-
Remove the bolt.
-
Detach the 5 guides and remove the deck floor box.
-
-
REMOVE DECK FLOOR BOX RH
Tech Tips
Use the same procedure described for the LH side.
-
REMOVE REAR FLOOR FINISH PLATE
-
Detach the 4 clips and remove the rear floor finish plate.
-
-
REMOVE FRONT DECK FLOOR BOX
-
Remove the 2 clips.
-
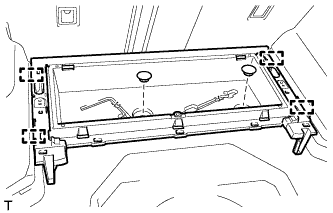
Detach the 4 guides and remove the front deck floor box.
-
-
REMOVE REAR DOOR SCUFF PLATE RH
Tech Tips
Use the same procedure described for the LH side.
-
REMOVE REAR DOOR OPENING TRIM WEATHERSTRIP RH
Tech Tips
Use the same procedure described for the LH side.
-
REMOVE BACK DOOR WEATHERSTRIP
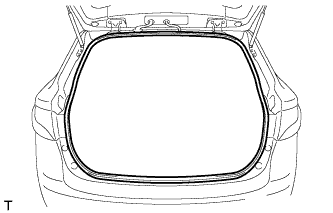
-
Remove the back door weatherstrip.
-
-
REMOVE NO. 2 DECK SIDE TRIM HOOK

Tech Tips
Use the same procedure to remove the No. 2 deck side trim hook on the other side.
-
Remove the screw and No. 2 deck side trim hook.
-
-
REMOVE INNER ROOF SIDE GARNISH CAP RH
Tech Tips
Use the same procedure described for the LH side.
-
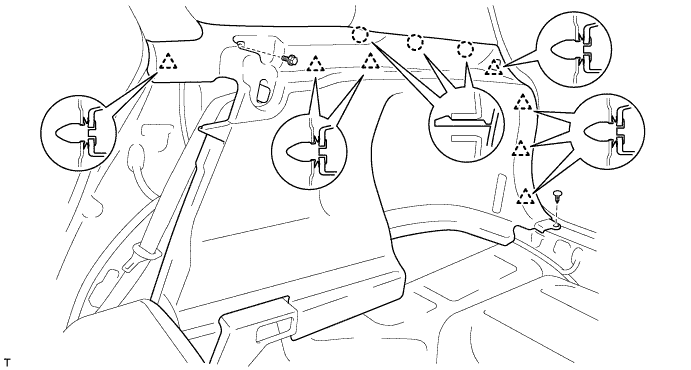
REMOVE DECK TRIM SIDE PANEL ASSEMBLY RH
-
Remove the bolt and clip.
-
Detach the 7 clips and 3 claws, and remove the deck trim side panel.
-
-
REMOVE SELF POWER SIREN ASSEMBLY
-
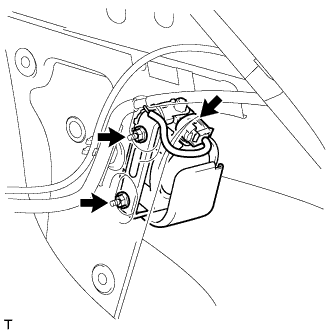
Disconnect the connector.
-
Remove the 2 nuts and self power siren.
-