CLEARANCE WARNING ECU REMOVAL

-
REMOVE SHIFT LEVER KNOB SUB-ASSEMBLY (for Manual Transaxle)
-
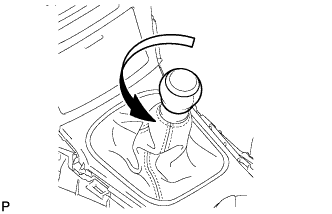
Twist the shift lever knob in the direction indicated by the arrow and remove it.
-
-
REMOVE SHIFT LEVER KNOB SUB-ASSEMBLY (for Automatic Transaxle)
-
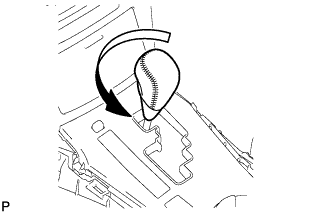
Twist the shift lever knob in the direction indicated by the arrow and remove it.
-
-
REMOVE REAR UPPER CONSOLE PANEL SUB-ASSEMBLY (for Manual Transaxle)
-

Detach the cover.
-
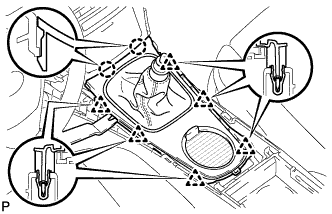
Using a moulding remover B, detach the 2 claws.
-
Detach the 6 clips and remove the console panel.
-
-
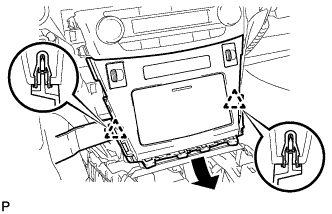
REMOVE REAR UPPER CONSOLE PANEL SUB-ASSEMBLY (for Automatic Transaxle)
-
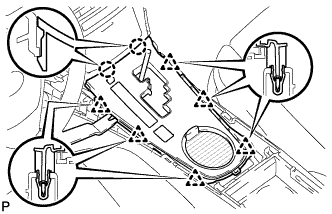
Using a moulding remover B, detach the 2 claws.
-
Detach the 6 clips.
-
Remove the console panel and then disconnect the connector.
-
-
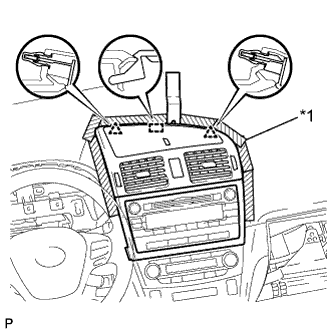
REMOVE LOWER INSTRUMENT CLUSTER FINISH PANEL
-
Using a moulding remover B, detach the 2 clips.
-
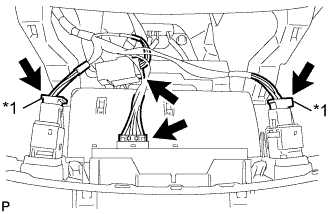
Text in Illustration *1 w/ Seat Heater System Remove the finish panel and then disconnect the connectors.
-
-
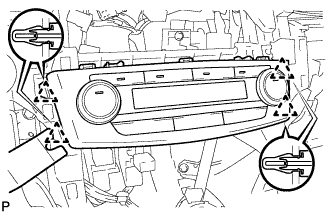
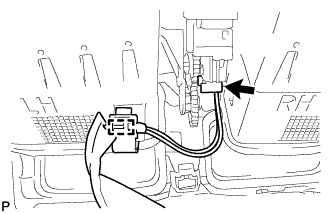
REMOVE AIR CONDITIONING CONTROL ASSEMBLY
-
Using a moulding remover, detach the 4 clips.
-
Disconnect the connector and remove the air conditioning control.
-
-
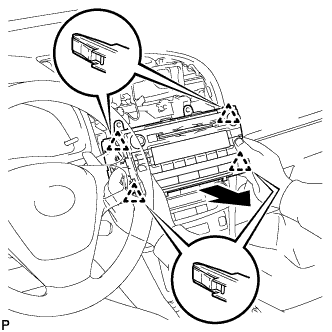
REMOVE CENTER INSTRUMENT PANEL REGISTER ASSEMBLY WITH FINISH PANEL (for Audio, HDD Navigation System)
-
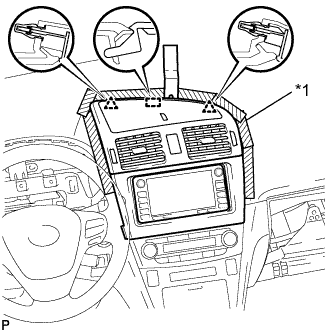
Text in Illustration *1 Protective Tape Place protective tape as shown in the illustration.
-
Using a moulding remover B, detach the 2 clips and hook.
-
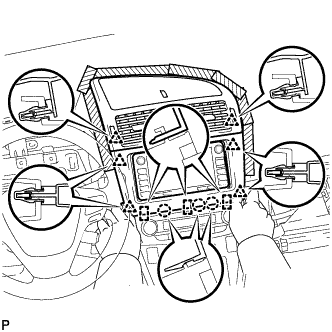
Detach the 3 claws and 3 hooks.
-
Detach the 6 clips.
-
Remove the panel register. Then disconnect the connector and detach the clamp.
-
-
REMOVE CENTER INSTRUMENT PANEL REGISTER ASSEMBLY WITH FINISH PANEL (for Audio-less, DVD Navigation System)
-
Text in Illustration *1 Protective Tape Place protective tape as shown in the illustration.
-
Using a moulding remover B, detach the 2 clips and hook.
-
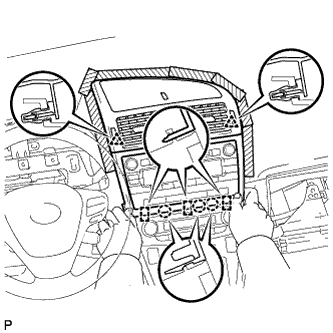
Detach the 3 claws and 3 hooks.
-
Detach the 2 clips.
-
Remove the panel register. Then disconnect the connector and detach the clamp.
-
-
REMOVE STEREO OPENING COVER WITH BRACKET (w/o Audio)
-
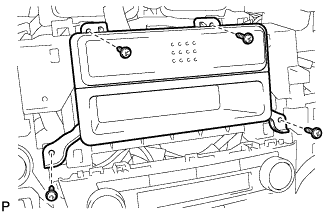
Remove the 4 screws and cover with bracket.
-
-
REMOVE RADIO RECEIVER ASSEMBLY WITH BRACKET (w/ Audio)
-
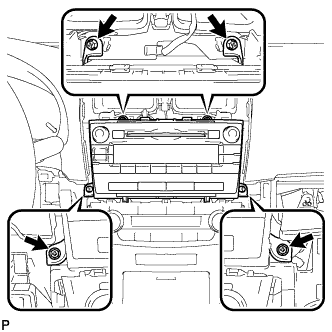
Remove the 4 screws.
-
Pull the radio receiver to detach the 4 clips on the backside of the radio receiver.
-
Disconnect the connectors and remove the radio receiver.
-
-
REMOVE NAVIGATION RECEIVER ASSEMBLY WITH RACKET (w/ Navigation System for DVD)
-
Remove the 4 screws.
-

Pull the navigation receiver.
-
Disconnect the connectors and remove the navigation receiver.
-
-
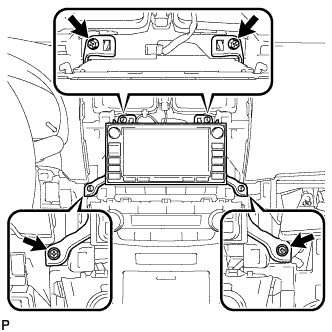
REMOVE NAVIGATION RECEIVER ASSEMBLY WITH RACKET (w/ Navigation System for HDD)
-
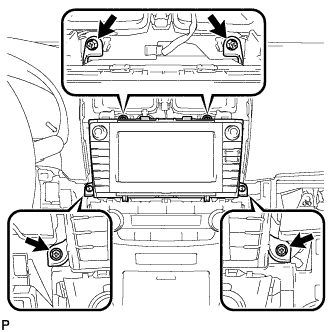
Remove the 4 screws.
-

Pull the display to detach the 4 clips on the backside of the display.
-
Disconnect the connectors and remove the navigation receiver.
-
-
REMOVE CLEARANCE WARNING ECU ASSEMBLY
-
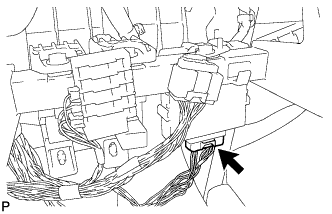
Disconnect the connector.
-
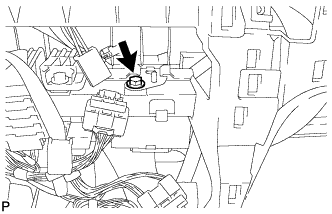
Remove the bolt and ECU.
-