CLUTCH UNIT (for 1AD-FTV) REMOVAL

-
REMOVE MANUAL TRANSAXLE ASSEMBLY
-
Remove the manual transaxle assembly Click here.
-
-
REMOVE CLUTCH RELEASE FORK SUB-ASSEMBLY
-
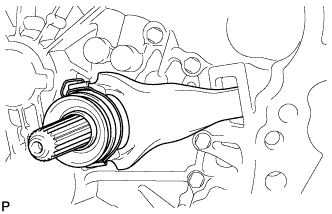
Remove the clutch release fork with the clutch release bearing from the manual transaxle assembly.
-
-
REMOVE CLUTCH RELEASE BEARING ASSEMBLY
-
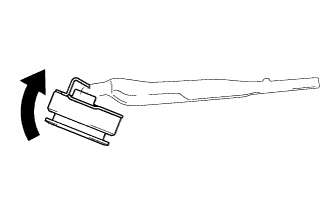
Remove the clutch release bearing and clip from the clutch release fork.
-
-
REMOVE RELEASE FORK SUPPORT
-
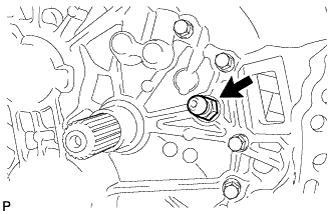
Remove the release fork support from the manual transaxle assembly.
-
-
REMOVE CLUTCH RELEASE FORK BOOT
-
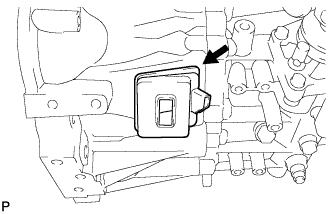
Remove the clutch release fork boot from the manual transaxle assembly.
-
-
REMOVE CLUTCH COVER ASSEMBLY
-
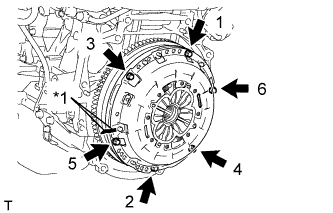
Text in Illustration *1 Matchmark Place matchmarks on the clutch cover and flywheel.
-
Loosen each set bolt 180° at a time until the spring tension is released.
Note
Be sure to uniformly loosen the bolts 180° at a time according to the order in the illustration.
-
Remove the set bolts and pull off the clutch cover to remove it.
Note
Do not drop the clutch disc.
-
-
REMOVE CLUTCH DISC ASSEMBLY
Note
Keep the lining part of the clutch disc, the pressure plate, and the surface of the flywheel away from oil and foreign matter.