ROOF HEADLINING (for Sedan) REASSEMBLY

-
INSTALL AMPLIFIER ANTENNA ASSEMBLY
-
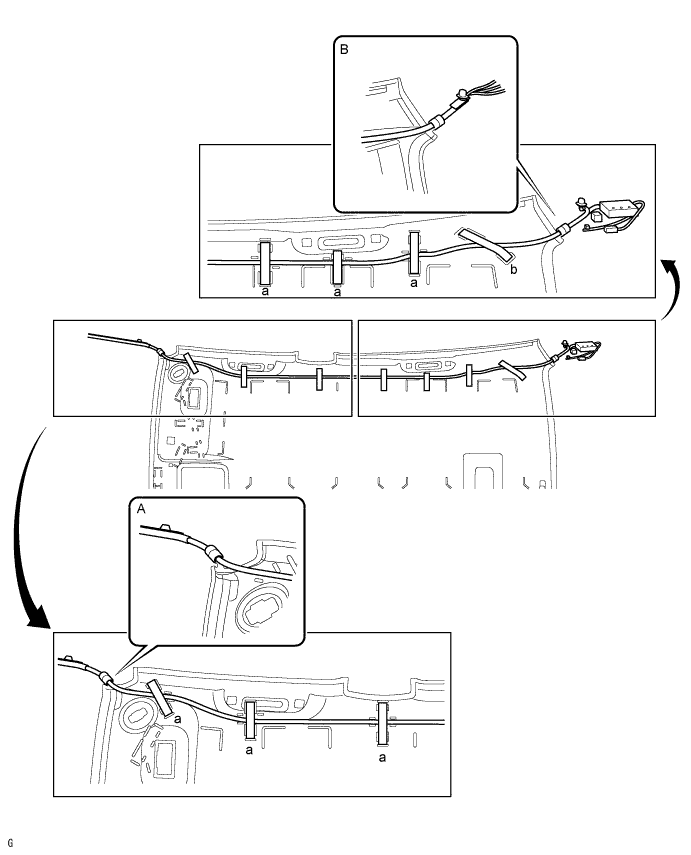
w/o Digital Audio Broadcasting:
-
Align the marking tape on the antenna cord with the roof headlining tabs shown in A and B, and wrap tape around the cord to install it.
-
Starting from the front of the vehicle, attach the antenna cord to the roof headlining with tape at the 6 marked locations labeled "a".
-
While adjusting the slack of the antenna cord, attach the antenna cord to the roof headlining with tape at the marked location labeled "b".
-
-
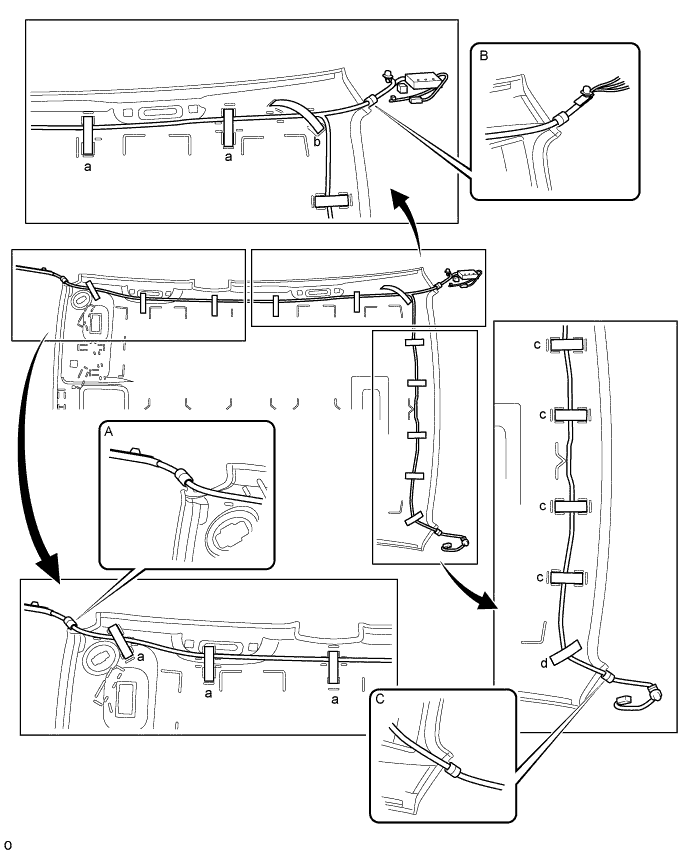
w/ Digital Audio Broadcasting:
-
Align the marking tape on the antenna cord with the roof headlining tabs shown in A and B, and wrap tape around the cord to install it.
-
Starting from the front of the vehicle, attach the antenna cord to the roof headlining with tape at the 5 marked locations labeled "a".
-
While adjusting the slack of the antenna cord, attach the antenna cord to the roof headlining with tape at the marked location labeled "b".
-
Align the marking tape on the antenna cord with the roof headlining tabs shown in C, and wrap tape around the cord to install it.
-
Starting from the right of the vehicle, attach the antenna cord to the roof headlining with tape at the 4 marked locations labeled "c".
-
While adjusting the slack of the antenna cord, attach the antenna cord to the roof headlining with tape at the marked location labeled "d".
-
-
-
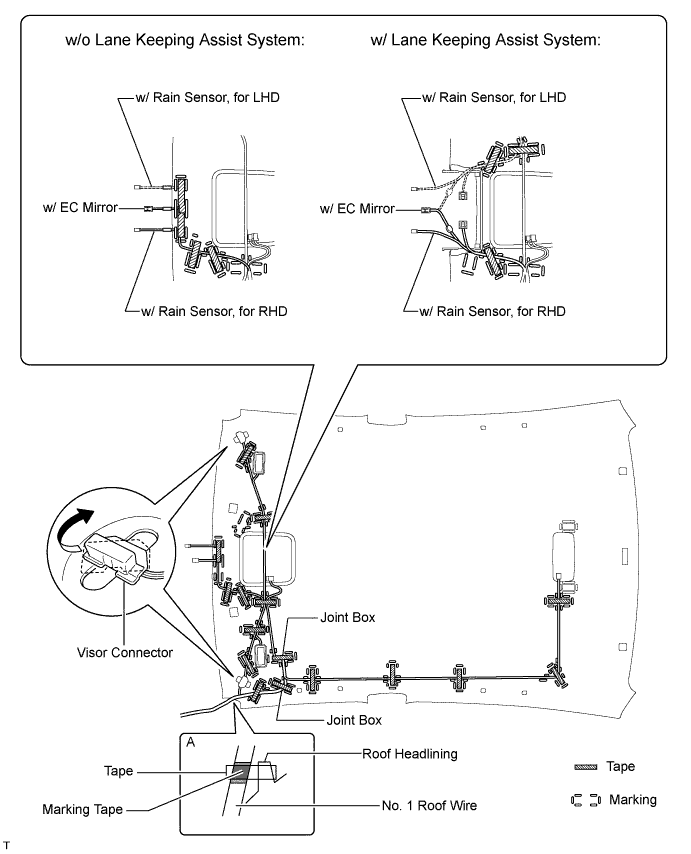
INSTALL NO. 1 ROOF WIRE
-
Fix the No. 1 roof wire in place by wrapping tape around the No. 1 roof wire and the protrusion of the roof headlining as shown in the part of the illustration labeled A.
-
Position the joint boxes as shown in the illustration and set the No. 1 roof wire on the roof headlining.
-
Attach tape at the locations shown in the illustration to install the No. 1 roof wire.
Tech Tips
Apply sufficient pressure when placing tape.
-
Turn the visor connectors approximately 90° clockwise to install them to the roof headlining.
-
-
INSTALL ROOF HEADLINING PAD
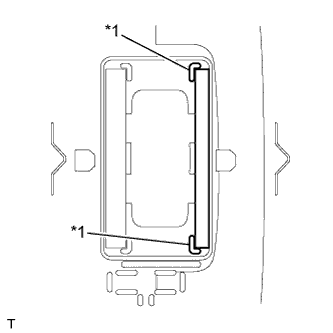
Text in Illustration *1 Silencer Marking
-
Align the roof headlining pad with the silencer markings on the roof headlining and install the roof headlining pad using double-sided tape as shown in the illustration.
-
-
INSTALL FRONT ROOF HEADLINING SIDE PAD
Text in Illustration *1 Silencer Marking
-
Align the front roof headlining side pad with the silencer markings on the roof headlining and install the front roof headlining side pad using double-sided tape as shown in the illustration.
-
-
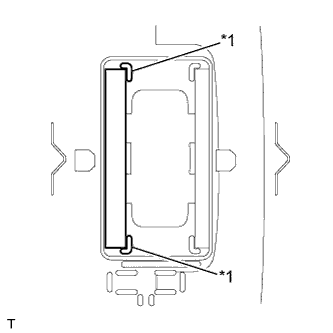
INSTALL NO. 3 ROOF SILENCER PAD

Text in Illustration *1 Silencer Marking
-
Align the No. 3 roof silencer pad with the silencer marking on the roof headlining and install the No. 3 roof silencer pad using double-sided tape as shown in the illustration.
-
-
INSTALL NO. 2 ROOF SILENCER PAD
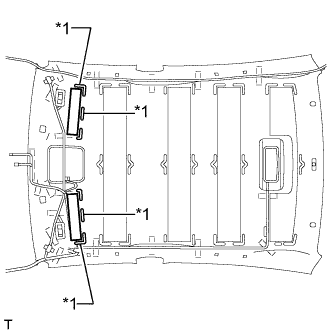
Text in Illustration *1 Silencer Marking
-
Align the No. 2 roof silencer pads with the silencer markings on the roof headlining and install the 2 No. 2 roof silencer pads using double-sided tape as shown in the illustration.
-
-
INSTALL NO. 1 ROOF SILENCER PAD
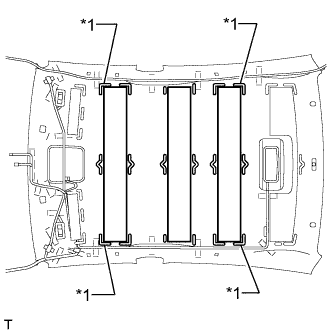
Text in Illustration *1 Silencer Marking
-
Align the No. 1 roof silencer pads with the silencer markings on the roof headlining and install the 3 No. 1 roof silencer pads using double-sided tape as shown in the illustration.
-
-
INSTALL VANITY LIGHT ASSEMBLY
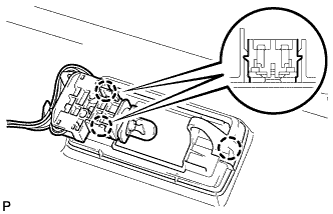
Tech Tips
Use the same procedure to install the vanity light on the other side.
-
Attach the 3 claws to install the vanity light.
-