COMPRESSOR REMOVAL

-
REMOVE NO. 1 ENGINE COVER
-
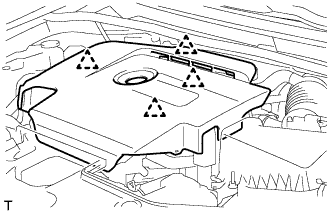
Hold the rear of the cover and slowly raise it to detach the clip on the rear of the cover. Continue to raise the cover to detach the 3 clips on the front and side of the cover and remove the cover.
Note
Attempting to disengage both front and rear clips at the same time may cause the cover to break.
-
-
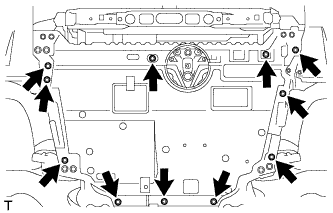
REMOVE RADIATOR SUPPORT OPENING COVER
-
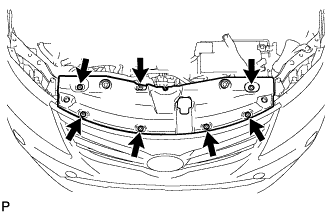
Remove the 7 clips and radiator support opening cover.
-
-
RECOVER REFRIGERANT FROM REFRIGERATION SYSTEM
-
Start the engine.
-
Turn the A/C switch on.
-
Operate the cooler compressor while the engine speed is approximately 1000 rpm for 5 to 6 minutes to circulate the refrigerant and collect the compressor oil remaining in each component into the cooler compressor.
-
Stop the engine.
-
Recover the refrigerant from the A/C system using a refrigerant recovery unit.
-
-
REMOVE FRONT LOWER BUMPER ABSORBER
-
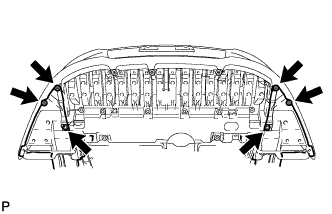
Remove the 4 screws and 2 bolts.
-
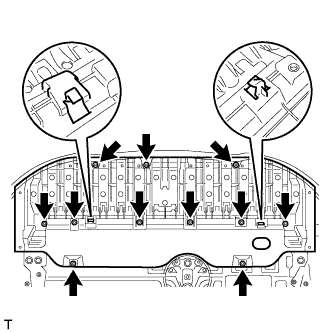
Remove the 8 bolts and 3 screws.
-
Detach the 2 hooks of the front lower bumper absorber from the installation holes on the body and remove the front lower bumper absorber.
-
-
REMOVE NO. 1 ENGINE UNDER COVER
-
Remove the 11 clips and engine under cover.
-
-
REMOVE REAR ENGINE UNDER COVER RH
-
Remove the 5 clips and rear engine under cover RH.
-
-
REMOVE FRONT SUSPENSION MEMBER REINFORCEMENT RH
-
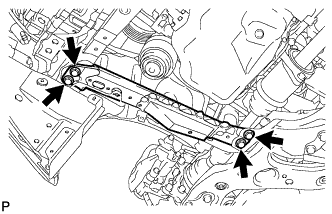
Remove the 4 bolts and front suspension member reinforcement.
-
-
REMOVE FAN AND GENERATOR V BELT
-
for 1AD-FTV:
Remove the fan and generator V belt Click here.
-
for 2AD-FHV:
Remove the fan and generator V belt Click here.
-
for 2AD-FTV:
Remove the fan and generator V belt Click here.
-
-
DISCONNECT NO. 3 AIR HOSE
-
Loosen the hose clamp and disconnect the No. 3 air hose.
-
-
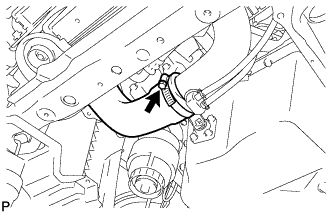
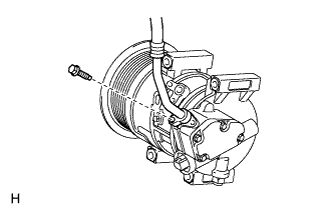
DISCONNECT DISCHARGE HOSE SUB-ASSEMBLY
-
Remove the bolt and disconnect the discharge hose sub-assembly from the compressor assembly with pulley.
Note
Seal the openings of the disconnected parts using vinyl tape to prevent entry of moisture and foreign matter.
-
Remove the O-ring from the discharge hose sub-assembly.
Note
Seal the openings of the disconnected parts using vinyl tape to prevent entry of moisture and foreign matter.
-
-
DISCONNECT SUCTION HOSE SUB-ASSEMBLY
-
Remove the bolt and disconnect the suction hose sub-assembly from the compressor assembly with pulley.
Note
Seal the openings of the disconnected parts using vinyl tape to prevent entry of moisture and foreign matter.
-
Remove the O-ring from the suction hose sub-assembly.
Note
Seal the openings of the disconnected parts using vinyl tape to prevent entry of moisture and foreign matter.
-
-
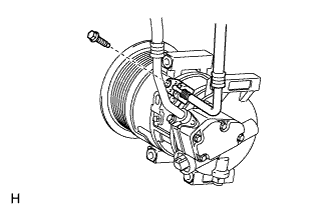
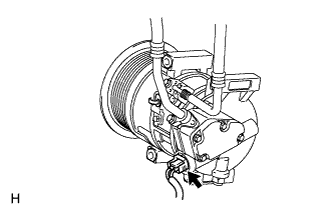
REMOVE COMPRESSOR ASSEMBLY WITH PULLEY
-
Disconnect the connector.
-
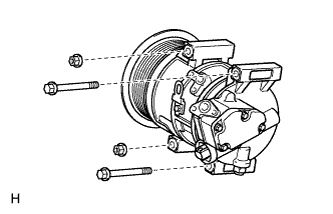
Remove the 2 bolts and 2 nuts.
-
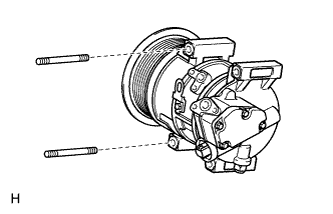
Using a "TORX" socket wrench (E8), remove the 2 stud bolts and compressor assembly with pulley.
-