REAR SEAT OUTER BELT ASSEMBLY (for Sedan) INSTALLATION

Tech Tips
-
Use the same procedure for the RH and LH sides.
-
The procedure listed below is for the LH side.
-
INSTALL OUTER BELT ANCHOR BRACKET SUB-ASSEMBLY LH

-
Align the claw with the anchor bracket positioning hole.
-
Install the anchor bracket with the bolt.
- Torque:
- 41 N*m { 418 kgf*cm, 30 ft.*lbf }
-
-
INSTALL REAR SEAT 3 POINT TYPE BELT ASSEMBLY LH
-
Align the claw with the 3 point type belt positioning hole and install the retractor of the 3 point type belt with the nut.
- Torque:
- 41 N*m { 418 kgf*cm, 30 ft.*lbf }
-
-
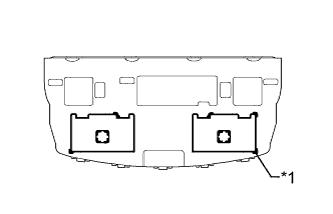
INSTALL NO. 3 PACKAGE TRAY TRIM PAD
Tech Tips
Perform the following procedure if replacing the No. 3 package tray trim pad.
-
Text in Illustration *1 Mark Install 2 new No. 3 package tray trim pads using double-sided tape as shown in the illustration.
-
-
INSTALL NO. 2 PACKAGE TRAY TRIM PAD
Tech Tips
Perform the following procedure if replacing the No. 2 package tray trim pad.
-
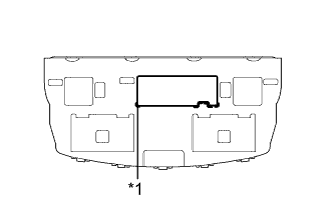
Text in Illustration *1 Mark Install a new No. 2 package tray trim pad using double-sided tape as shown in the illustration.
-
-
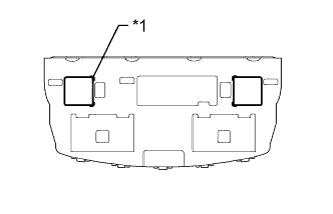
INSTALL NO. 1 PACKAGE TRAY TRIM PAD
Tech Tips
Perform the following procedure if replacing the No. 1 package tray trim pad.
-
Text in Illustration *1 Mark Install 2 new No. 1 package tray trim pads using double-sided tape as shown in the illustration.
-
-
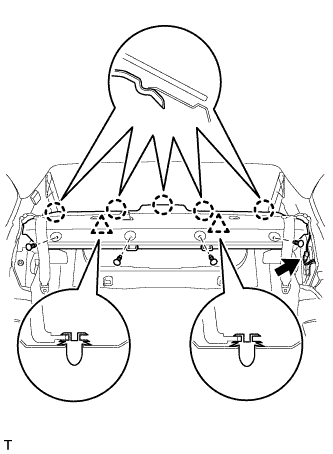
INSTALL NO. 1 ROOM PARTITION BOARD
-
Attach the 4 clips to install the partition board.
-
Install the 4 clips.
-
-
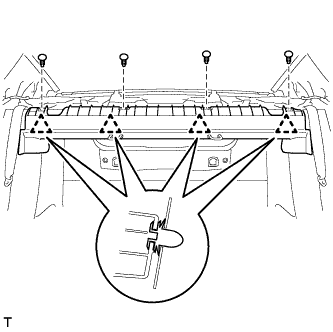
INSTALL PACKAGE TRAY TRIM PANEL ASSEMBLY
-
Pass the 3 rear seat belt floor anchors through the package tray trim panel assembly.
-
Attach the 5 claws and 2 clips to install the package tray trim panel assembly.
-
Install the 4 clips.
-
-
INSTALL REAR SEAT SHOULDER BELT HOLE COVER
-
Attach the 4 claws to install the belt hole cover.
Tech Tips
Use the same procedure to install all the belt hole covers.
-
-
INSTALL INNER ROOF SIDE GARNISH LH
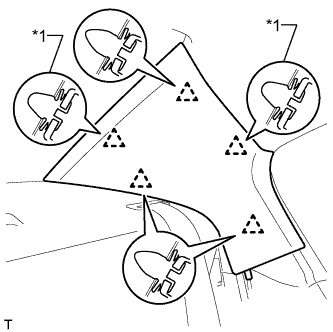
Text in Illustration *1 Clip A
-
Install 2 new clips labeled A to the inner roof side garnish.
-
Attach the 5 clips to install the inner roof side garnish.
-
-
INSTALL INNER ROOF SIDE GARNISH RH
Tech Tips
Use the same procedure described for the LH side.
-
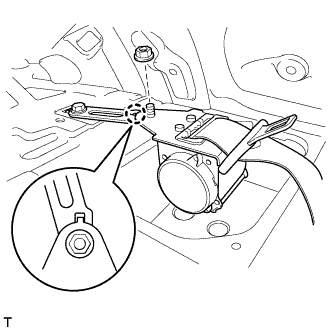
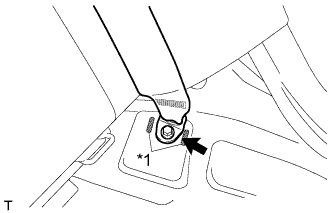
CONNECT REAR CENTER SEAT OUTER BELT ASSEMBLY

Text in Illustration *1 Protruding Part
-
Connect the center seat outer belt anchor with the bolt.
- Torque:
- 41 N*m { 418 kgf*cm, 30 ft.*lbf }
Note
Do not allow the anchor part of the seat belt to overlap the protruding parts of the inner belt.
-
-
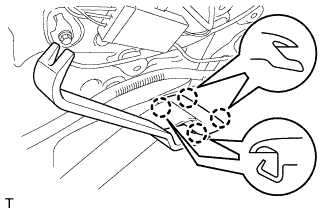
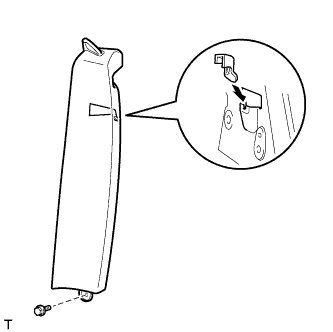
INSTALL REAR SIDE SEATBACK ASSEMBLY LH
-
Install the claw as shown in the illustration.
- Torque:
- 7.8 N*m { 80 kgf*cm, 69 in.*lbf }
-
Text in Illustration *1 Protruding Part Install the side seatback with the bolt.
- Torque:
- 41 N*m { 418 kgf*cm, 30 ft.*lbf }
Note
Do not allow the anchor part of the rear seat 3 point type belt to overlap the protruding parts of the floor panel.
-
Install the seat belt to the belt guide.
-
Attach the claw to close the cap of the rear seat shoulder belt guide.
-
Check if the ELR locks.
Note
The check should be performed with the outer belt assembly installed.
-
With the belt assembly installed, check that the belt locks when it is pulled out quickly.
-
-
-
INSTALL REAR SIDE SEATBACK ASSEMBLY RH
Tech Tips
Use the same procedure described for the LH side.
-
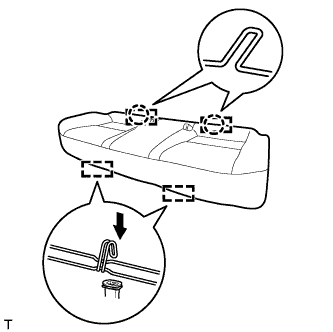
INSTALL REAR BENCH TYPE SEAT CUSHION ASSEMBLY
-
Attach the 2 rear hooks of the seat cushion to the seatback.
-
Attach the 2 front hooks to install the seat cushion.
-
Confirm that the seat cushion is firmly installed.
Note
When installing the seat cushion, make sure the seat belt buckle is not under the seat cushion.
-