LANE RECOGNITION CAMERA SENSOR REMOVAL

Tech Tips
-
Use the same procedure for RHD and LHD vehicles.
-
The procedure listed below is for the LHD.
-
REMOVE MAP LIGHT ASSEMBLY

-
Using a moulding remover, detach the 4 clips.
-
Disconnect the connector and remove the map light.
-
-
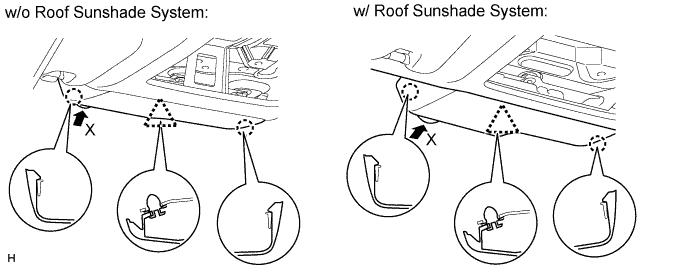
REMOVE FRONT ROOF TOP GARNISH
-
Detach the clip and 2 claws and remove the front roof top garnish.
Note
When removing the rain sensor cover, do not apply force to the lane recognition camera sensor assembly areas labeled "X".
-
-
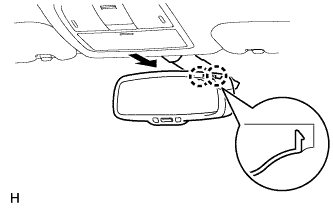
REMOVE INNER REAR VIEW MIRROR STAY HOLDER COVER
-
Detach the 2 claws and remove the inner rear view mirror stay holder cover as shown in the illustration.
-
-
REMOVE REAR INNER VIEW MIRROR ASSEMBLY
-
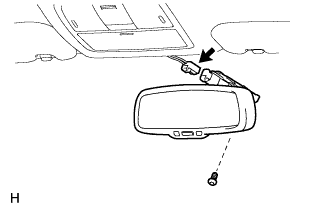
Disconnect the connector.
-
Using a T20 "TORX" socket wrench, remove the screw and inner rear view mirror.
-
-
REMOVE RAIN SENSOR COVER
-
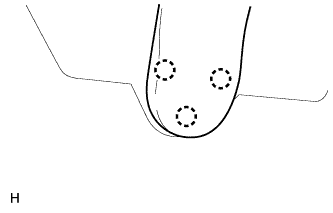
Detach the 3 claws and remove the rain sensor cover.
-
-
REMOVE LANE RECOGNITION CAMERA SENSOR ASSEMBLY
-
Disconnect the clamp and camera connector.
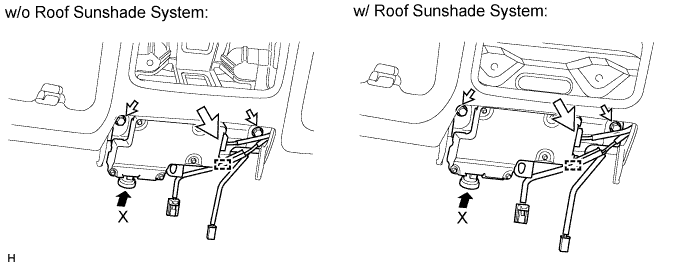
Note
When removing the rain sensor cover, do not apply force to the lane recognition camera sensor assembly areas labeled "X".
-
Remove the 2 bolts.
-
Detach the clip and remove the camera.

Note
When removing the rain sensor cover, do not apply force to the lane recognition camera sensor assembly areas labeled "X".
-
Remove the roof side inner garnish clip from the object recognition camera.
Note
When removing the roof side inner garnish clip, replace it with a new one.
-