SPEED SENSOR REMOVAL

-
REMOVE FRONT LOWER BUMPER ABSORBER
-
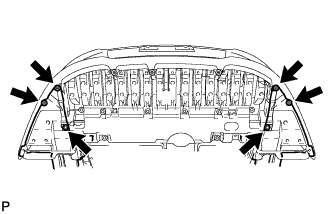
Remove the 4 screws and 2 bolts.
-
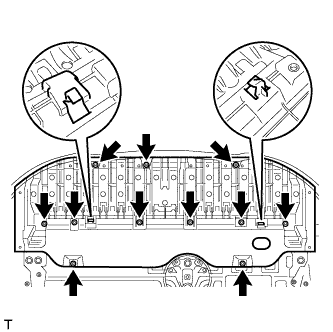
Remove the 8 bolts and 3 screws.
-
Detach the 2 hooks of the front lower bumper absorber from the installation holes on the body and remove the front lower bumper absorber.
-
-
REMOVE NO. 1 ENGINE UNDER COVER
-
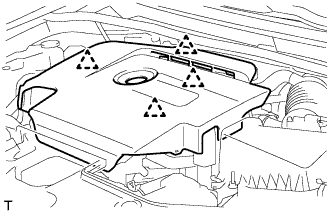
Hold the rear of the cover and slowly raise it to detach the clip on the rear of the cover. Continue to raise the cover to detach the 3 clips on the front and side of the cover and remove the cover.
Note
Attempting to disengage both front and rear clips at the same time may cause the cover to break.
-
-
REMOVE REAR ENGINE UNDER COVER LH
-
Remove the 5 clips and under cover.
-
-
DRAIN AUTOMATIC TRANSAXLE FLUID
-
Remove the refill plug and gasket from the automatic transaxle.
-

Using a 6 mm socket hexagon wrench, remove the overflow plug and gasket from the automatic transaxle.
-
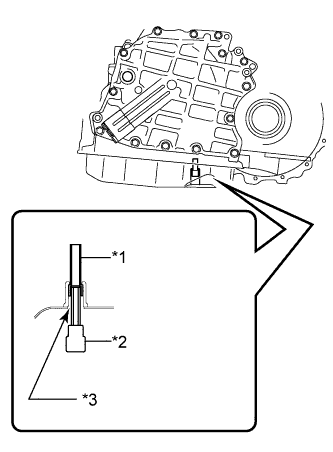
Using a 6 mm socket hexagon wrench, remove the No. 1 transmission oil filler tube from the automatic transaxle and drain the automatic transaxle fluid.
-
Using a 6 mm socket hexagon wrench, install the No. 1 transmission oil filler tube to the automatic transaxle.
- Torque:
- 1.7 N*m { 17 kgf*cm, 15 in.*lbf }
Text in Illustration *1 No. 1 Transmission Oil Filler Tube *2 Hexagon Socket Wrench *3 Overflow Plug Hole -
Using a 6 mm socket hexagon wrench, install a new gasket and the overflow plug to the automatic transaxle.
- Torque:
- 40 N*m { 408 kgf*cm, 30 ft.*lbf }
-
Temporarily install the gasket and the refill plug to the automatic transaxle.
-
-
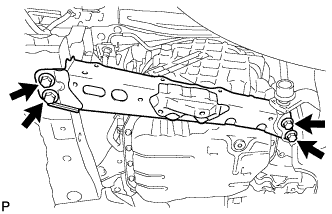
REMOVE FRONT SUSPENSION MEMBER REINFORCEMENT LH
-
Remove the 4 bolts and front suspension member reinforcement.
-
-
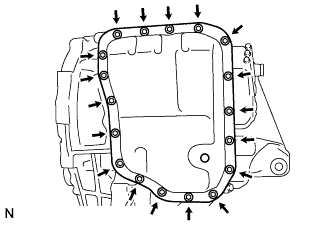
REMOVE AUTOMATIC TRANSAXLE OIL PAN SUB-ASSEMBLY
-
Remove the 18 bolts and oil pan from the transaxle.
Note
Some fluid will remain in the oil pan. Remove all the pan bolts, and carefully remove the oil pan sub-assembly.
-
Remove the gasket from the oil pan.
-
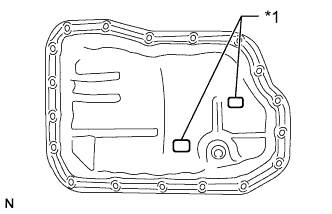
Text in Illustration *1 Magnet Remove the 2 magnets from the oil pan.
-
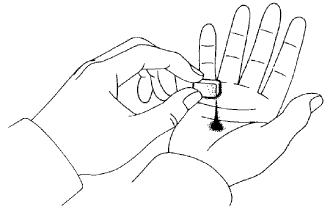
Examine the particles in the oil pan.
-
Use the removed magnets to collect any steel chips. Look carefully at the chips and particles in the pan and on the magnet to anticipate what type of wear you will find in the transaxle.
Steel (magnetic): bearing, gear and plate wear
Brass (non-magnetic): bush wear
-
-
-
REMOVE VALVE BODY OIL STRAINER ASSEMBLY
-
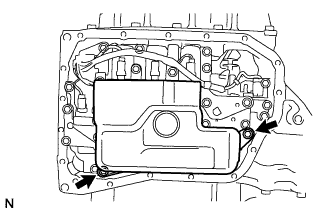
Remove the 2 bolts and oil strainer from the valve body.
-
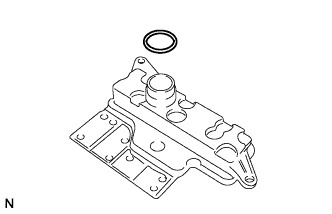
Remove the O-ring from the oil strainer.
-
-
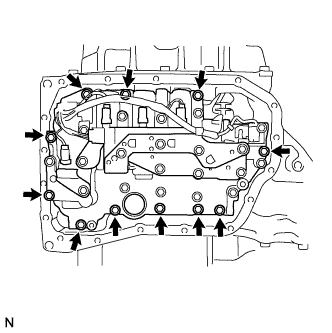
REMOVE TRANSMISSION VALVE BODY ASSEMBLY
-
Remove the 11 bolts and valve body from the transaxle.
Note
When removing the transmission valve body assembly, be careful not to allow the transmission revolution sensor and the transaxle case to interfere with each other.
-
-
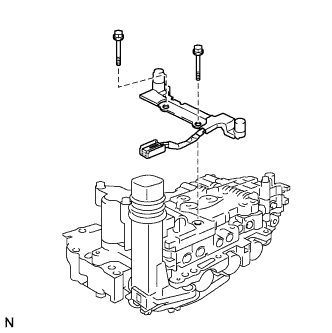
REMOVE SPEED SENSOR
-
Disconnect the connector.
-
Remove the 2 bolts and speed sensor from the valve body.
-