КОНТАКТНЫЙ ДАТЧИК ДАВЛЕНИЯ МАСЛА УСТАНОВКА
-
INSTALL ENGINE OIL PRESSURE SWITCH ASSEMBLY
-
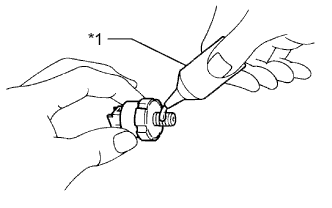
Apply adhesive to 2 or 3 threads of the oil pressure switch.
Adhesive Toyota Genuine Adhesive 1344, Three Bond 1344 or equivalent Text in Illustration *1 Adhesive Note
Do not let adhesive adhere to the oil hole.
-
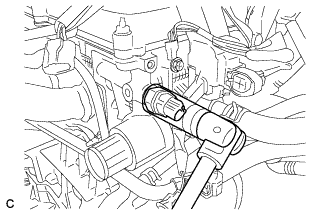
Using a 24 mm deep socket wrench, install the oil pressure switch.
- Torque:
- 15 N*m { 153 kgf*cm, 11 ft.*lbf }
Note
Do not start the engine for at least 1 hour after installation.
-
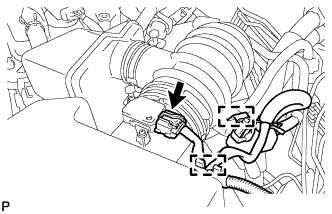
Connect the oil pressure switch connector.
-
-
INSTALL AIR CLEANER CAP AND HOSE
-
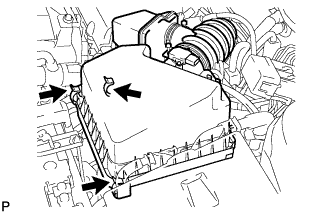
Вставьте петли крышки воздушного фильтра и шланг в корпус воздушного фильтра, а затем закрепите 3 откидных защелки.
-
Совместите метки на шланге воздушного фильтра № 1 и корпусе дроссельной заслонки. Затем подсоедините шланг воздушного фильтра № 1 к корпусу дроссельной заслонки и разведите выступы хомута шланга воздушного фильтра № 1.
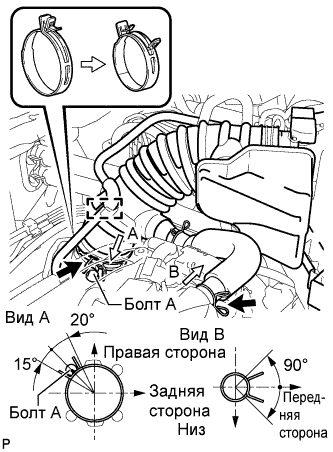
Note
Убедитесь, что хомут шланга установлен под правильным углом.
-
Подсоедините питающий шланг паров топлива № 2 к патрубку воздушного фильтра.
-
Подсоедините шланг вентиляции картера № 2 к шлангу воздушного фильтра.
-
Подсоедините электровакуумный клапан продувки.
-
Подсоедините жгут проводов и разъем датчика массового расхода воздуха.
-
-
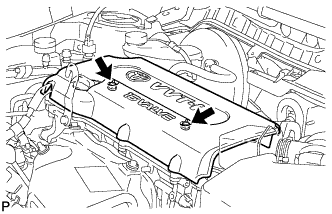
INSTALL NO. 1 ENGINE COVER SUB-ASSEMBLY
-
Установите крышку и закрепите ее 2 гайками.
- Torque:
- 9,0 Н*м { 92 кгс*см, 80 фунт-сила-дюймов }
-
-
INSPECT FOR OIL LEAK
-
Start the engine. Make sure that there are no oil leaks from the area that was worked on.
-
-
CHECK ENGINE OIL LEVEL
-
Warm up the engine, and then stop the engine and wait for 5 minutes.
-
Check that the engine oil level is between the low level and full level marks on the dipstick.
If low, check for leakage and add oil up to the full level mark.
Note
Do not fill engine oil above the full level mark.
-