ВПУСКНОЙ КОЛЛЕКТОР СНЯТИЕ
-
REMOVE RADIATOR SUPPORT OPENING COVER
-
Remove the 7 clips and radiator support opening cover.
-
-
DRAIN ENGINE COOLANT
-
Loosen the radiator drain cock plug.
Tech Tips
Collect the coolant in a container and dispose of it according to the regulations in your area.
-
Remove the reserve tank cap.
CAUTION:
Do not remove the reserve tank cap while the engine and radiator are still hot.
Pressurized, hot engine coolant and steam may be released and cause serious burns.
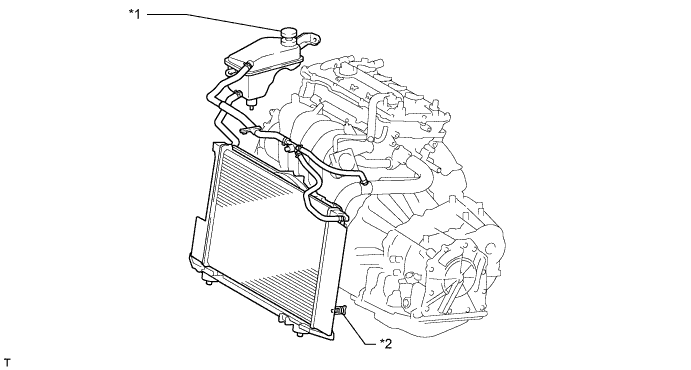
Text in Illustration *1 Reserve Tank Cap *2 Radiator Drain Cock Plug
-
-
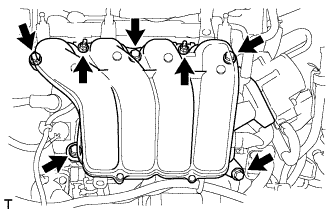
REMOVE NO. 2 CYLINDER HEAD COVER
-
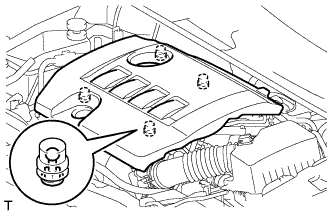
Возьмитесь сзади за крышку и поднимите ее, чтобы разъединить 2 задних фиксатора крышки. Продолжайте поднимать крышку так, чтобы освободить 2 передних фиксатора крышки, после чего снимите крышку.
Note
Попытка освободить задние и передние фиксаторы за один прием может привести к поломке крышки.
-
-
PRECAUTION
Note
After turning the ignition switch off, waiting time may be required before disconnecting the cable from the battery terminal. Therefore, make sure to read the disconnecting the cable from the battery terminal notice before proceeding with work Click here.
-
DISCONNECT CABLE FROM NEGATIVE BATTERY TERMINAL
Note
When disconnecting the cable, some systems need to be initialized after the cable is reconnected Click here.
-
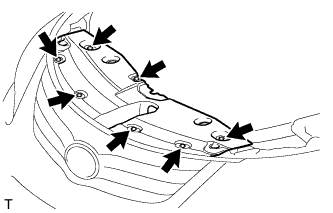
REMOVE REAR ENGINE UNDER COVER RH
-
Снимите 5 фиксаторов и правую защиту картера.
-
-
REMOVE V-RIBBED BELT
-
Ослабьте болты A и В.
-
Ослабьте болт C и снимите поликлиновой ремень.
Note
Не ослабляйте болт D.
-
-
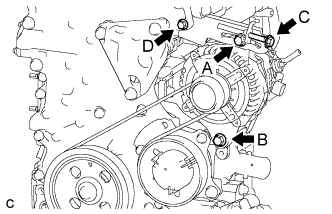
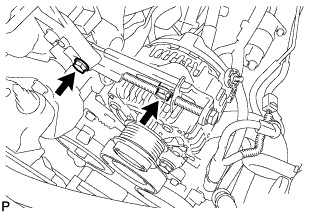
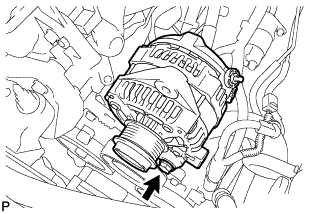
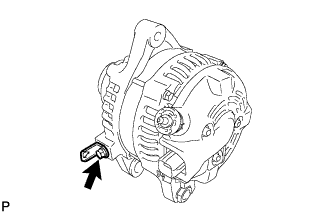
REMOVE GENERATOR ASSEMBLY
-
Remove the terminal cap.

-
Remove the nut and disconnect the wire harness from terminal B.
-
Disconnect the connector and detach the wire harness clamp.
-
Remove the 2 bolts and adjusting bar.
-
Remove the bolt and generator.
-
Remove the bolt and wire harness clamp bracket.
-
-
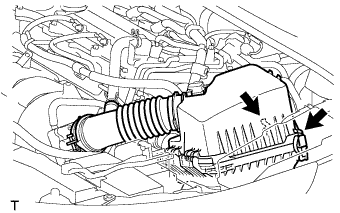
REMOVE AIR CLEANER CAP SUB-ASSEMBLY
-
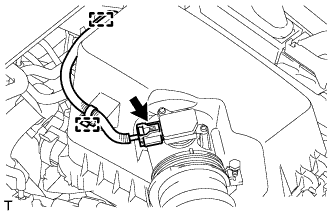
Отсоедините разъем датчика массового расхода воздуха.
-
Отсоедините жгут проводов от 2 зажимов.
-
Отсоедините 2 зажима.
-
Отсоедините шланг вентиляции.
-
Ослабьте хомут и снимите крышку воздушного фильтра.
-
-
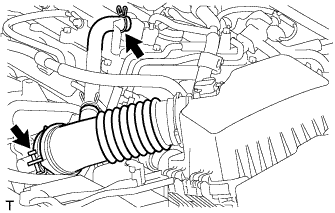
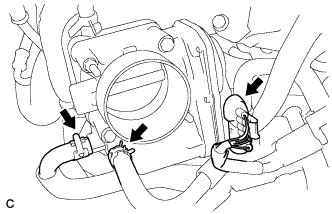
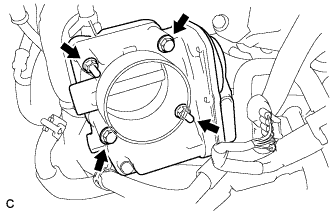
REMOVE THROTTLE BODY ASSEMBLY
-
Отсоедините разъем и 2 патрубка охлаждающей жидкости.
-
Выверните 2 болта, отверните 2 гайки и снимите корпус дроссельной заслонки.
-
Снимите прокладку.
-
-
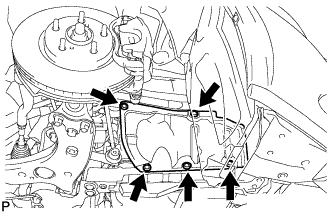
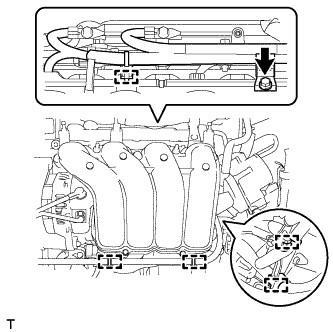
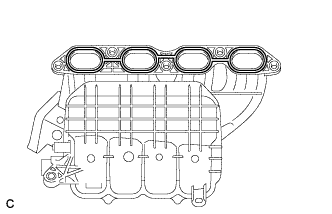
REMOVE INTAKE MANIFOLD
-
Remove the bolt and wire harness clamp bracket.
-
Detach the 5 clamps and wire harness from the intake manifold.
-
Disconnect the fuel vapor feed hose, ventilation hose and vacuum transmitting hose.
-
Remove the 5 bolts, 2 nuts, intake manifold stay and intake manifold.
-
Remove the gasket from the intake manifold.
-
Remove the bolt and wire harness clamp bracket from the intake manifold.

-
Using an E6 "TORX" socket wrench, remove the 2 stud bolts from the intake manifold.
-
-
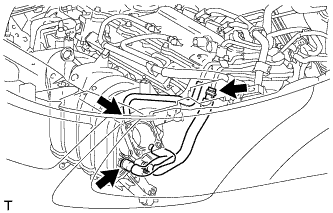
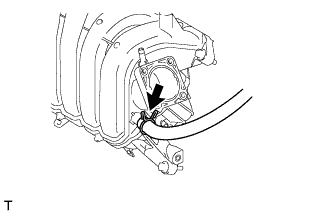
REMOVE NO. 1 VACUUM TRANSMITTING HOSE
-
Remove the vacuum transmitting hose.
-
-
REMOVE ENGINE COVER JOINT
-
Remove the 2 engine cover joints.
-