ИНТЕГРИРОВАННОЕ РЕЛЕ СНЯТИЕ
-
REMOVE ECM
-
Remove the ECM Click here.
-
-
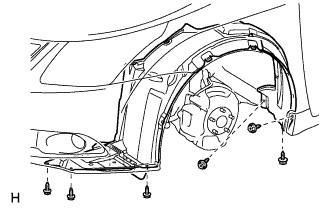
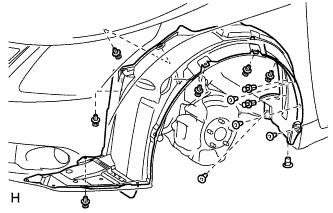
REMOVE FRONT FENDER LINER LH
-
С помощью отвертки поверните палец на 90 градусов и снимите фиксатор штифта.

-
Выверните 6 винтов из подкрылка.
-
Снимите 5 уплотнительных шайб с подкрылка.
Tech Tips
Уплотнительные шайбы необходимо заменять новыми, поскольку при снятии они повреждаются.
-
Снимите 8 фиксаторов и подкрылок.
-
-
REMOVE NO. 1 RELAY BLOCK COVER
-
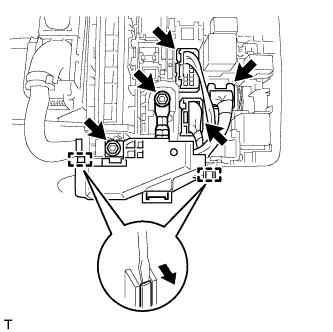
DISCONNECT WIRE HARNESS
-
Remove the 2 nuts from the engine room No. 1 relay block.
-
Disconnect the 3 connectors, detach the 2 clamps from the engine room No. 1 relay block and disconnect the wire harness.
-
-
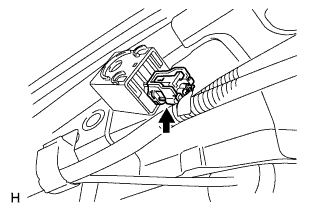
DISCONNECT RELAY BLOCK
-
Disconnect the wireless door lock buzzer connector.
-
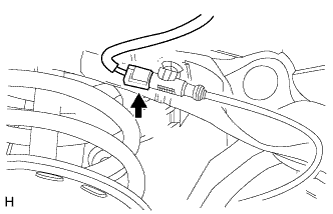
Disconnect the front speed sensor connector.
-
Disconnect the 2 wire harness clamps.
-
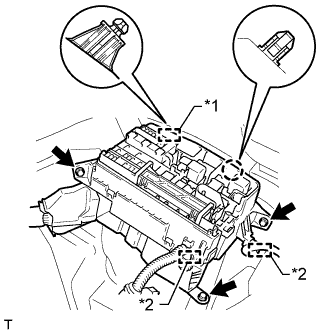
Remove the 3 bolts.
-
Detach the claw and guide, and slide the relay block to the inside of the engine compartment.
Text in Illustration *1 Guide *2 Clamp Note
Do not forcibly pull the relay block as the wire harness is connected.
-
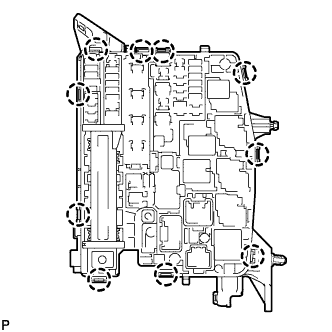
Detach the 10 claws and separate the relay block cover upper side and lower side.
-

Detach the 4 claws and remove the wire harness cover.
-
-
REMOVE INTEGRATION NO.1 RELAY
-

Detach the 2 claws and pull the integration relay out from the relay block.
Tech Tips
By unraveling the wire harness indicated by the circle in the illustration, the integration relay is easier to pull out.
-
Disconnect the 3 connectors and remove the integration relay.
-