ТРОС МЕХАНИЗМА ПЕРЕКЛЮЧЕНИЯ ПЕРЕДАЧ СНЯТИЕ
-
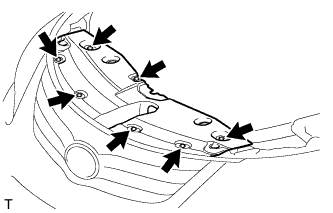
REMOVE RADIATOR SUPPORT OPENING COVER
-
Remove the 7 clips and radiator support opening cover.
-
-
REMOVE NO. 2 CYLINDER HEAD COVER
-
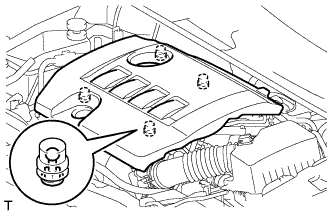
Возьмитесь сзади за крышку и поднимите ее, чтобы разъединить 2 задних фиксатора крышки. Продолжайте поднимать крышку так, чтобы освободить 2 передних фиксатора крышки, после чего снимите крышку.
Note
Попытка освободить задние и передние фиксаторы за один прием может привести к поломке крышки.
-
-
PRECAUTION
Note
After turning the ignition switch off, waiting time may be required before disconnecting the cable from the battery terminal. Therefore, make sure to read the disconnecting the cable from the battery terminal notice before proceeding with work Click here.
-
DISCONNECT CABLE FROM NEGATIVE BATTERY TERMINAL
Note
When disconnecting the cable, some systems need to be initialized after the cable is reconnected Click here.
-
REMOVE BATTERY
-
Disconnect the cable from the positive (+) battery terminal.
-
Remove the bolt and loosen the nut.
-
Remove the battery clamp.
-
Remove the battery.
-
Remove the battery tray.
-
-
REMOVE BATTERY CARRIER
-
Detach the 2 wire harness clamps.
-
Remove the 4 bolts and battery carrier.
-
-
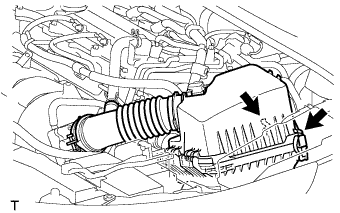
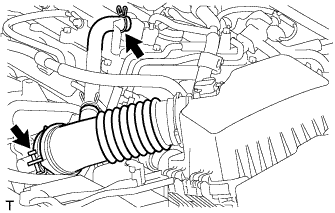
REMOVE AIR CLEANER CAP AND HOSE
-
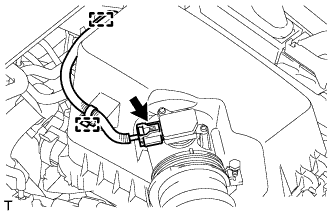
Отсоедините разъем датчика массового расхода воздуха.
-
Отсоедините жгут проводов от 2 зажимов.
-
Отсоедините 2 зажима.
-
Отсоедините шланг вентиляции.
-
Ослабьте хомут и снимите крышку воздушного фильтра.
-
-
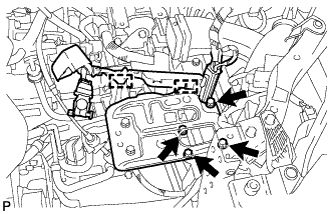
REMOVE AIR CLEANER CASE SUB-ASSEMBLY
-
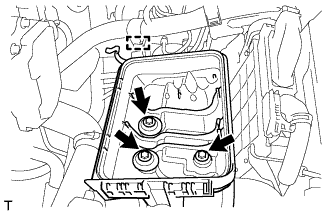
Detach the wire harness clamp from the air cleaner case.
-
Remove the 3 bolts and air cleaner case.
-
-
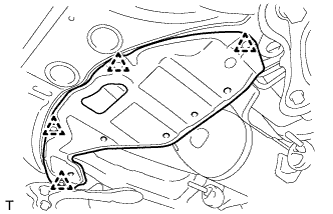
REMOVE NO. 2 ENGINE UNDER COVER
-
С помощью съемника фиксаторов освободите 4 фиксатора и снимите защиту картера.
-
-
DISCONNECT HEATED OXYGEN SENSOR CONNECTOR
-
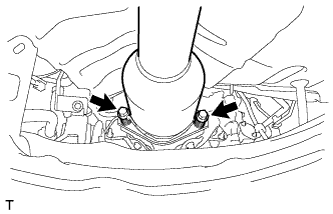
REMOVE FRONT EXHAUST PIPE ASSEMBLY
-
Выверните 2 болта и снимите 2 пружины сжатия.
-
Снимите 2 опоры выпускной трубы и приемную трубу в сборе.
-
-
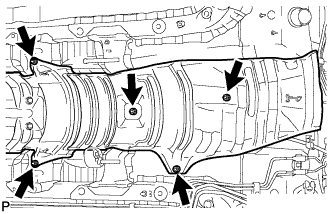
REMOVE FRONT FLOOR NO. 1 HEAT INSULATOR
-
Remove the 5 nuts and heat insulator.
-
-
REMOVE CONSOLE BOX ASSEMBLY
-
REMOVE TRANSMISSION CONTROL CABLE ASSEMBLY
-
Move the shift lever to N.
-
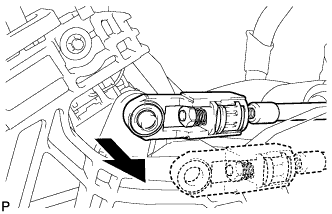
Disconnect the end of the transmission control cable from the shift lever.
-
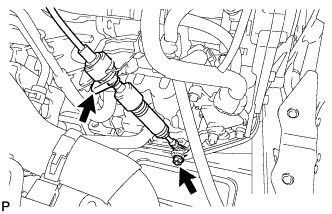
Pull out the stopper of the transmission control cable.
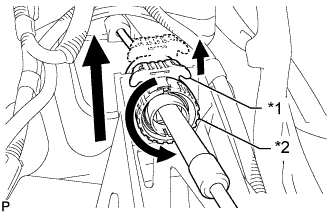
Text in Illustration *1 Stopper *2 Nut Note
Do not remove the stopper. If the stopper is removed, reinstall it to its original position.
-
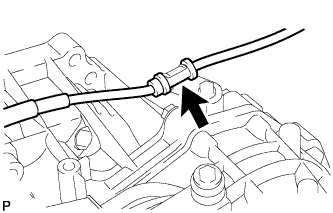
Rotate the nut counterclockwise approximately 180° and, while holding the nut in that position, disconnect the transmission control cable from the shift lever retainer.
Note
Do not over-rotate the nut as it will come off the internal spring and the transmission control cable will not be reusable.
-
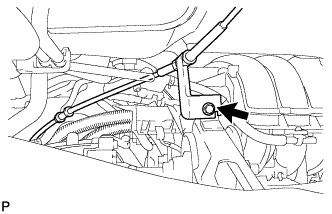
Remove the nut and disconnect the control cable assembly from the control shaft lever.
-
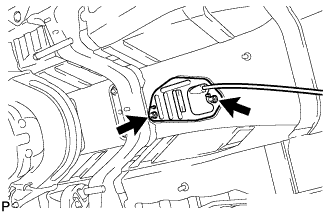
Remove the clip and disconnect the transmission control cable from the control cable bracket.
-
Disconnect the control cable from the transmission control cable support.
-
Remove the bolt and disconnect the transmission control cable support.
-
Remove the 2 nuts and disconnect the transmission control cable.
-
Pull out the transmission control cable to remove it.
-