REAR TURN SIGNAL LIGHT BULB REPLACEMENT
CAUTION / NOTICE / HINT
Tech Tips
-
Use the same procedure for the RH side and LH side.
-
The following procedure is for the LH side.
PROCEDURE
-
REMOVE REAR LIGHT COVER
-
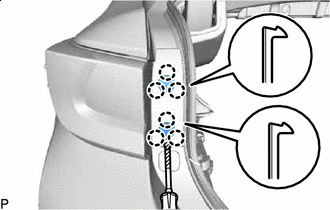

Protective Tape Using a screwdriver with its tip wrapped with protective tape, disengage the 6 claws to remove the 2 rear light covers.
-
-
DISCONNECT REAR COMBINATION LIGHT ASSEMBLY
-

Protective Tape Apply protective tape around the rear combination light assembly as shown in the illustration.
-
Remove the 2 screws.
-
Push the rear combination light assembly at the portion (A) toward the rear of the vehicle to disengage the pin and 3 guides to separate the rear combination light assembly as shown in the illustration.
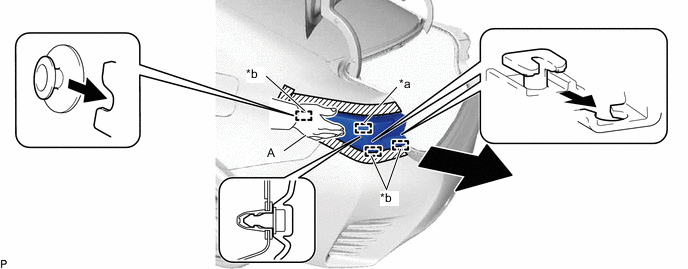
*a Pin *b Guide Note
To prevent the rear combination light assembly from falling when disengaging the pin and 3 guides, lightly hold the rear combination light assembly.
Tech Tips
Pushing on the portion (A) will make disengagement of the pin easier.
-
-
REMOVE REAR TURN SIGNAL LIGHT BULB
-
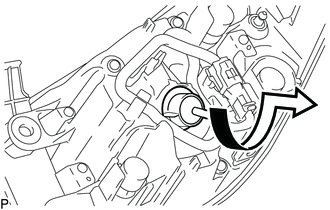
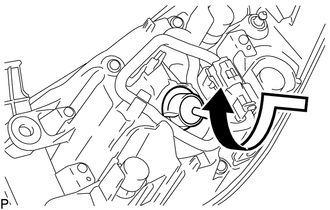
Turn the rear combination light socket and wire sub-assembly with the rear turn signal light bulb as shown in the illustration to disconnect them as a unit.
-
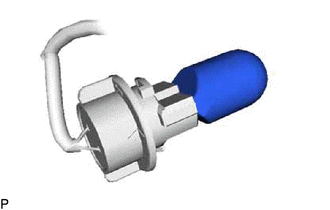
Remove the rear turn signal light bulb from the rear combination light socket and wire sub-assembly.
-
-
INSTALL REAR TURN SIGNAL LIGHT BULB
-
Install a new rear turn signal light bulb to the rear combination light socket and wire sub-assembly.
-
Turn the rear combination light socket and wire sub-assembly with the rear turn signal light bulb as shown in the illustration to connect them as a unit.
-
-
INSTALL REAR COMBINATION LIGHT ASSEMBLY
-
Engage the 3 guides and pin to temporarily install the rear combination light assembly as shown in the illustration.
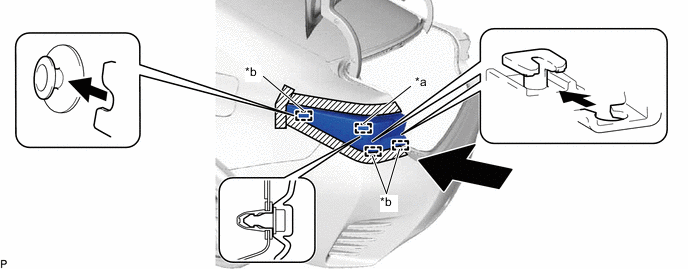
*a Pin *b Guide -
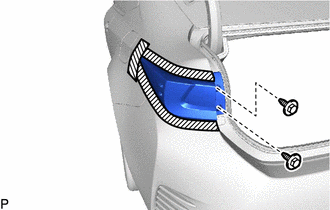
Install the rear combination light assembly with the 2 screws.
- Torque:
- 2.3 N*m { 23 kgf*cm, 20 in.*lbf }
-
Remove the protective tape.
-
-
INSTALL REAR LIGHT COVER
-
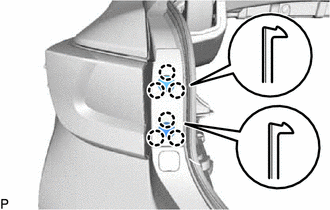
Engage the 6 claws to install the 2 rear light covers.
-