GENERATOR REMOVAL

PROCEDURE
-
PRECAUTION
Note
After turning the engine switch off, waiting time may be required before disconnecting the cable from the negative (-) battery terminal. Therefore, make sure to read the disconnecting the cable from the negative (-) battery terminal notices before proceeding with work.
-
DISCONNECT CABLE FROM NEGATIVE BATTERY TERMINAL
Note
When disconnecting the cable, some systems need to be initialized after the cable is reconnected.
-
REMOVE ENGINE ROOM SIDE COVER
-
REMOVE COOL AIR INTAKE DUCT SEAL
-
REMOVE V-RIBBED BELT
-
REMOVE CENTER NO. 4 ENGINE UNDER COVER
-
DRAIN ENGINE COOLANT
-
REMOVE NO. 1 RADIATOR HOSE
-
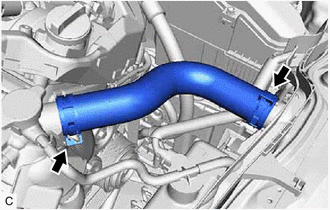
Slide the 2 clips and remove the No. 1 radiator hose.
-
-
REMOVE NO. 2 ENGINE COVER SUB-ASSEMBLY
-
REMOVE NO. 2 IDLER PULLEY SUB-ASSEMBLY
-
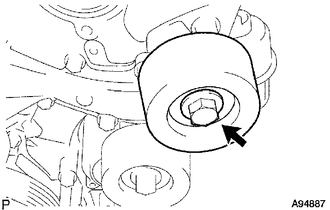
Remove the bolt, No. 2 idler pulley cover plate and No. 2 idler pulley sub-assembly.
-
-
REMOVE GENERATOR ASSEMBLY
-
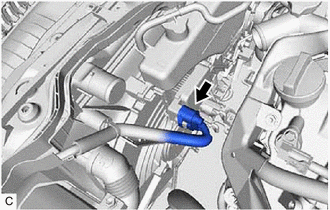
Disconnect the cooling fan ECU connector.
-
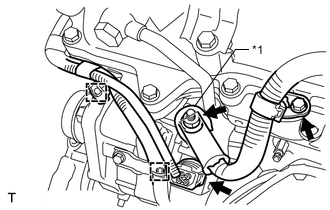
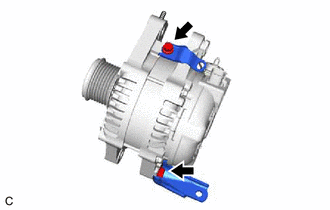
*1 Terminal Cap Remove the bolt and disconnect the engine wire bracket.
-
Remove the terminal cap.
-
Remove the nut and disconnect the engine wire from terminal B.
-
Disconnect the generator assembly connector, and disengage the 2 clamps.
-

Remove the nut.
-
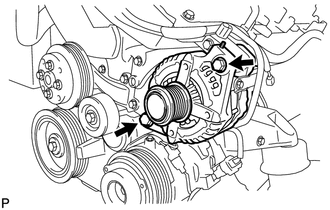
Remove the 2 bolts and generator assembly.
-
Remove the bolt and generator bracket.
-
Remove the bolt and wire harness bracket.
-
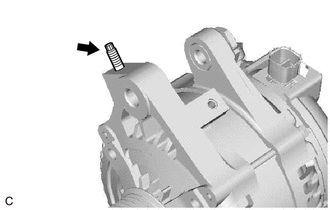
Using an E6 "TORX" socket wrench, remove the stud bolt.
-