SHIFT LEVER REMOVAL
PROCEDURE
-
REMOVE SHIFT LEVER CAP
-
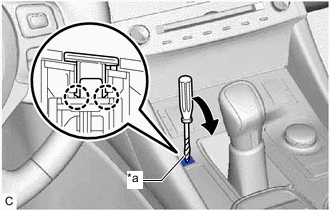
*a Protective Tape Using a screwdriver, disengage the 2 claws as shown in the illustration and remove the shift lever cap from the shift position indicator.
Note
Do not damage the shift lever cap and shift position indicator.
Tech Tips
Tape the screwdriver tip before use.
-
-
REMOVE FRONT EXHAUST PIPE ASSEMBLY (TWC: Rear Catalyst)
-
REMOVE FRONT NO. 1 FLOOR HEAT INSULATOR
-
DISCONNECT FLOOR SHIFT GEAR SHIFTING ROD SUB-ASSEMBLY
-
Move the shift lever to N.
-
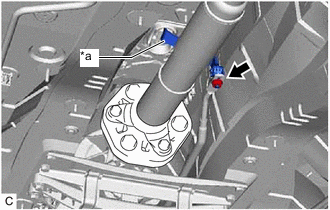
*a Lever Remove the nut and disconnect the floor shift gear shifting rod sub-assembly from the lever of the transmission floor shift assembly.
-
-
REMOVE CONSOLE BOX ASSEMBLY
-
REMOVE NO. 1 CONSOLE BOX DUCT
-
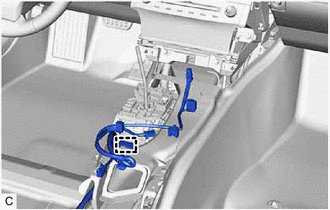
Disengage the clamp to disconnect the wire harness from the No. 1 console box duct.
-
Remove the 2 clips and No. 1 console box duct.
-
-
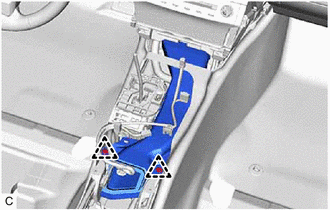
REMOVE TRANSMISSION FLOOR SHIFT ASSEMBLY
-
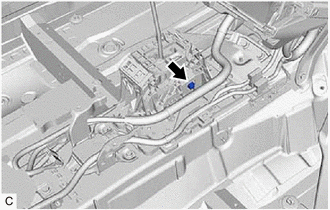
Disconnect the shift lock control ECU connector.
-
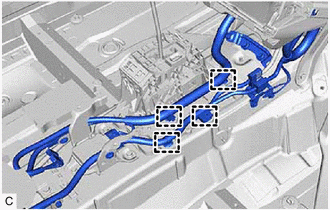
Disengage the 4 clamps to disconnect the wire harness from the transmission floor shift assembly.
-
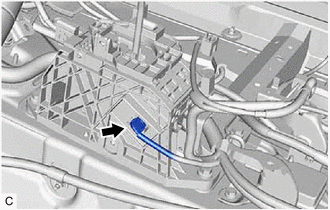
Disconnect the transmission control switch connector.
-
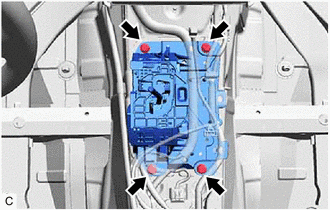
Remove the 4 bolts and transmission floor shift assembly from the vehicle body.
-