CYLINDER HEAD DISASSEMBLY

PROCEDURE
-
REMOVE INTAKE VALVE
-
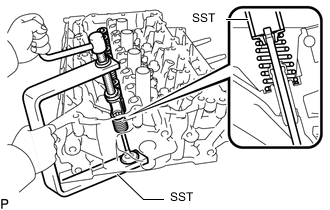
Using SST, compress the compression spring and remove the 8 valve spring retainer locks.
- SST
- 09202-70020
- 09202-00021
-
Remove the 8 valve spring retainers, 8 compression springs and 8 intake valves.
Tech Tips
Arrange the removed parts in the correct order.
-
-
REMOVE EXHAUST VALVE
CAUTION:
-
The exhaust valve is filled with sodium. Sodium is a strong alkali which can produce a dangerous chemical reaction. Be very careful when handling and disposing of it.
-
Do not intensionally expose the sodium in exhaust valve. If sodium enters your eyes, vision loss may occur. If sodium contacts your skin, burns may occur. If a fire occurs due to a chemical reaction with sodium, burns may occur.
-
If the sodium in the exhaust valve is exposed, perform all necessary preparations to safely remove and dispose of the sodium.
-
When removing a damaged exhaust valve, always wear rubber gloves and safety glasses.
-
Do not intentionality cut or break open the exhaust valve to remove the sodium.
Tech Tips
-
The sodium inside the exhaust valve is safe as long as it remains sealed inside the exhaust valve.
-
Exhaust valves filled with sodium can be identified by their "NA" identification mark.
-
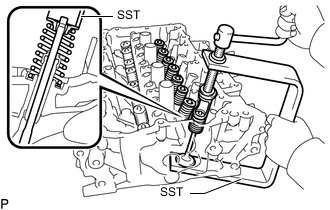
Using SST, compress the compression spring and remove the 8 valve spring retainer locks.
- SST
- 09202-70020
- 09202-00021
-
Remove the 8 valve spring retainers, 8 compression springs and 8 exhaust valves.
Tech Tips
Arrange the removed parts in the correct order.
-
-
REMOVE VALVE STEM OIL SEAL
-
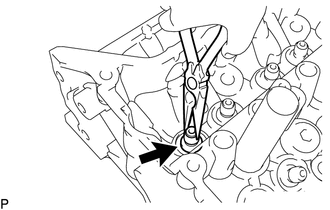
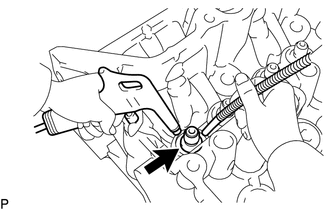
Using needle-nose pliers, remove the 16 valve stem oil seals.
-
-
REMOVE VALVE SPRING SEAT
-
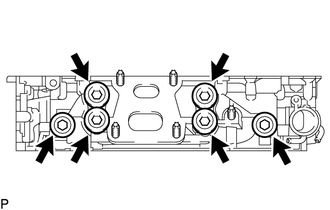
Using compressed air and a Magnet Hand, remove the 16 valve spring seats from the cylinder head sub-assembly by blowing air onto them.
-
-
REMOVE NO. 1 STRAIGHT SCREW PLUG
Note
If coolant leaks from a No. 1 straight screw plug or the plug is corroded, replace it.
-
Using a 14 mm hexagon wrench, remove the 6 No. 1 straight screw plugs and 6 gaskets.
-
-
REMOVE STUD BOLT
Note
If a stud bolt is deformed or its threads are damaged, replace it.
-
DISPOSE OF EXHAUST VALVE
CAUTION:
-
The exhaust valve is filled with sodium. Sodium is a strong alkali which can produce a dangerous chemical reaction. Be very careful when handling and disposing of it.
-
Do not intensionally expose the sodium in exhaust valve. If sodium enters your eyes, vision loss may occur. If sodium contacts your skin, burns may occur. If a fire occurs due to a chemical reaction with sodium, burns may occur.
-
If the sodium in the exhaust valve is exposed, perform all necessary preparations to safely remove and dispose of the sodium.
-
When removing a damaged exhaust valve, always wear rubber gloves and safety glasses.
-
Do not intentionality cut or break open the exhaust valve to remove the sodium.
Tech Tips
-
The sodium inside the exhaust valve is safe as long as it remains sealed inside the exhaust valve.
-
Exhaust valves filled with sodium can be identified by their "NA" identification mark.
-
Waste disposal preparation
CAUTION:
Observe the following precautions when performing the disposal procedure.
-
Have a suitable fire extinguisher close by.
-
Wear safety glasses.
-
Wear rubber gloves.
-
-
Waste disposal
-
Remove the damaged exhaust valve from the cylinder head sub-assembly.
-
Prepare a large container, such as a bucket or oil can, filled with 10 L or more of water and place it in a well ventilated area.
-
Using pliers or a large pair of tweezers, hold the damaged exhaust valve upright and submerge it into the water.
CAUTION:
-
Make sure to fully submerge the damaged exhaust valve in water.
-
Do not allow any sparks or other flames near the container as hydrogen gas is generated by the chemical reaction.
-
Stay at least 2 m away from the receptacle as a strong chemical reaction occurs.
-
-
-