RADIO ANTENNA CORD REMOVAL
PROCEDURE
-
PRECAUTION
Note
After turning the engine switch off, waiting time may be required before disconnecting the cable from the negative (-) battery terminal. Therefore, make sure to read the disconnecting the cable from the negative (-) battery terminal notices before proceeding with work.
-
DISCONNECT CABLE FROM NEGATIVE BATTERY TERMINAL
Note
When disconnecting the cable, some systems need to be initialized after the cable is reconnected.
-
REMOVE REAR CONSOLE BOX ASSEMBLY
-
REMOVE RADIO RECEIVER ASSEMBLY WITH BRACKET
-
REMOVE NO. 1 CONSOLE BOX DUCT
-
REMOVE ANTENNA CORD SUB-ASSEMBLY
-
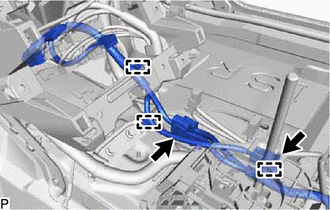
Disconnect each connector.
-
Disengage each clamp and remove the antenna cord sub-assembly.
-
-
REMOVE FRONT SEAT ASSEMBLY LH
-
REMOVE FRONT SEAT ASSEMBLY RH
Tech Tips
Use the same procedure as for the LH side.
-
REMOVE REAR SEAT ASSEMBLY
-
REMOVE FRONT DOOR SCUFF PLATE LH
-
REMOVE FRONT QUARTER TRIM PANEL ASSEMBLY LH
-
REMOVE FRONT DOOR SCUFF PLATE RH
Tech Tips
Use the same procedure as for the LH side.
-
REMOVE FRONT QUARTER TRIM PANEL ASSEMBLY RH
Tech Tips
Use the same procedure as for the LH side.
-
REMOVE INNER ROOF SIDE GARNISH ASSEMBLY RH
-
REMOVE NO. 1 LUGGAGE COMPARTMENT TRIM COVER
-
REMOVE FRONT LUGGAGE COMPARTMENT TRIM COVER
-
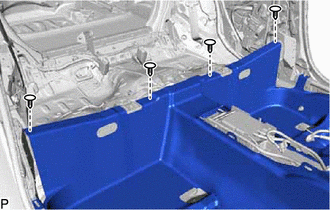
REMOVE REAR SEAT SUB FLOOR PANEL
-
REMOVE NO. 1 ROOM PARTITION COVER
-
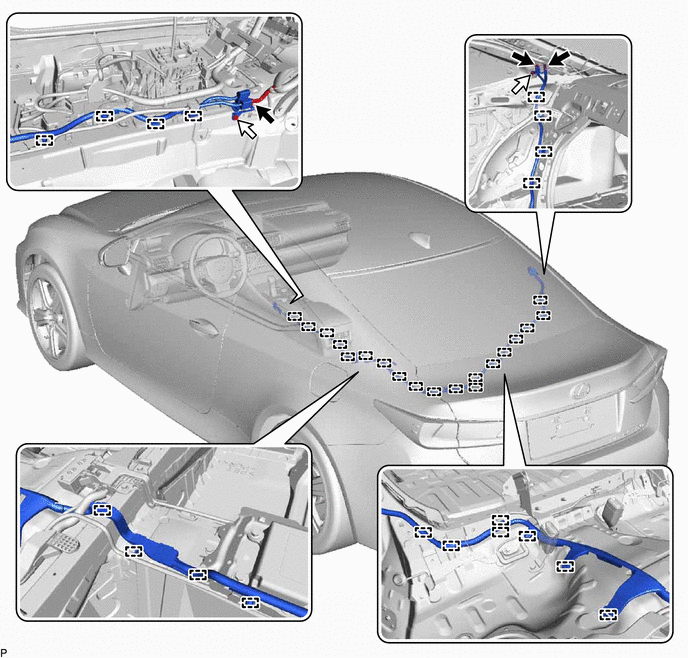
REMOVE NO. 2 ANTENNA CORD SUB-ASSEMBLY
-
Remove the 4 clips.
-
Disengage the 2 guides.
-
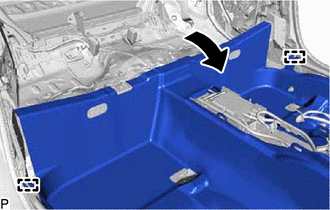
Turn back the floor carpet as shown in the illustration so that the No. 2 antenna cord sub-assembly can be removed.
-
w/o Digital Audio Broadcasting Antenna or Television Antenna:
-
Disconnect each connector.
-
Remove the 2 bolts.
-
Disengage each clamp and remove the No. 2 antenna cord sub-assembly.
-
-
w/ Digital Audio Broadcasting Antenna or Television Antenna:
-
Disconnect each connector.

-
Remove the 3 bolts.
-
Disengage each clamp and remove the No. 2 antenna cord sub-assembly.
-
-
-
REMOVE CURTAIN SHIELD AIRBAG ASSEMBLY
-
REMOVE NO. 5 ANTENNA CORD SUB-ASSEMBLY
-
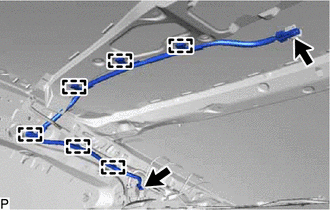
Disconnect the 2 connectors.
-
Disengage each clamp and remove the No. 5 antenna cord sub-assembly.
-