CIGARETTE LIGHTER REMOVAL

Tech Tips
-
Use the same procedure for LHD and RHD vehicles.
-
The procedure listed below is for LHD vehicles.
-
REMOVE LOWER INSTRUMENT PANEL PAD SUB-ASSEMBLY LH
-
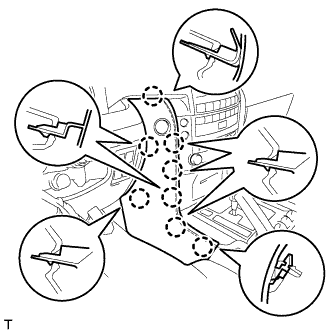
Detach the 8 claws.
-
Disconnect the connector and remove the panel pad.
-
-
REMOVE INNER NO. 1 INSTRUMENT PANEL BRACKET COVER LH
-
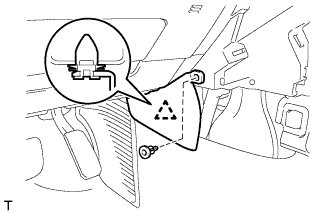
Remove the clip.
-
Detach the clip and remove the cover.
-
-
REMOVE LOWER INSTRUMENT PANEL PAD SUB-ASSEMBLY RH
-
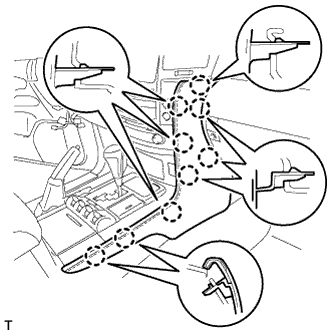
Detach the 9 claws and remove the panel pad.
-
-
REMOVE INNER NO. 1 INSTRUMENT PANEL BRACKET COVER RH
-
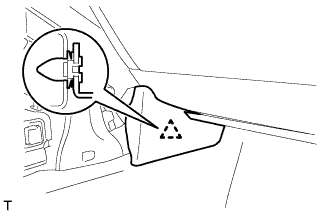
Detach the clip and remove the cover.
-
-
REMOVE SHIFT LEVER KNOB SUB-ASSEMBLY
-
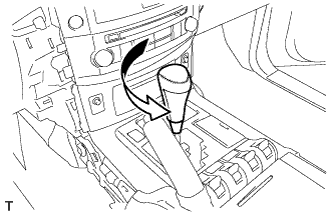
Twist the shift lever knob in the direction indicated by the arrow and remove it.
-
-
REMOVE LOWER CENTER INSTRUMENT CLUSTER FINISH PANEL SUB-ASSEMBLY
-
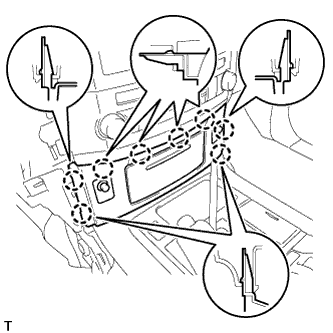
Detach the 8 claws.
-
Disconnect the connectors and remove the panel.
-
-
REMOVE CIGARETTE LIGHTER KNOB AND ELEMENT ASSEMBLY
-
REMOVE CIGARETTE LIGHTER ASSEMBLY
-
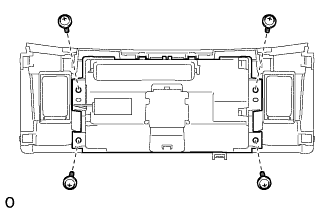
Remove the 4 screws.
-
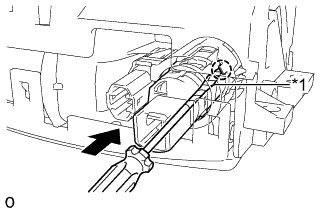
Text in Illustration *1 Protective Tape Using a screwdriver, detach the claw and remove the cigarette lighter.
Tech Tips
Tape the screwdriver tip before use.
-
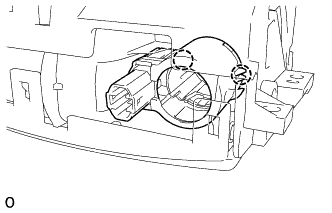
Detach the 2 claws and remove the cigarette lighter retainer.
-
-
REMOVE BULB
-
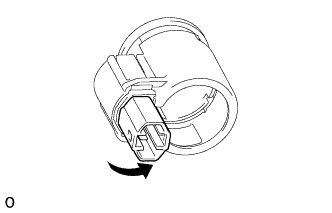
Remove the socket as shown in the illustration.
-
Remove the bulb from the socket.
-