DUCT TEMPERATURE SENSOR INSTALLATION

Tech Tips
-
Use the same procedures for LHD and RHD vehicles.
-
The procedures listed below are for LHD vehicles.
-
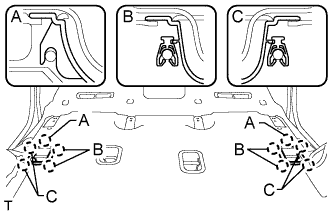
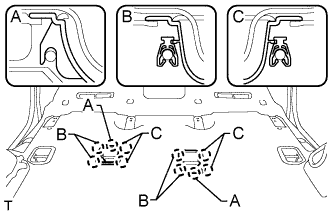
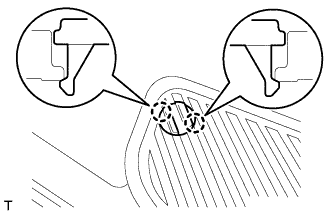
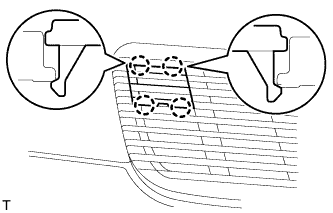
INSTALL COOLER THERMISTOR
-
Attach the 4 claws to install the 2 sensors.
-
-
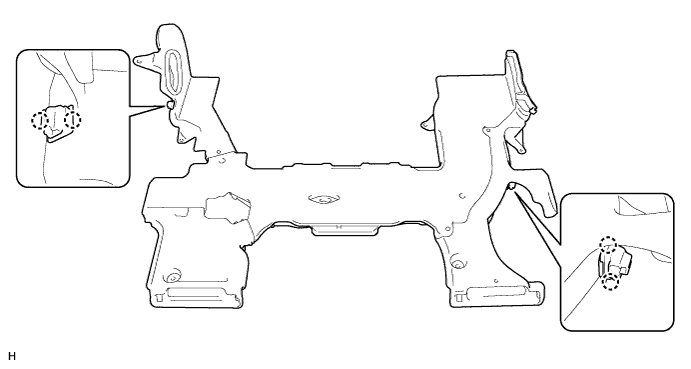
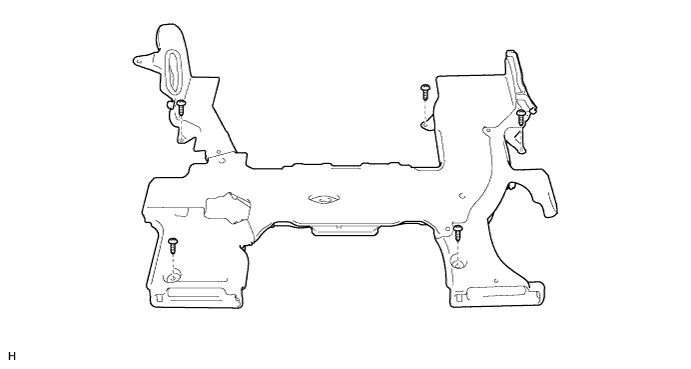
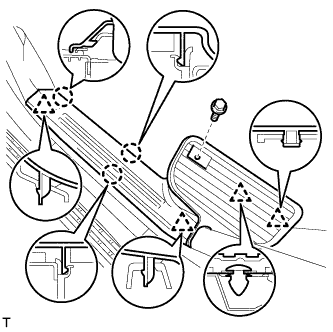
INSTALL REAR NO. 6 AIR DUCT
-
Install the duct with the 5 screws.
-
Connect the 2 connectors.
-
-
INSTALL FRONT FLOOR CARPET ASSEMBLY
-
Install the floor carpet.
-
Install the 2 clips.
-
-
INSTALL REAR NO. 1 SEAT PROTECTOR
-
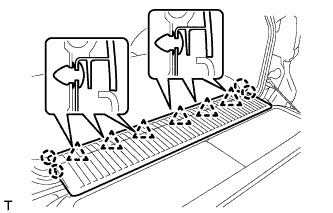
Attach the 10 claws to install the 2 seat protectors.
-
-
INSTALL REAR NO. 2 SEAT PROTECTOR
-
Attach the 10 claws to install the 2 seat protectors.
-
-
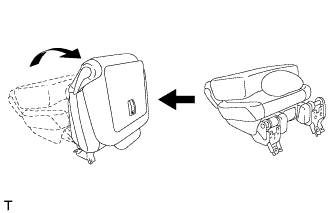
INSTALL FRONT QUARTER TRIM PANEL ASSEMBLY LH
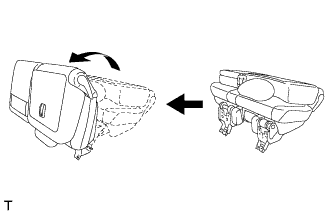
Tech Tips
When installing the front quarter trim panel, operate the reclining adjuster release handle and move the No. 1 rear seat to the position shown in the illustration.
-
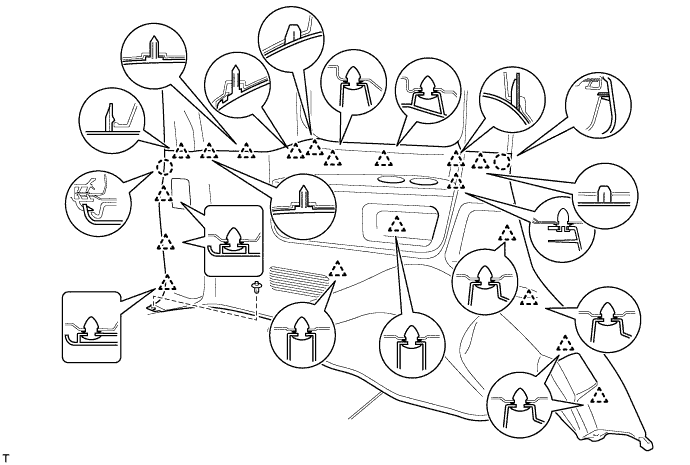
Connect the thermistor connector.
-
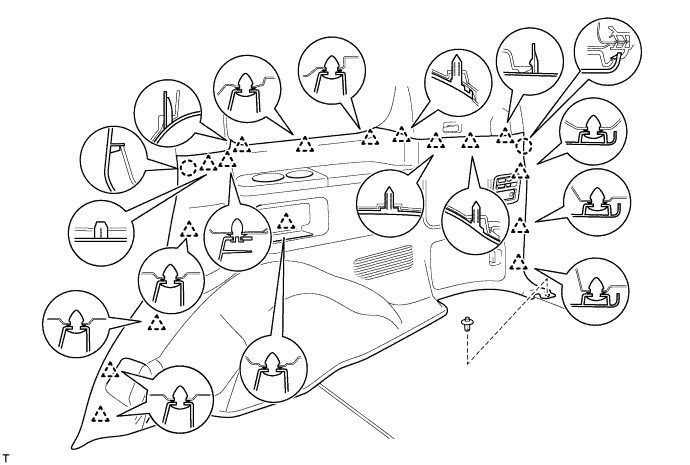
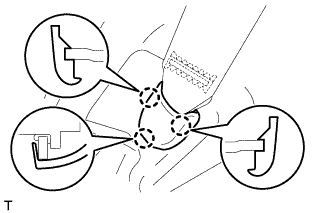
Attach the 19 clips and 2 claws to install the quarter trim panel.
-
Install the clip.
-

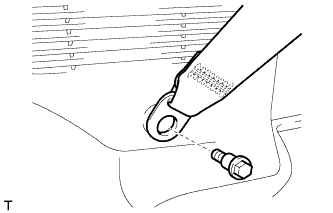
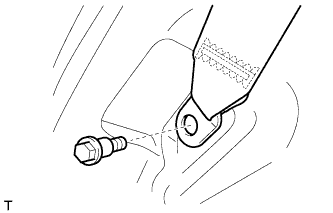
Install the rear No. 2 seat belt anchor with the bolt.
- Torque:
- 42 N*m { 428 kgf*cm, 31 ft.*lbf }
Note
Do not overlap the anchor part of the seat belt and protruding parts of the vehicle body.
-
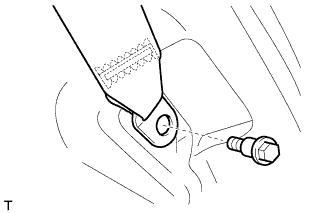
Install the rear No. 1 seat belt anchor with the bolt.
- Torque:
- 42 N*m { 428 kgf*cm, 31 ft.*lbf }
-
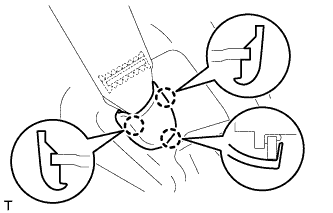
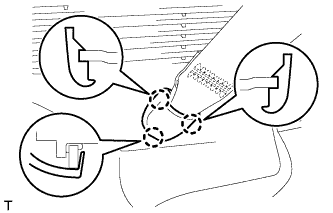
Attach the 3 claws to install the cover.
-
-
INSTALL FRONT QUARTER TRIM PANEL ASSEMBLY RH
Tech Tips
When installing the front quarter trim panel, operate the reclining adjuster release handle and move the No. 1 rear seat to the position shown in the illustration.
-
Connect the thermistor connector.
-
Attach the 17 clips and 2 claws to install the quarter trim panel.
-
Install the clip.
-
Install the rear No. 2 seat belt anchor with the bolt.
- Torque:
- 42 N*m { 428 kgf*cm, 31 ft.*lbf }
-
Attach the 3 claws to install the cover.
-
Install the rear No. 1 seat belt anchor with the bolt.
- Torque:
- 42 N*m { 428 kgf*cm, 31 ft.*lbf }
-
Attach the 3 claws to install the cover.
-
-
INSTALL REAR FLOOR MAT REAR SUPPORT PLATE
-
Attach the 6 clips and 4 claws to install the support plate.
-
-
INSTALL REAR DOOR SCUFF PLATE LH
-
w/o Illumination Type Front Door Scuff Plate:
-
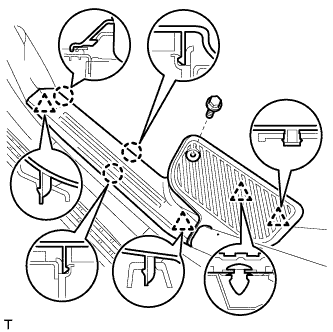
Attach the 3 claws and 4 clips to install the scuff plate.
-
Install the screw.
-
-
w/ Illumination Type Front Door Scuff Plate:
-
Attach the 3 claws and 4 clips to install the scuff plate.
-
Install the screw.
-
-
-
INSTALL REAR DOOR SCUFF PLATE RH
Tech Tips
Use the same procedures described for the LH side.
-
INSTALL REAR STEP COVER
Tech Tips
Use the same procedure to install the step cover on the other side.
-
w/o Illumination Type Front Door Scuff Plate:
Attach the 2 claws to install the step cover.
-
w/ Illumination Type Front Door Scuff Plate:
Attach the 4 claws to install the step cover.
-
-
INSTALL REAR NO. 2 SEAT ASSEMBLY LH
-
INSTALL REAR NO. 2 SEAT ASSEMBLY RH
-
INSTALL REAR NO. 1 SEAT ASSEMBLY LH
-
INSTALL REAR NO. 1 SEAT ASSEMBLY RH
-
CONNECT CABLE TO NEGATIVE BATTERY TERMINAL
Note
When disconnecting the cable, some systems need to be initialized after the cable is reconnected Click here.
-
INSTALL ENGINE ROOM SIDE COVER LH
-
Install the engine room side cover LH with the 7 clips.
-
-
CHECK SRS WARNING LIGHT