CONDENSER REMOVAL

-
RECOVER REFRIGERANT FROM REFRIGERATION SYSTEM
-
Start the engine.
-
Turn the A/C switch on.
-
Operate the cooler compressor while the engine speed is approximately 1000 rpm for 5 to 6 minutes to circulate the refrigerant and collect the compressor oil remaining in each component into the cooler compressor.
-
Stop the engine.
-
Recover the refrigerant from the A/C system using a refrigerant recovery unit.
-
-
REMOVE FRONT BUMPER COVER
-
REMOVE MILLIMETER WAVE RADAR SENSOR ASSEMBLY (w/ Dynamic Radar Cruise Control System)
-
DISCONNECT CABLE FROM NEGATIVE BATTERY TERMINAL
Note
When disconnecting the cable, some systems need to be initialized after the cable is reconnected Click here.
-
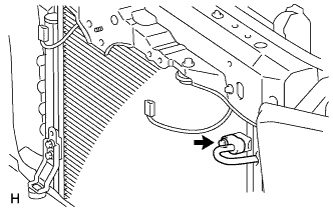
DISCONNECT NO. 1 COOLER REFRIGERANT DISCHARGE HOSE
-
Remove the bolt and disconnect the discharge hose from the cooler condenser.
Note
-
When removing the bolt, do not allow any tools to contact the pipe.
-
When removing the bolt, hold a part of the pipe near the connector.
-
-
Remove the O-ring from the discharge hose.
Note
Seal the openings of the disconnected parts using vinyl tape to prevent moisture and foreign matter from entering them.
-
-
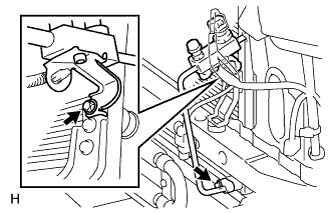
DISCONNECT COOLER REFRIGERANT LIQUID PIPE A
-
Remove the 2 bolts and disconnect the liquid pipe A from the cooler condenser.
Note
-
When removing the bolts, do not allow any tools to contact the pipe.
-
When removing the bolts, hold a part of the pipe near the connector.
-
-
Remove the O-ring from the liquid pipe A.
Note
Seal the openings of the disconnected parts using vinyl tape to prevent moisture and foreign matter from entering them.
-
-
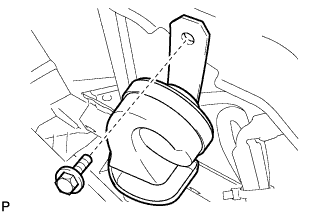
REMOVE HIGH PITCHED HORN ASSEMBLY
-
Remove the bolt and high pitched horn assembly.
-
Disconnect the connector.
-
-
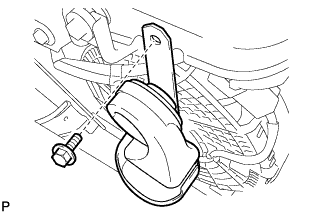
REMOVE LOW PITCHED HORN ASSEMBLY
-
Remove the bolt and low pitched horn assembly.
-
Disconnect the connector.
-
-
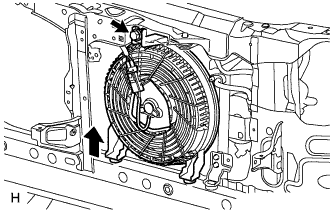
REMOVE SHROUD BLOWER ASSEMBLY
-
Disconnect the connector.
-
Remove the bolt and shroud blower as shown in the illustration.
-
-
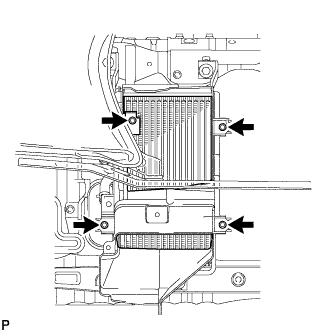
REMOVE TRANSMISSION OIL COOLER AIR DUCT
-
Remove the 4 bolts and transmission oil cooler air duct.
-
-
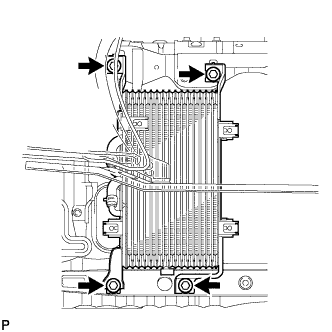
REMOVE OIL COOLER ASSEMBLY
-
Remove the 4 bolts and oil cooler.
-
-
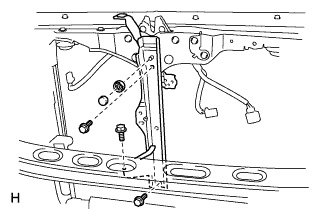
REMOVE HOOD LOCK SUPPORT BRACE SUB-ASSEMBLY
-
Remove the hood lock nut cap.
-
Remove the 3 bolts, nut and brace.
-
-
REMOVE HOOD LOCK CONTROL CABLE COVER
-
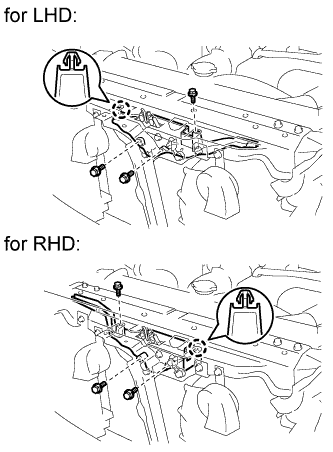
Remove the 3 screws.
-
Detach the claw and remove the cable cover.
-
-
REMOVE HOOD LOCK ASSEMBLY
-
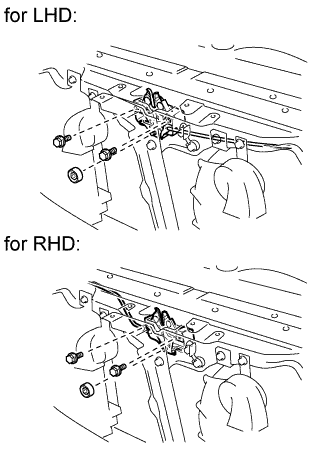
Remove the 2 bolts and nut.
-
Remove the hood lock.
-
Disconnect the connector.
-
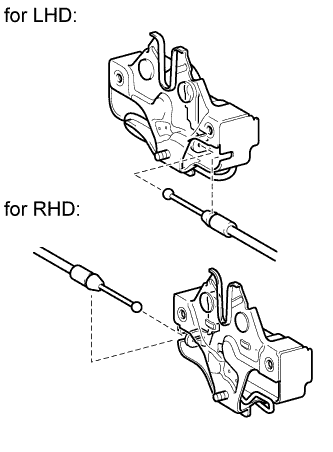
Disconnect the hood lock control cable.
-
-
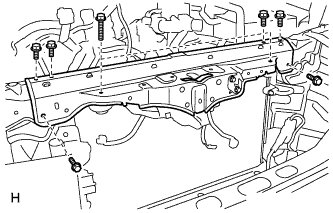
REMOVE RADIATOR SUPPORT SUB-ASSEMBLY
-
Remove the 8 bolts and radiator support.
-
-
REMOVE COOLER CONDENSER ASSEMBLY
-
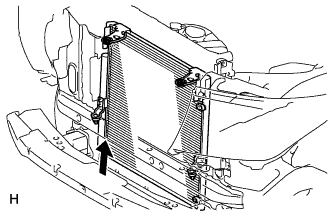
Remove the cooler condenser by pulling it up in the direction shown in the illustration.
-
-
REMOVE COOLER DRYER
-
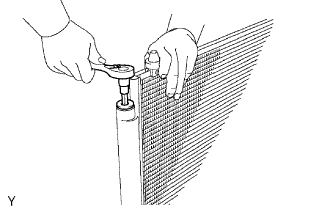
Using a 14 mm socket hexagon wrench, remove the cap from the modulator.
-
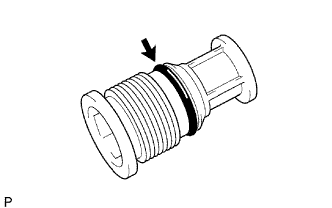
Remove the O-ring from the cap.
-
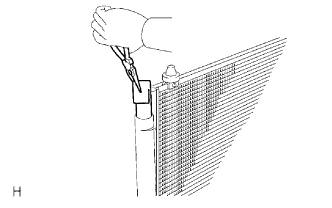
Using pliers, remove the cooler dryer.
-