REAR AIR CONDITIONING UNIT REMOVAL

-
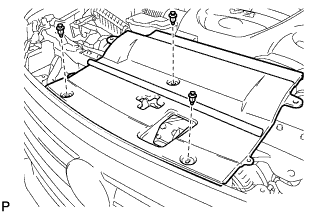
REMOVE FRONT FENDER SPLASH SHIELD SUB-ASSEMBLY LH
-
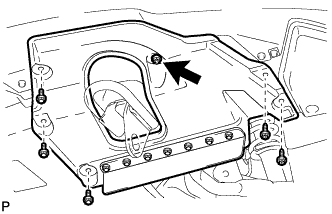
Remove the 3 bolts and 2 screws.
-
Turn the clip indicated by the arrow in the illustration to remove the front fender splash shield sub-assembly LH.
-
-
REMOVE FRONT FENDER SPLASH SHIELD SUB-ASSEMBLY RH
Tech Tips
Use the same procedure described for the LH side.
-
REMOVE NO. 1 ENGINE UNDER COVER SUB-ASSEMBLY
-
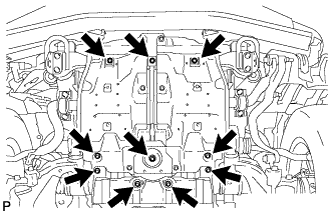
Remove the 10 bolts and No. 1 engine under cover sub-assembly.
-
-
REMOVE ENGINE ROOM SIDE COVER LH
-
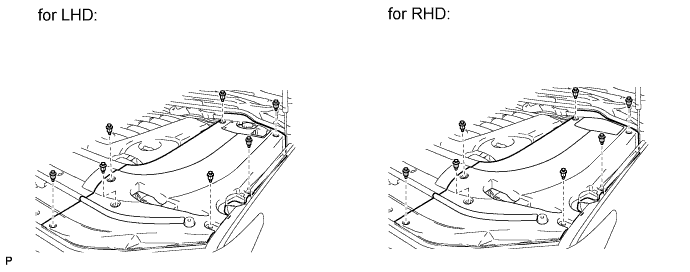
Remove the 7 clips and engine room side cover LH.
-
-
REMOVE ENGINE ROOM SIDE COVER RH
-
Remove the 7 clips and engine room side cover RH.
-
-
REMOVE UPPER RADIATOR SUPPORT SEAL
-
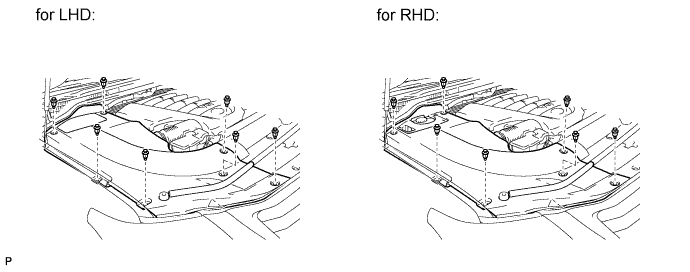
Remove the 3 clips and upper radiator support seal.
-
-
RECOVER REFRIGERANT FROM REFRIGERATION SYSTEM
-
Start the engine.
-
Turn the A/C switch on.
-
Operate the cooler compressor while the engine speed is approximately 1000 rpm for 5 to 6 minutes to circulate the refrigerant and collect the compressor oil remaining in each component into the cooler compressor.
-
Stop the engine.
-
Recover the refrigerant from the A/C system using a refrigerant recovery unit.
-
-
DRAIN ENGINE COOLANT
-
for 1UR-FE:
-
for 3UR-FE:
-
-
DISCONNECT CABLE FROM NEGATIVE BATTERY TERMINAL
CAUTION:
Wait at least 90 seconds after disconnecting the cable from the negative (-) battery terminal to disable the SRS system.
Note
When disconnecting the cable, some systems need to be initialized after the cable is reconnected Click here.
-
REMOVE REAR NO. 2 SEAT ASSEMBLY LH
-
REMOVE REAR NO. 2 SEAT ASSEMBLY RH
-
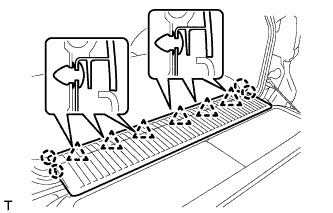
REMOVE REAR FLOOR MAT REAR SUPPORT PLATE
-
Detach the 6 clips and 4 claws, and remove the support plate.
-
-
REMOVE REAR STEP COVER
Tech Tips
Use the same procedure to remove the step cover on the other side.
-
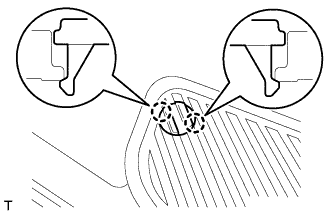
w/o Illumination Type Front Door Scuff Plate:
Detach the 2 claws and remove the step cover.
-
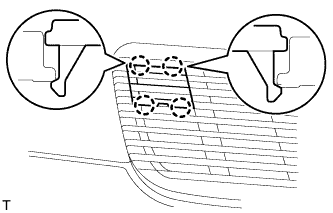
w/ Illumination Type Front Door Scuff Plate:
Detach the 4 claws and remove the step cover.
-
-
REMOVE REAR DOOR SCUFF PLATE LH
-
w/o Illumination Type Front Door Scuff Plate:
Remove the rear door scuff plate.
-
Remove the screw.
-
Detach the 3 claws and 4 clips, and remove the scuff plate.
-
-
w/ Illumination Type Front Door Scuff Plate:
Remove the rear door scuff plate.
-
Remove the screw.
-
Detach the 3 claws and 4 clips, and remove the scuff plate.
-
-
-
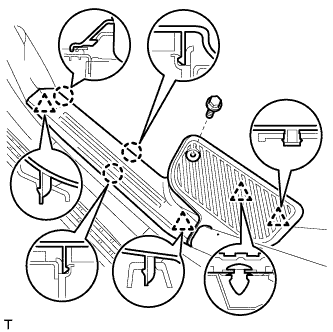
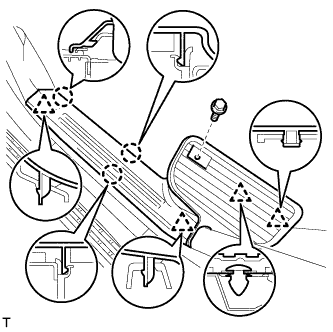
REMOVE FRONT QUARTER TRIM PANEL ASSEMBLY LH
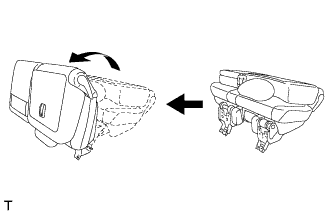
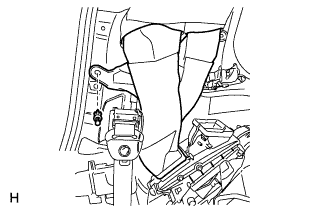
Tech Tips
When removing the front quarter trim panel, operate the reclining adjuster release handle and move the No. 1 rear seat to the position shown in the illustration.
-
Detach the 3 claws and remove the cover.
-
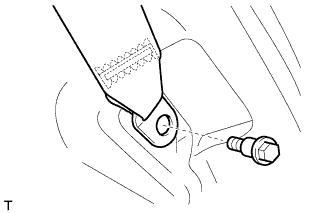
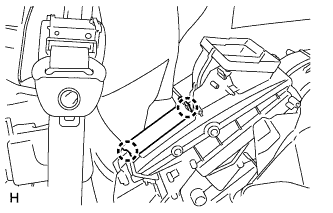
Remove the bolt and rear No. 1 seat belt anchor.
-
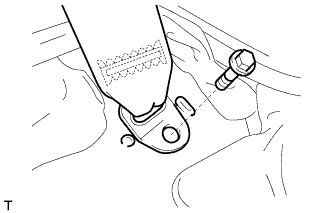
Remove the bolt and rear No. 2 seat belt anchor.
-
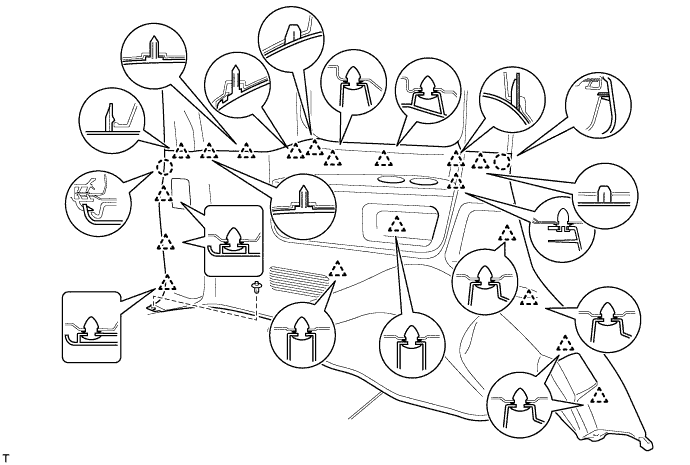
Remove the clip.
-
Detach the 19 clips and 2 claws.
-
Disconnect the thermistor connector and then remove the quarter trim panel.
-
-
DISCONNECT AIR CONDITIONER TUBE AND ACCESSORY ASSEMBLY
-
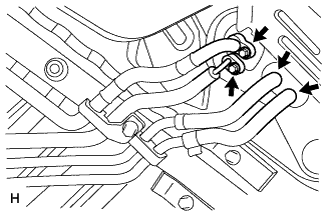
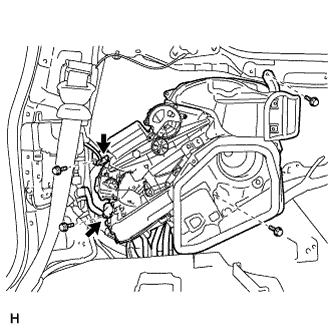
Using pliers, grip the claws of the clips and slide the 2 clips.
-
Disconnect the heater water inlet hose and heater water outlet hose.
-
Remove the 2 nuts.
-
Disconnect the air conditioner tube and accessory assembly.
Note
-
Do not use a screwdriver or similar tool to disconnect the tube.
-
Seal the openings of the disconnected parts using vinyl tape to prevent moisture and foreign matter from entering them.
-
-
Remove the 2 O-rings from the air conditioner tube and accessory assembly.
-
-
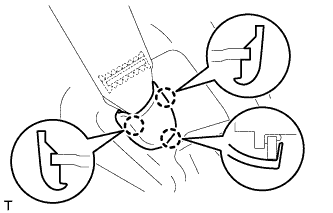
REMOVE REAR ROOF NO. 1 AIR DUCT
-
Detach the 2 claws and remove the cooler plate.
-
Remove the clip and duct.
-
-
REMOVE REAR COOLING UNIT ASSEMBLY
-
Disconnect the 2 connectors.
-
Remove the 4 bolts and rear cooling unit.
-