FRONT SEAT OUTER BELT ASSEMBLY REMOVAL

Tech Tips
-
Use the same procedures for the LH side and RH side.
-
The procedures listed below are for the LH side.
-
DISCONNECT CABLE FROM NEGATIVE BATTERY TERMINAL
CAUTION:
Wait at least 90 seconds after disconnecting the cable from the negative (-) battery terminal to disable the SRS system.
Note
When disconnecting the cable, some systems need to be initialized after the cable is reconnected Click here.
-
REMOVE FRONT DOOR SCUFF PLATE
-
w/o Illumination:
-
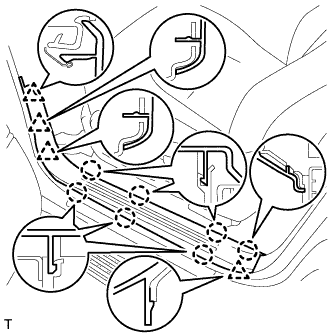
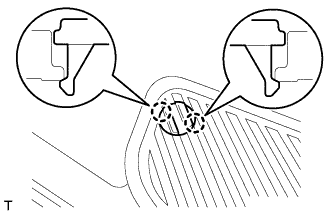
Detach the 7 claws and 4 clips, and remove the scuff plate.
-
-
w/ Illumination:
-
Detach the 7 claws and 4 clips.
-
Disconnect the connector and remove the scuff plate.
-
-
-
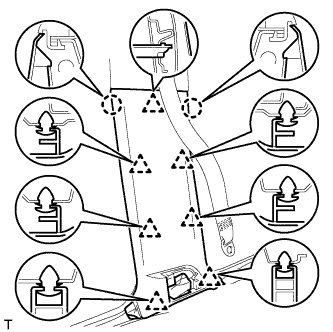
REMOVE REAR STEP COVER
Tech Tips
Use the same procedure to remove the step cover on the other side.
-
w/o Illumination Type Front Door Scuff Plate:
Detach the 2 claws and remove the step cover.
-
w/ Illumination Type Front Door Scuff Plate:
Detach the 4 claws and remove the step cover.
-
-
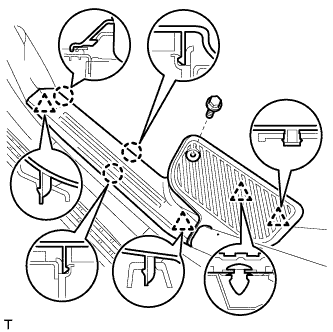
REMOVE REAR DOOR SCUFF PLATE
-
w/o Illumination Type Front Door Scuff Plate:
Remove the rear door scuff plate.
-
Remove the screw.
-
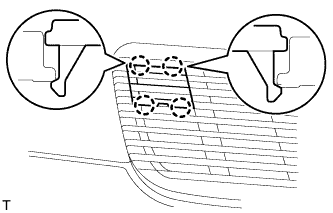
Detach the 3 claws and 4 clips, and remove the scuff plate.
-
-
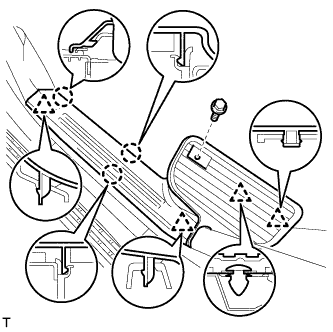
w/ Illumination Type Front Door Scuff Plate:
Remove the rear door scuff plate.
-
Remove the screw.
-
Detach the 3 claws and 4 clips, and remove the scuff plate.
-
-
-
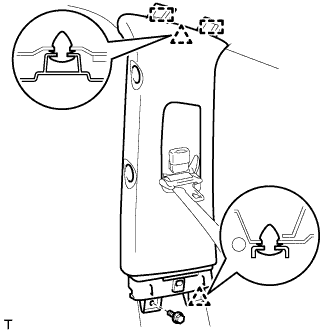
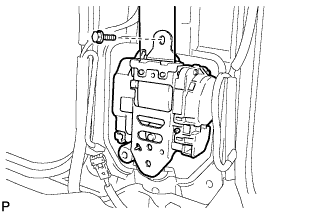
REMOVE CENTER PILLAR GARNISH COVER
Tech Tips
-
When removing the center pillar garnish cover, connect the cable to the negative (-) battery terminal and operate the power seat switch to move the front seat and seatback to the foremost upright position.
-
After moving the front seat, disconnect the cable from the negative (-) battery terminal.
-

Detach the 2 clips and 2 guides, and remove the cover.
-
-
REMOVE CENTER LOWER PILLAR GARNISH
Tech Tips
-
When removing the center pillar garnish cover, connect the cable to the negative (-) battery terminal and operate the power seat switch to move the front seat and seatback to the foremost upright position.
-
After moving the front seat, disconnect the cable from the negative (-) battery terminal.
-
Remove the bolt and seat belt anchor.
-
Detach the 2 claws and 7 clips, and remove the center lower pillar garnish.
-
-
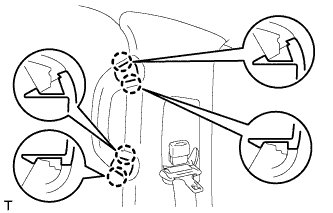
REMOVE REAR ASSIST GRIP ASSEMBLY
Tech Tips
Use the same procedure to remove the rear assist grip on the other side.
-
Detach the 4 claws and remove the 2 assist grip plugs.
-
Remove the 2 bolts.
-
Detach the 2 claws and remove the rear assist grip.
-
-
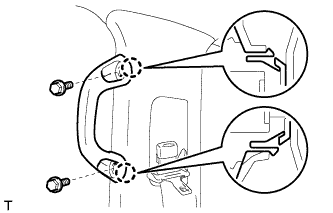
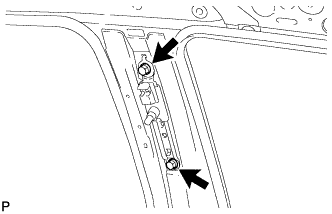
REMOVE CENTER PILLAR GARNISH
-
Remove the bolt.
-
Detach the 2 clips and 2 guides.
-
Pass the seat belt anchor through the center pillar garnish, and remove the center pillar garnish.
-
-
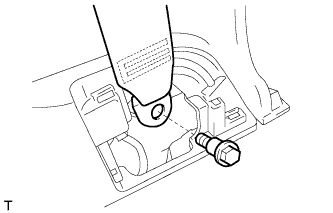
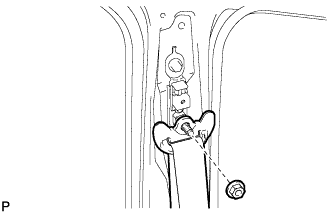
REMOVE FRONT SEAT OUTER BELT ASSEMBLY
-
Remove the nut and shoulder anchor.
-
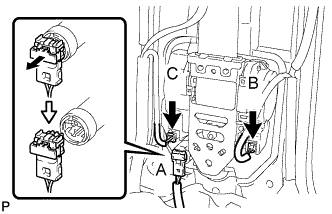
Disconnect the pretensioner connector labeled A as shown in the illustration.
-
Disconnect the tension reducer connector labeled B.
-
w/ Pre-Crash Safety System:
Disconnect the pre-crash safety system connector labeled C.
-
Remove the bolt and seat belt.
-
-
REMOVE FRONT SHOULDER BELT ANCHOR PLATE SUB-ASSEMBLY
-
Remove the 2 bolts and anchor plate.
-