FRONT SEATBACK HEATER (w/ Seat Heater System) REMOVAL

CAUTION:
Wear protective gloves. Sharp areas on the parts may injure your hands.
Tech Tips
-
Use the same procedure for RHD and LHD vehicles.
-
The procedure listed below is for LHD vehicles.
-
Use the same procedure for the RH and LH sides.
-
The procedure listed below is for the LH side.
-
REMOVE FRONT SEAT ASSEMBLY LH
-
REMOVE SLIDE AND VERTICAL POWER SEAT SWITCH KNOB
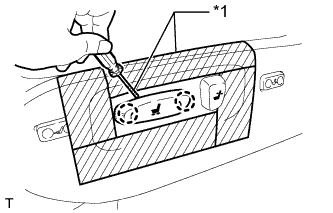
Text in Illustration *1 Protective Tape
-
Apply protective tape as shown in the illustration.
-
Using a screwdriver, detach the 2 claws and remove the slide and vertical power seat switch knob.
Tech Tips
Tape the screwdriver tip before use.
-
-
REMOVE RECLINING POWER SEAT SWITCH KNOB
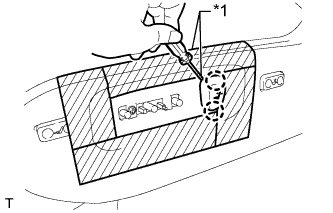
Text in Illustration *1 Protective Tape
-
Using a screwdriver, detach the 2 claws and remove the reclining power seat switch knob.
Tech Tips
Tape the screwdriver tip before use.
-
-
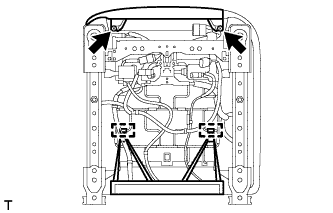
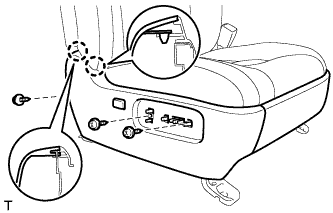
REMOVE FRONT SEAT CUSHION SHIELD LH
-
Remove the 2 screws.
-
Disconnect the 2 rubber bands.
-
Disconnect the connector.
-
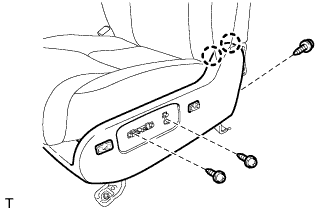
Remove the 3 screws.
-
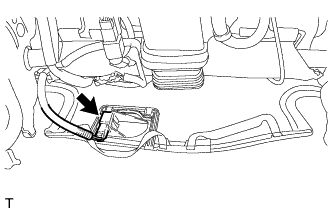
Detach the 2 claws and remove the front seat cushion shield LH together with the front inner No. 1 seat cushion shield LH.
-
Detach the 2 wire harness clamps.
-
Disconnect the 2 connectors.
-
-
REMOVE FRONT SEAT CUSHION SHIELD RH (for Front Passenger Side)
-
Remove the 2 screws.
-
Disconnect the 2 rubber bands.
-
Disconnect the connector.
-
Remove the 3 screws.
-
Detach the 2 claws and remove the front seat cushion shield RH together with the front inner No. 1 seat cushion shield RH.
-
Disconnect the connector.
-
-
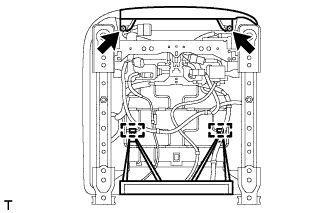
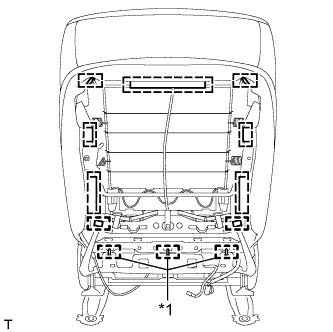
REMOVE FRONT SEAT INNER BELT ASSEMBLY LH
-
Disconnect the 3 connectors and detach the clamps.
-
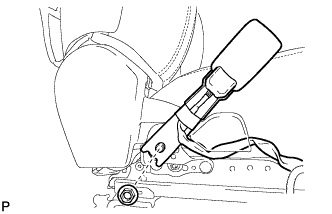
Remove the nut and front seat inner belt assembly.
-
-
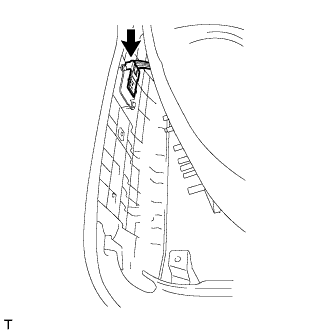
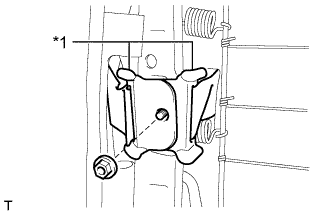
REMOVE FRONT INNER SEAT CUSHION SHIELD LH

-
Remove the screw.
-
Detach the 2 claws and clip, and then remove the front inner seat cushion shield LH.
-
-
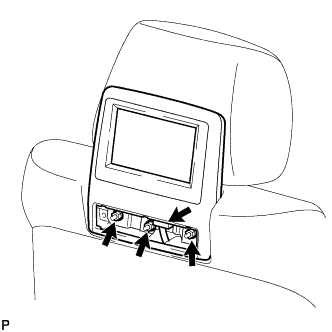
REMOVE TELEVISION BASE (w/ Rear Seat Entertainment System)
-
Text in Illustration *1 Protective tape Put protective tape around the No. 1 instrument panel garnish sub-assembly.
-
Using a moulding remover A, detach the 3 claws and 3 guides and remove the television base.
-
-
REMOVE TELEVISION DISPLAY ASSEMBLY (w/ Rear Seat Entertainment System)
-
Disconnect the connector.
-
Remove the 3 nuts and television display assembly.
-
-
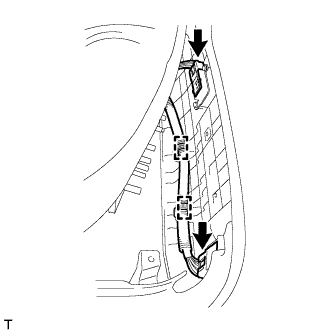
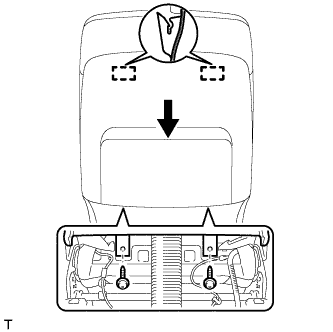
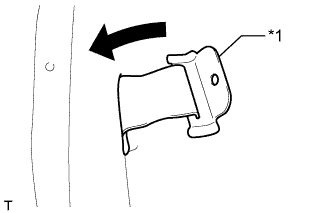
REMOVE FRONT SEATBACK BOARD SUB-ASSEMBLY LH
-
Remove the 2 screws.
-
Move the front seatback board sub-assembly LH in the direction of the arrow to detach the 2 hooks and remove it.
-
-
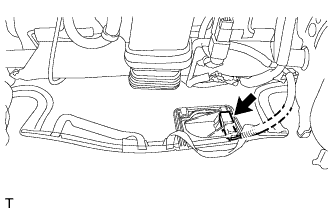
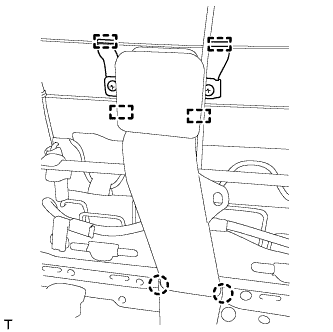
REMOVE SEAT CLIMATE CONTROL CONTROLLER LH (w/ Climate Control Seat System)
-
Detach the 2 claws and disconnect the seat climate control blower LH.
-
Detach the 4 hooks and remove the seat climate control controller LH.
-
-
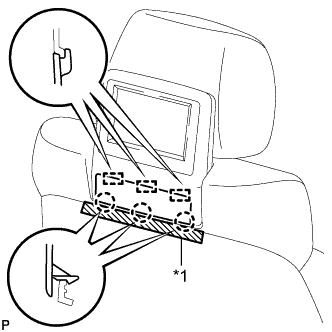
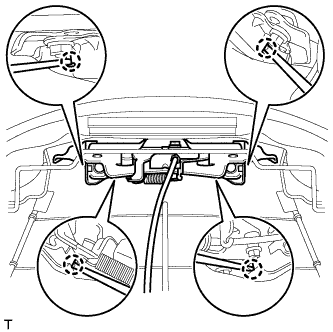
REMOVE FRONT SEAT HEADREST SUPPORT
-
Detach the 4 claws and remove the 2 front seat headrest supports.
-
-
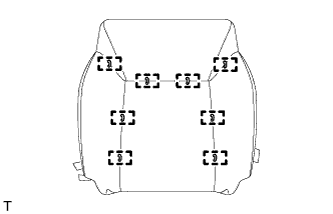
REMOVE SEATBACK COVER WITH PAD
-
Text in Illustration *1 Hog Ring Remove the hog rings.
-
Text in Illustration *1 Seatback Cover Bracket Remove the nut and detach the seatback cover bracket.
-
Detach the hooks and remove the seatback cover with pad.
-
-
REMOVE FRONT SEPARATE TYPE SEATBACK COVER
-
Text in Illustration *1 Seatback Cover Bracket Pass the seatback cover bracket through the hole of the front separate type seatback pad.
-
Remove the hog rings and front separate type seatback cover from the front separate type seatback pad.
-
-
REMOVE FRONT SEATBACK HEATER ASSEMBLY LH
-
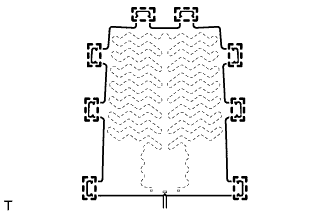
w/o Climate Control Seat System:
Cut off the tack pins and remove the front seatback heater assembly LH from the front separate type seatback cover.
-
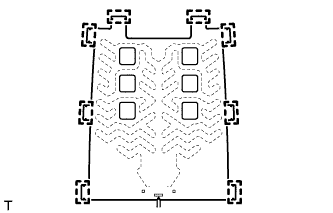
w/ Climate Control Seat System:
Cut off the tack pins and remove the front seatback heater assembly LH from the front separate type seatback cover.
-