SEAT MEMORY SWITCH INSTALLATION

Tech Tips
-
Use the same procedures for LHD and RHD vehicles.
-
The procedures listed below are for LHD vehicles.
-
INSTALL SEAT MEMORY SWITCH
-
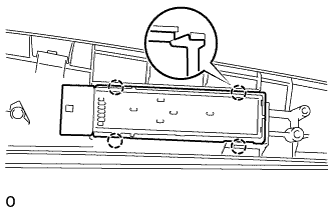
Attach the 4 claws to install the seat memory switch.
-
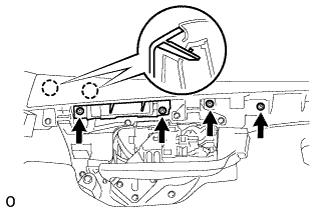
Attach the 2 claws to install the front door trim ornament.
-
Install the 4 screws.
-
-
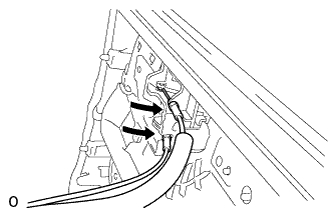
INSTALL FRONT DOOR WIRING SUB-ASSEMBLY RH
-
Connect the connector.
-
Attach the clamp to install the front door wiring sub-assembly RH.
-
-
INSTALL FRONT DOOR TRIM BOARD SUB-ASSEMBLY LH
-
Connect the connector.
-
Connect the front door lock remote control cable assembly LH and front door inside locking cable assembly LH to the front door inside handle sub-assembly LH.
-
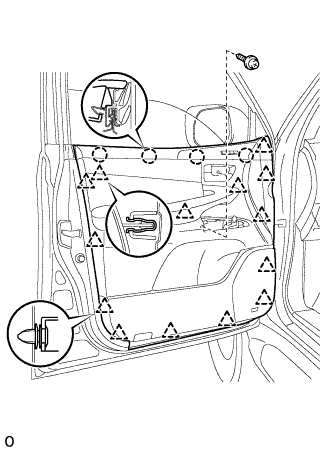
Attach the 4 claws and 14 clips to install the front door trim board sub-assembly LH.
-
Install the 2 screws.
-
-
INSTALL FRONT UPPER ARMREST BASE PANEL LH
-
Connect the connector.
-
Attach the 5 claws to install the front upper armrest base panel LH.
-
-
INSTALL FRONT DOOR INSIDE HANDLE BEZEL LH
-
Connect the connector.
-
Attach the 5 claws to install the front upper armrest base panel LH.
-
-
INSTALL FRONT LOWER DOOR FRAME BRACKET GARNISH LH
-
Attach the clip and claw to install the front lower door frame bracket garnish LH.
-