SEAT MEMORY SWITCH REMOVAL

Tech Tips
-
Use the same procedures for LHD and RHD vehicles.
-
The procedures listed below are for LHD vehicles.
-
REMOVE FRONT LOWER DOOR FRAME BRACKET GARNISH LH
-
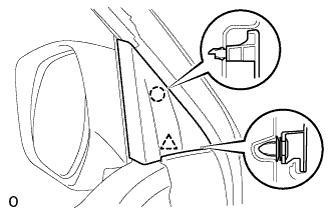
Detach the clip and claw, and remove the front lower door frame bracket garnish LH.
-
-
REMOVE FRONT DOOR INSIDE HANDLE BEZEL LH
-
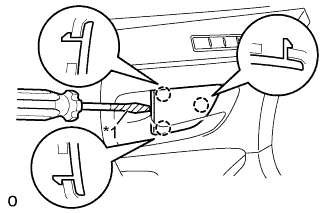
Text in Illustration *1 Protective Tape Using a screwdriver, detach the 3 claws and remove the front door inside handle bezel plug LH.
Tech Tips
Tape the screwdriver tip before use.
-
-
REMOVE FRONT UPPER ARMREST BASE PANEL LH
-
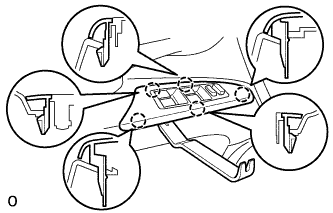
Using a moulding remover, detach the 5 claws.
-
Disconnect the connector and remove the front upper armrest base panel LH and multiplex network master switch assembly.
-
-
REMOVE FRONT DOOR TRIM BOARD SUB-ASSEMBLY LH
-
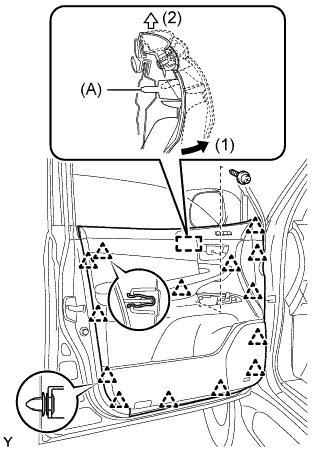
Remove the 2 screws.
-
Detach the 14 clips.
-
Remove the front inner door glass weatherstrip LH together with the front door trim board sub-assembly LH by pulling them upward in the order shown in the illustration.
Tech Tips
Make sure that the pin labeled A in the illustration is detached from the door panel.
-
Disconnect the connector.
-
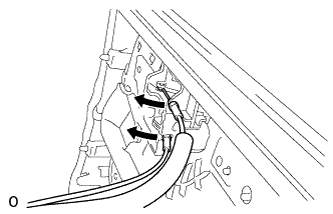
Disconnect the 2 cables from the front door inside handle sub-assembly LH.
-
-
REMOVE FRONT DOOR WIRING SUB-ASSEMBLY RH
-
Disconnect the connector.
-
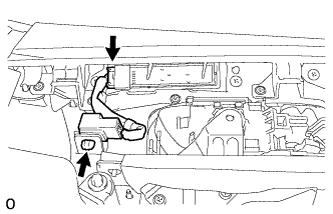
Detach the clamp and remove the front door wiring sub-assembly RH.
-
-
REMOVE SEAT MEMORY SWITCH
-
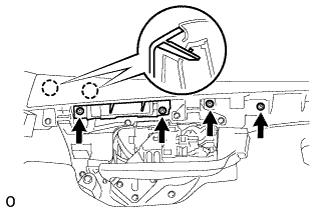
Remove the 4 screws.
-
Detach the 2 claws and remove the front door trim ornament.
-
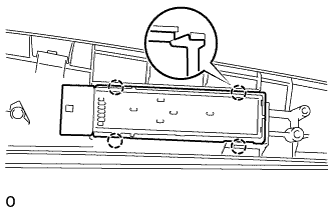
Detach the 4 claws and remove the seat memory switch.
-