POWER SEAT SWITCH (for 60/40 Split Seat Type 40 Side) INSTALLATION

CAUTION:
Wear protective gloves. Sharp areas on the parts may injure your hands.
Tech Tips
-
Use the same procedures for LHD and RHD vehicles.
-
The procedures listed below are for LHD vehicles.
-
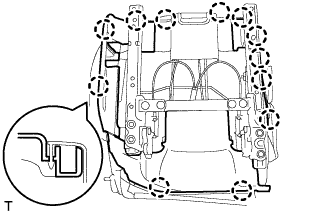
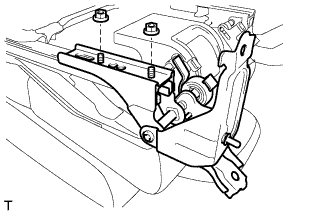
INSTALL REAR POWER SEAT SWITCH
-
Install the power seat switch with the 2 screws.
-
-
INSTALL REAR UNDER SIDE COVER LH
-
Attach the 2 claws and clip to install the cover.
-
Install the 5 screws.
-
-
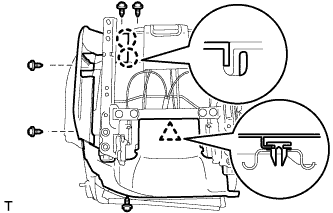
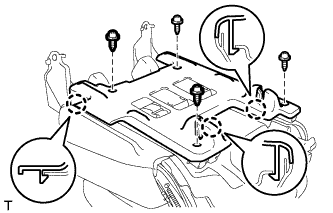
INSTALL REAR SEAT COVER
-
Attach the 2 claws to install the cover.
-
Install the 3 screws.
-
Attach the 12 claws.
-
-
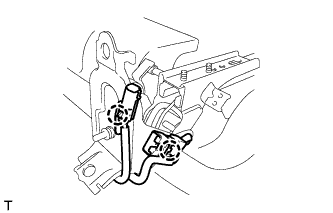
INSTALL REAR NO. 1 SEAT HINGE SUB-ASSEMBLY RH
-
Install the hinge with the 2 nuts.
- Torque:
- 42 N*m { 428 kgf*cm, 31 ft.*lbf }
-
Attach the wire harness clamp.
-
w/ Seat Heater System:
Attach the wire harness clamp.
-
-
INSTALL REAR NO. 1 SEAT HINGE SUB-ASSEMBLY LH
-
Install the hinge with the 2 nuts.
- Torque:
- 42 N*m { 428 kgf*cm, 31 ft.*lbf }
-
-
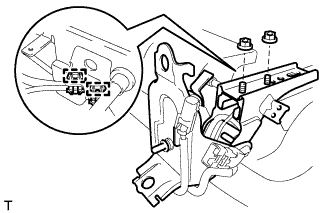
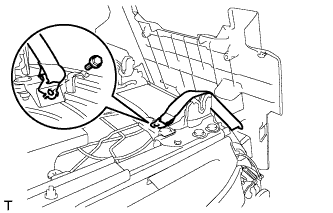
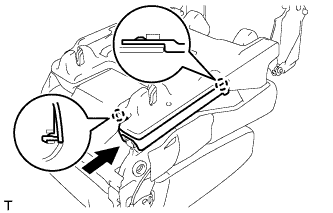
INSTALL REAR NO. 2 SEAT PROTECTOR
-
Install the wire harness, and attach the 2 claws to close the protector.
-
Attach the claw to install the protector to the seat hinge.
-
Install the clip.
-
Attach the claw to install the wire harness connector.
-
w/ Seat Heater System:
Attach the claw to install the wire harness connector.
-
-
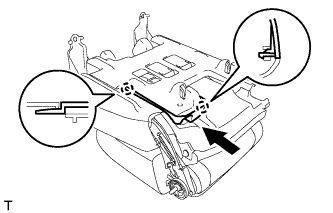
INSTALL REAR NO. 2 SEAT LEG SIDE COVER
-
Pass the fold seat stopper band through the seat leg side cover and attach it to the seat cushion frame with the bolt.
-
Attach the 3 claws to install the seat leg side cover.
-
Install the 4 screws.
-
-
INSTALL UPPER SEAT TRACK RAIL COVER RH
-
Attach the 2 claws to install the cover.
-
-
INSTALL UPPER SEAT TRACK RAIL COVER LH
-
Attach the 2 claws to install the cover.
-
-
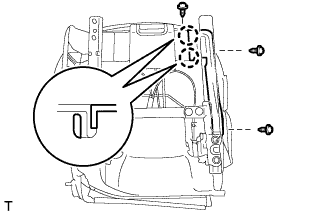
INSTALL REAR NO. 1 SEAT RECLINING COVER LH
-
Attach the 4 claws to install the cover.
-
Install the 2 screws.
-
-
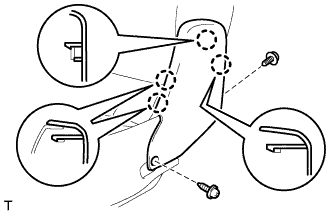
INSTALL REAR NO. 1 SEAT RECLINING COVER RH
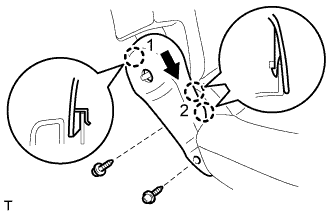
-
Attach the 3 claws in the order shown in the illustration to install the cover.
-
Install the 2 screws.
-
-
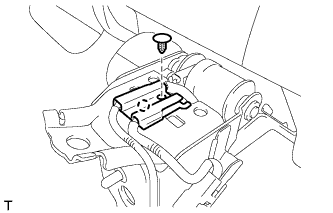
INSTALL RECLINING ADJUSTER RELEASE HANDLE RH
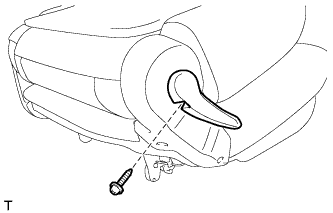
-
Install the release handle with the screw.
-
-
INSTALL SEAT ADJUSTER BOLT COVER
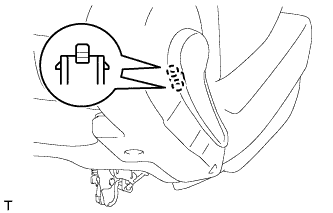
-
Attach the 2 claws to install the cover.
-
-
INSTALL REAR NO. 1 SEAT ASSEMBLY RH
-
Install the rear No. 1 seat assembly Click here.
-