BACK DOOR LOCK REMOVAL

-
REMOVE ENGINE ROOM SIDE COVER LH
-
Remove the 7 clips and engine room side cover LH.
-
-
DISCONNECT CABLE FROM NEGATIVE BATTERY TERMINAL
CAUTION:
Wait at least 90 seconds after disconnecting the cable from the negative (-) battery terminal to disable the SRS system.
Note
-
w/ Navigation System:
After the engine switch is turned off, the HDD navigation system requires approximately 6 minutes to record various types of memory and settings. As a result, after turning the engine switch off, wait 6 minutes or more before disconnecting the cable from the negative (-) battery terminal.
-
When disconnecting the cable, some systems need to be initialized after the cable is reconnected Click here.
-
-
REMOVE CENTER BACK DOOR GARNISH
-
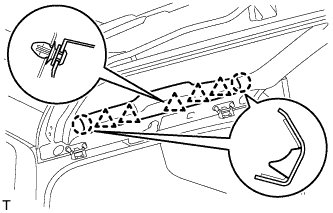
Detach the 5 clips and 2 claws, and remove the back door garnish.
-
-
REMOVE BACK DOOR SIDE GARNISH LH
-
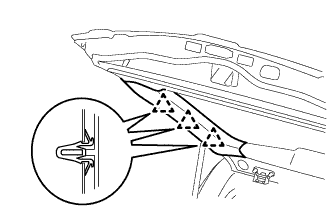
Detach the 3 clips and remove the back door side garnish.
-
-
REMOVE BACK DOOR SIDE GARNISH RH
-
w/o Power Back Door:
Tech Tips
Use the same procedures described for the LH side.
-
w/ Power Back Door:
-
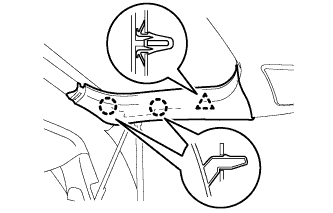
Detach the clip and 2 claws and remove the back door side garnish.
-
-
-
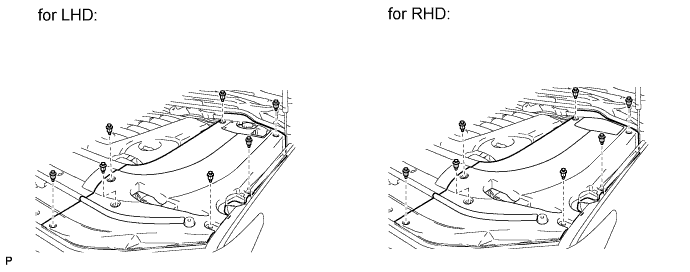
REMOVE BACK DOOR GARNISH
-
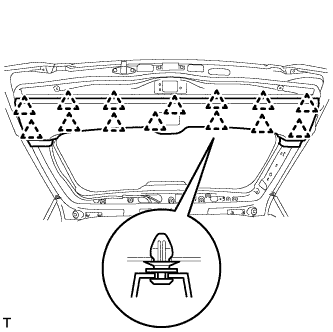
Using a screwdriver, detach the 14 clips and remove the back door garnish.
-
-
REMOVE BACK DOOR LOCK COVER
-
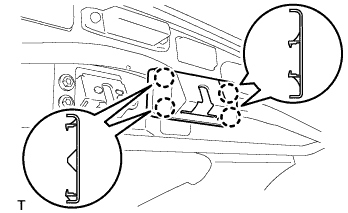
Detach the 4 claws and remove the cover.
-
-
REMOVE BACK DOOR LOCK ASSEMBLY
-
w/o Power Back Door:
-
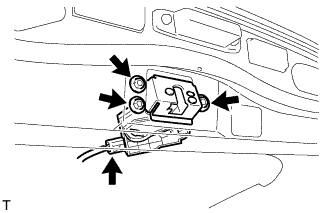
Disconnect the connector.
-
Remove the 3 bolts and door lock.
-
-
w/ Power Back Door:
-
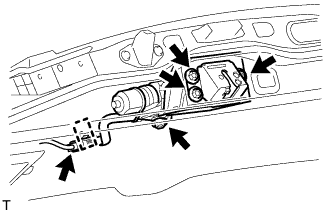
Disconnect the connector.
-
Detach the guide.
-
Remove the 4 bolts and door lock assembly.
-
-
-
REMOVE BACK DOOR LOCK PROTECTOR (w/ Power Back Door)
-
Remove the screw.
-
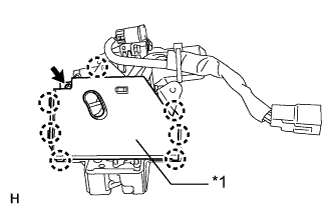
Text in Illustration *1 Protector (B) Detach the 7 claws and remove the protector (B).
-
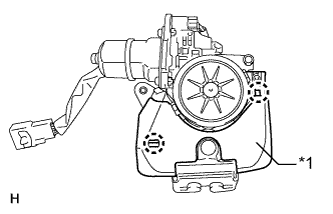
Text in Illustration *1 Protector (A) Detach the 2 claws and remove the protector (A).
-