TELEVISION CAMERA (for Side) INSTALLATION

Tech Tips
-
Use the same procedure for the RH and LH sides.
-
The procedure listed below is for the LH side.
-
INSTALL SIDE TELEVISION CAMERA ASSEMBLY
-
Install the side television camera assembly with the 3 screws.
-
Install the body.
-
Attach the 2 guides and body.
Note
Be careful not to break the guide.
-
-
Install the body cover.
-
Install the body with the 5 screws.
-
-
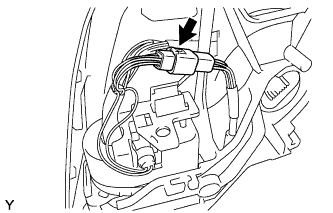
Connect the connector.
-
Attach the connector to the wire clip.
-
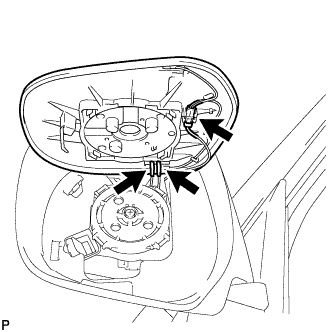
Install the base.
-
Attach the guide.
-
Using "TORX" socket wrench T25, install the base with 3 new screws.
Note
When installing the base, check that the wire harness is not caught between the base and housing. Failure to do so may cause a short circuit.
-
-
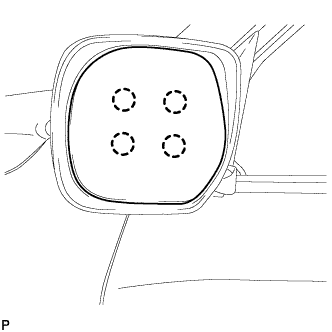
Install the lower mirror cover.
-
Attach the 4 claws and install the new lower mirror cover.
-
-
Install the gasket.
-
Attach the 9 guides and install the gasket.
-
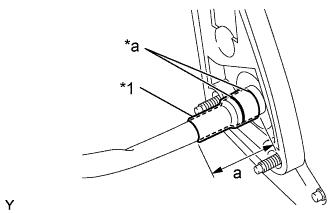
Text in Illustration *1 New Vinyl Tape *a Marking Align the marking on the wire harness with the marking on the end of the wire harness insertion hole of the gasket as shown in the illustration, and wrap them with new vinyl tape starting from the gasket marking.
Standard Area Specified Condition a 50.0 mm (1.97 in.) Note
If the vinyl tape is wrinkled, water may run down the wire harness and enter the vehicle. Make sure to wind the vinyl tape properly.
-
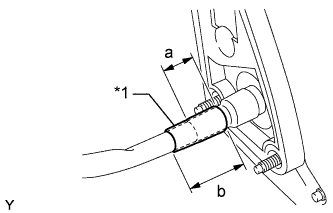
Text in Illustration *1 New Vinyl Tape Wrap new vinyl tape as shown in the illustration.
Standard Area Specified Condition a 30.0 mm (1.18 in.) b 50.0 mm (1.97 in.)
-
-
-
INSTALL SIDE TURN SIGNAL LIGHT ASSEMBLY LH
-
Install the side turn signal light assembly.
-
Connect the connector.
-
Install the side turn signal light assembly with the 3 screws.
-
-
Install the outer mirror cover.
-

Text in Illustration *1 Rib Insert the rib on the outer edge of the cover into the groove of the mirror body.
Note
Do not scratch the turn light.
-
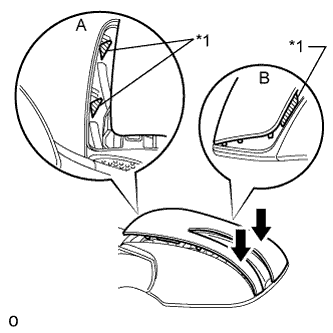
Text in Illustration *1 Rib Confirm that the cover and mirror body are aligned properly, and then push the outer end of the cover to attach the outer claws.
Note
-
Make sure that the upper ribs of the cover shown in part A of the illustration are properly attached to the mirror body.
-
Make sure that the ribs of the mirror body shown in part B of the illustration are not protruding from the cover.
-
-
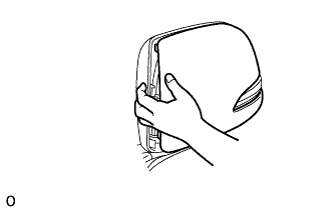
While making sure that the rib of the cover fits properly into the groove of the mirror body, squeeze the inner end of the cover and the mirror body together to attach the inner claws.
-
-
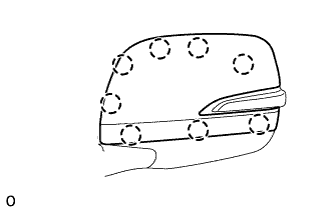
Push on the cover at the locations of the 8 claws to confirm that the claws are attached properly.
-
Check that there is no gap between the cover and mirror body.
Tech Tips
If there is a gap between the cover and body, noise will occur during driving.
-
-
INSTALL OUTER MIRROR LH
-
Connect the 3 connectors.
-
Attach the 4 claws to install the mirror glass.
-
-
INSTALL OUTER REAR VIEW MIRROR ASSEMBLY LH
-
ADJUST SIDE TELEVISION CAMERA ASSEMBLY