STEREO JACK ADAPTER ASSEMBLY REMOVAL

-
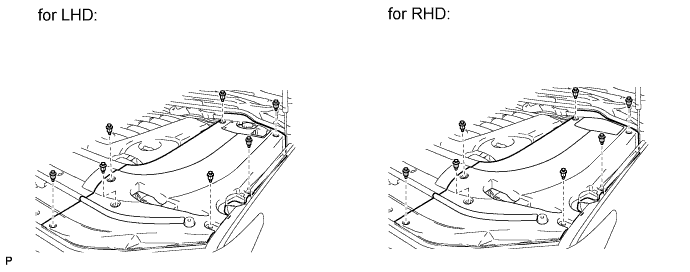
REMOVE ENGINE ROOM SIDE COVER LH
-
Remove the 7 clips and engine room side cover LH.
-
-
DISCONNECT CABLE FROM NEGATIVE BATTERY TERMINAL
Note
When disconnecting the cable, some systems need to be initialized after the cable is reconnected Click here.
-
REMOVE SHIFT LEVER KNOB SUB-ASSEMBLY
-
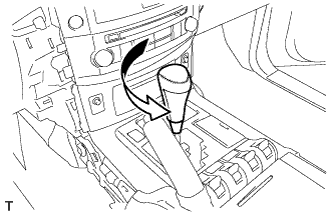
Twist the shift lever knob in the direction indicated by the arrow and remove it.
-
-
REMOVE UPPER CONSOLE PANEL SUB-ASSEMBLY
-
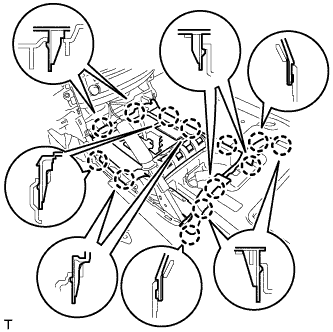
Detach the 13 claws.
-
Disconnect the connectors and remove the console panel.
-
-
REMOVE NO. 1 STEREO JACK ADAPTER ASSEMBLY
-
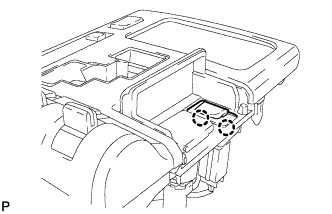
Detach the 2 claws and remove the stereo jack adapter.
-
-
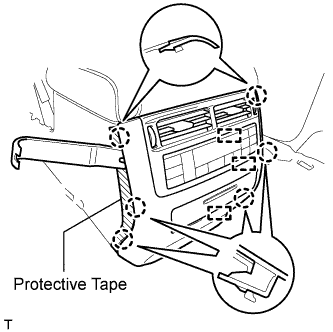
REMOVE REAR CONSOLE END PANEL SUB-ASSEMBLY
-
Place protective tape as shown in the illustration.
-
Using a moulding remover, detach the 6 claws.
-
Remove the end panel and disconnect the connectors and 3 clamps.
-
-
REMOVE REMOTE CONTROL ADAPTER ASSEMBLY
-
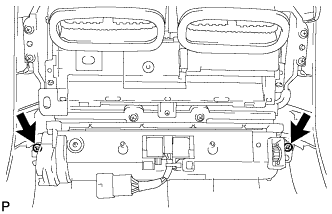
Remove the 2 screws and adapter.
-