INSTRUMENT PANEL SPEAKER REMOVAL

Tech Tips
-
Use the same procedures for the LH side and RH side.
-
The procedures listed below are for the LH side.
-
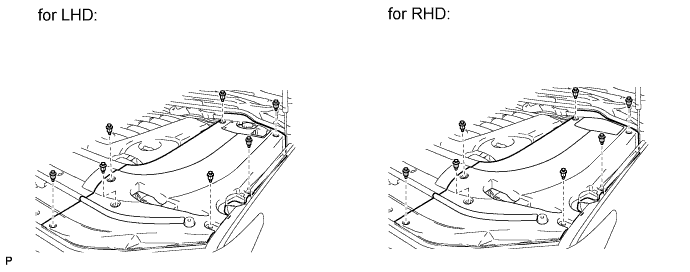
REMOVE ENGINE ROOM SIDE COVER LH
-
Remove the 7 clips and engine room side cover LH.
-
-
DISCONNECT CABLE FROM NEGATIVE BATTERY TERMINAL
Note
When disconnecting the cable, some systems need to be initialized after the cable is reconnected Click here.
-
REMOVE NO. 3 INSTRUMENT PANEL REGISTER ASSEMBLY
-
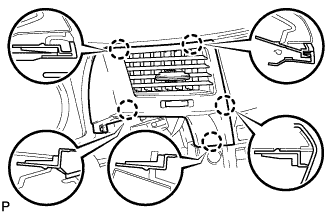
Detach the 5 claws and remove the register.
-
-
REMOVE NO. 4 INSTRUMENT PANEL REGISTER ASSEMBLY
-

Detach the 5 claws and remove the register.
-
-
REMOVE MULTI-DISPLAY ASSEMBLY WITH BRACKET
-
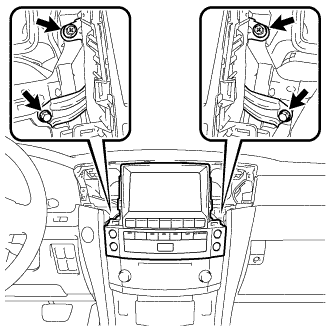
Remove the 2 screws and 2 bolts.
-
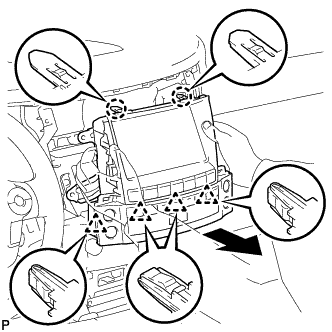
Pull the multi-display assembly with bracket to detach the 2 claws and 4 clips on the backside of the multi-display assembly.
-
Disconnect the connectors and remove the multi-display assembly.
-
-
REMOVE NO. 1 SPEAKER OPENING COVER ASSEMBLY
-
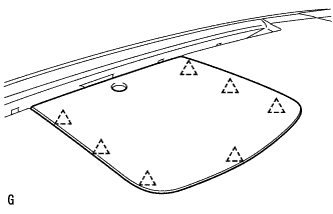
Detach the 7 clips and remove the opening cover.
-
-
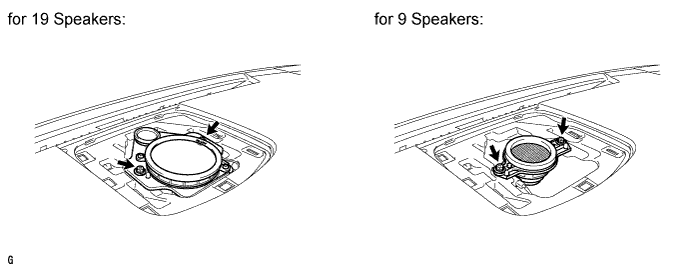
REMOVE FRONT NO. 4 SPEAKER ASSEMBLY
-
Remove the 2 bolts.
-
Remove the speaker and disconnect the speaker connector.
Note
Do not touch the cone part of the speaker.
-
-
REMOVE FRONT ASSIST GRIP SUB-ASSEMBLY
Tech Tips
Use the same procedure to remove the front assist grip on the other side.
-
Detach the 4 claws and remove the 2 assist grip plugs.
-
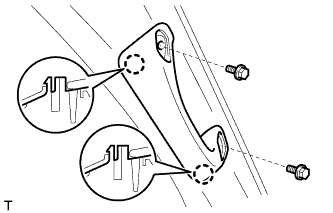
Remove the 2 bolts.
-
Detach the 2 claws and remove the front assist grip.
-
-
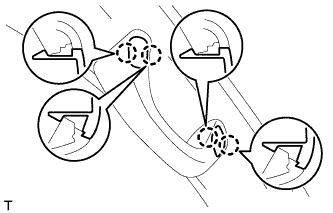
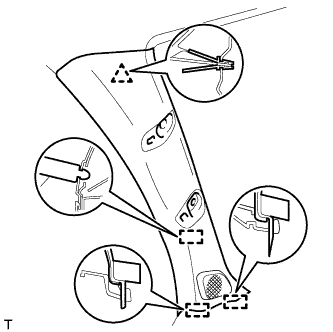
REMOVE FRONT PILLAR GARNISH LH
-
Detach the clip and 3 guides.
-
Disconnect the speaker connector and then remove the front pillar garnish.
-
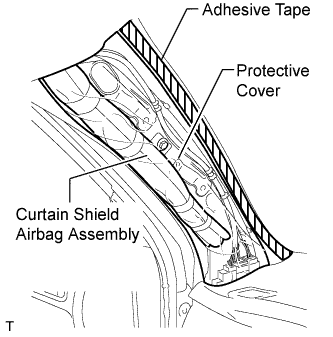
Protect the curtain shield airbag.
-
Thoroughly cover the airbag with a cloth or nylon sheet and fix the ends of the cover with adhesive tape, as shown in the illustration.
Note
Cover the curtain shield airbag with a protective cover as soon as the front pillar garnish is removed.
-
-
-
REMOVE NO. 1 INSTRUMENT PANEL SPEAKER PANEL SUB-ASSEMBLY
-

Detach the claw and clip on the near side. Then, raise the panel towards the front of the vehicle in the direction of the arrow and detach the 2 claws to remove the panel.
-
-
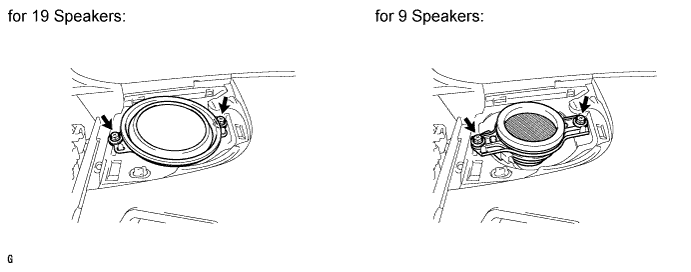
REMOVE FRONT NO. 2 SPEAKER ASSEMBLY
-
Remove the 2 bolts.
-
Remove the speaker and disconnect the speaker connector.
Note
Do not touch the cone part of the speaker.
-