HEADLIGHT ASSEMBLY REASSEMBLY

Tech Tips
-
Use the same procedure for the RH and LH sides.
-
The procedure listed below is for the LH side.
-
INSTALL NO. 2 HOOD TO FRONT END PANEL SEAL
-
Clean the headlight unit assembly LH surface.
-
Remove the double-sided tape from the headlight unit assembly LH surface.
-
Wipe off any tape adhesive residue with cleaner.
-
-
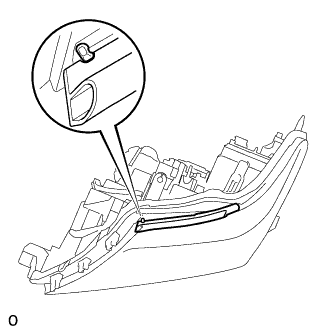
Install a new No. 2 hood to front end panel seal in the position shown in the illustration.
-
-
INSTALL HEADLIGHT CORD LH
-
Attach the claw and guide to install the headlight cord LH to the headlight unit LH.
-
-
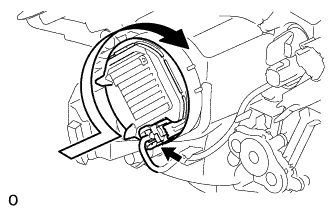
INSTALL HEADLIGHT SWIVEL MOTOR LH
-
Connect the connector.
-
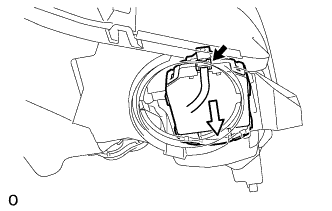
Move the headlight swivel motor LH as shown in the illustration to engage the gears.
-
Install the screw and cover.
-
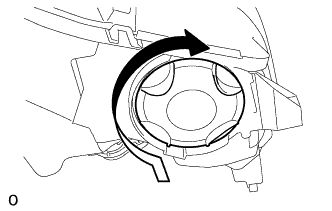
Turn the headlight cover in the direction indicated by the arrow in the illustration to install headlight cover to the headlight unit LH.
-
-
INSTALL FRONT TURN SIGNAL LIGHT BULB
-
Install the front turn signal light bulb to the headlight cord LH.
-
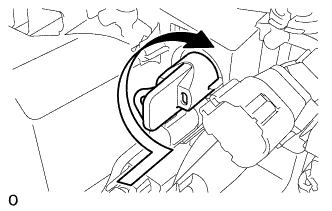
Turn the headlight cord LH in the direction indicated by the arrow in the illustration to install the front turn signal light bulb to the headlight unit LH.
-
-
INSTALL NO. 1 HEADLIGHT BULB
-
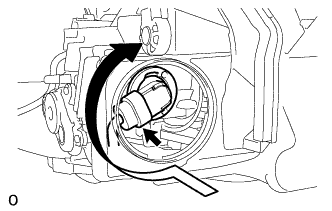
Connect the connector.
-
Turn the No. 1 headlight bulb in the direction indicated by the arrow in the illustration to install No. 1 headlight bulb to the headlight unit LH.
Note
Do not touch the No. 1 headlight bulb glass.
-
-
INSTALL HEADLIGHT SOCKET COVER
-
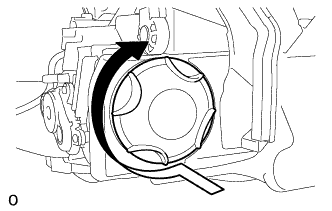
Turn the headlight socket cover in the direction indicated by the arrow in the illustration to install headlight socket cover to the headlight unit LH.
-
-
INSTALL DISCHARGE HEADLIGHT BULB
-
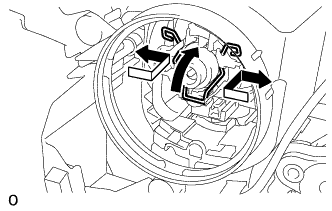
Lock the set spring as shown in the illustration to install the discharge headlight bulb to the headlight unit.
Note
Do not touch the discharge headlight bulb glass.
-
-
INSTALL HEADLIGHT GASKET
-
Install a new headlight gasket to the headlight light control ECU sub-assembly LH.
-
-
INSTALL HEADLIGHT LIGHT CONTROL ECU SUB-ASSEMBLY LH
-
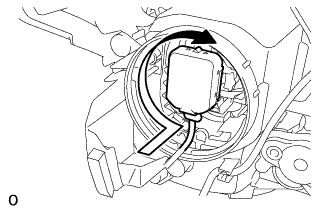
Turn the headlight light control ECU sub-assembly LH socket in the direction indicated by the arrow in the illustration to connect the headlight light control ECU sub-assembly LH socket.
Note
-
Check that the headlight gasket is installed on the headlight light control ECU subassembly LH.
-
Check that the headlight gasket is not damaged or contaminated with foreign matter. If there is any damage, replace the headlight gasket with a new one.
-
Do not pull the headlight light control ECU sub-assembly LH with the socket connected.
-
-
Turn the headlight light control ECU sub-assembly LH in the direction indicated by the arrow in the illustration to install the headlight light control ECU sub-assembly LH to the headlight unit.
-
Connect the connector.
-