HEADLIGHT ASSEMBLY DISASSEMBLY

Tech Tips
-
Use the same procedure for the RH and LH sides.
-
The procedure listed below is for the LH side.
-
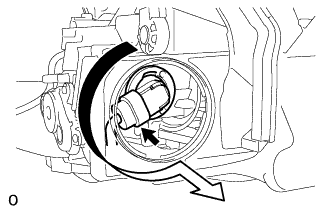
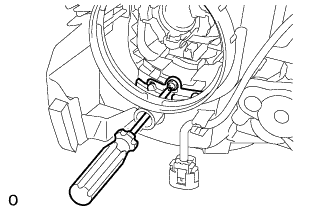
REMOVE HEADLIGHT LIGHT CONTROL ECU SUB-ASSEMBLY LH
-
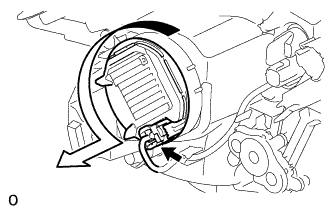
Disconnect the connector.
-
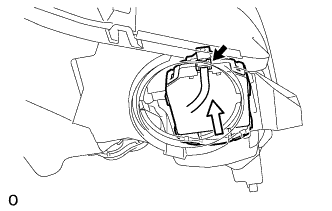
Turn the headlight light control ECU sub-assembly LH in the direction indicated by the arrow in the illustration and remove the headlight light control ECU sub-assembly LH.
Note
-
Do not apply excessive force using a tool.
-
Do not damage the headlight gasket or allow it to become contaminated with foreign matter. If the headlight gasket is damaged or contaminated, water may get into the headlight assembly, resulting in a malfunction of the headlight light control ECU sub-assembly LH.
-
-
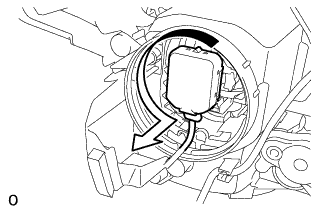
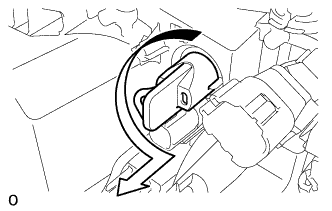
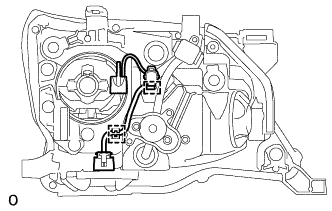
Turn the headlight light control ECU sub-assembly LH socket in the direction indicated by the arrow in the illustration and disconnect the headlight light control ECU sub-assembly LH socket.
Note
Do not pull the headlight light control ECU sub-assembly LH with the socket connected.
-
-
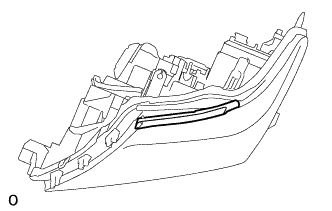
REMOVE HEADLIGHT GASKET
-
Remove the headlight gasket from the headlight light control ECU sub-assembly LH.
-
-
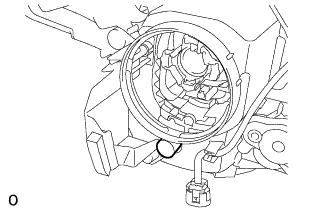
REMOVE DISCHARGE HEADLIGHT BULB
-
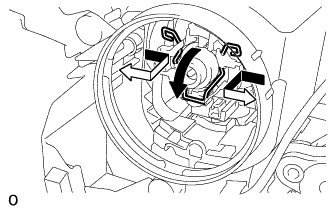
Release the set spring lock as shown in the illustration and remove the discharge headlight bulb.
Note
Do not touch the discharge headlight bulb glass.
-
-
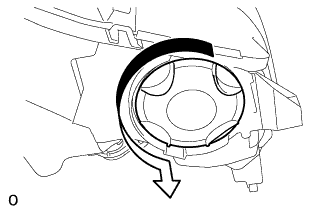
REMOVE HEADLIGHT SOCKET COVER
-
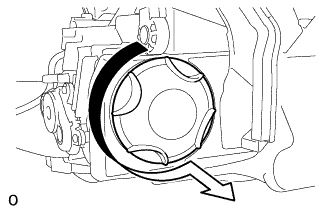
Turn the headlight socket cover in the direction indicated by the arrow in the illustration and remove the headlight socket cover.
-
-
REMOVE NO. 1 HEADLIGHT BULB
-
Turn the No. 1 headlight bulb in the direction indicated by the arrow in the illustration and remove the No. 1 headlight bulb.
Note
Do not touch the No. 1 headlight bulb glass.
-
Disconnect the connector.
-
-
REMOVE FRONT TURN SIGNAL LIGHT BULB
-
Turn the headlight cord LH in the direction indicated by the arrow in the illustration and remove the front turn signal light socket.
-
Remove the front turn signal light bulb from the headlight cord LH.
-
-
REMOVE HEADLIGHT SWIVEL MOTOR LH
-
Turn the headlight cover in the direction indicated by the arrow in the illustration and remove the cover.
-
Remove the cover.
-
Remove the screw.
-
Move the headlight swivel motor LH as shown in the illustration and remove it from the headlight unit LH.
-
Disconnect the connector.
-
-
REMOVE HEADLIGHT CORD LH
-
Detach the claw and guide and remove the headlight cord LH.
-
-
REMOVE NO. 2 HOOD TO FRONT END PANEL SEAL
Tech Tips
When removing the No. 2 hood to front end panel seal, heat the headlight unit assembly LH and No. 2 hood to front end panel seal using a heat light.
Standard Item Temperature Rear Spoiler 20 to 30°C (68 to 86°F) Note
Do not heat the headlight unit assembly LH excessively.
-
Remove the No. 2 hood to front end panel seal.
-