HEADLIGHT CLEANER MOTOR INSTALLATION

-
INSTALL HEADLIGHT CLEANER MOTOR AND PUMP ASSEMBLY
-
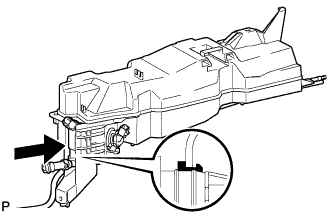
Install the headlight cleaner motor and pump together with the gasket in the direction shown in the illustration.
Tech Tips
Make sure the gasket is positioned as shown in the illustration.
-
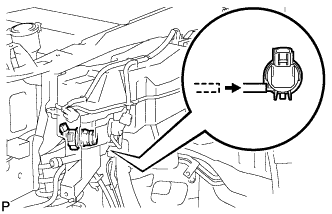
Connect the connector.
-
-
INSTALL WINDSHIELD WASHER JAR ASSEMBLY
-
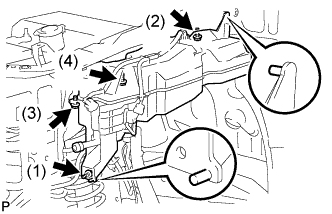
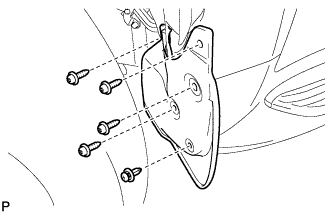
Temporarily install the windshield washer jar with the 4 bolts.
-
Tighten the 4 bolts in the order shown in the illustration to install the windshield washer jar.
- Torque:
- 8.0 N*m { 82 kgf*cm, 71 in.*lbf }
-
Connect the headlight cleaner hose to the windshield washer jar and pump.
-
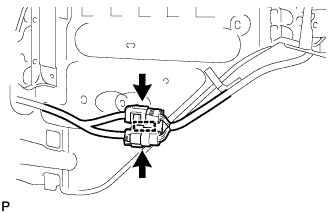
Connect the 2 connectors.
-
Attach the clamp.
-
-
INSTALL WASHER INLET SUB-ASSEMBLY
-
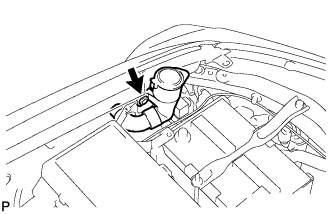
Install the washer inlet with the clip.
-
-
FILL WINDSHIELD WASHER JAR AND PUMP ASSEMBLY WITH WASHER FLUID
-
Connect the washer hose to the windshield washer motor and pump, and fill the washer jar with washer fluid.
-
-
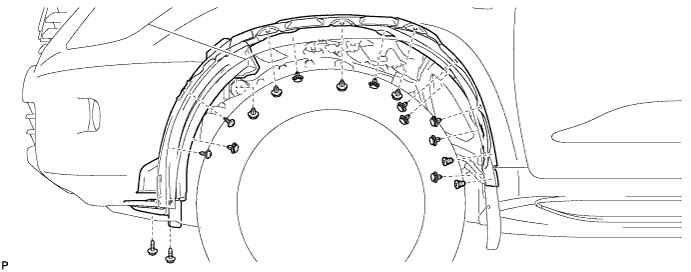
INSTALL FRONT FENDER LINER LH
-
Install the fender liner with the 12 clips and 2 new grommets.
-
Using a T30 "TORX" socket, install the 2 screws.
-
Install the 2 screws.
-
-
INSTALL SIDE STEP ASSEMBLY
-
Clean the vehicle body surface.
-
Using a heat light, heat the vehicle body surface.
-
Remove the double-sided tape from the vehicle body.
-
Wipe off any tape adhesive residue with cleaner.
-
-
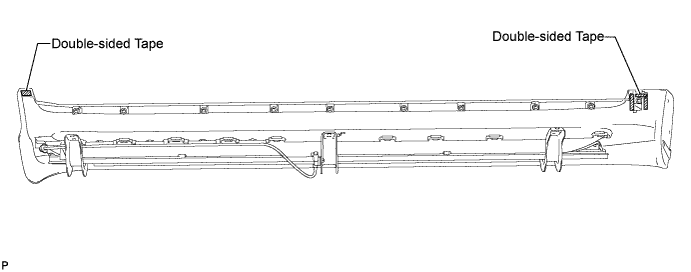
If reusing the side step:
Clean the side step.
-
Using a heat light, heat the side step.
-
Remove the double-sided tape from the side step.
-
Wipe off any tape adhesive residue with cleaner.
-
Apply new double-sided tape to the side step, as shown in the illustration.
-
-
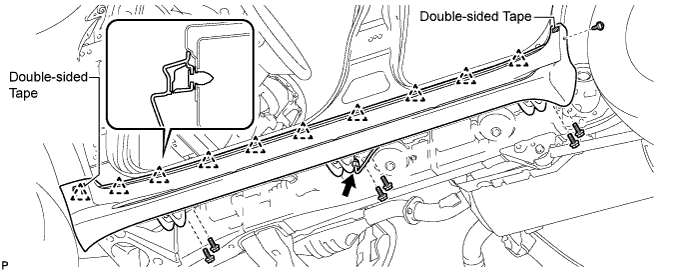
Install the side step.
-
Using a heat light, heat the vehicle body and side step.
-
Remove the peeling paper from the face of the side step.
Tech Tips
After removing the peeling paper, keep the exposed adhesive free from foreign matter.
-
Attach the 10 clips to install the side step.
-
Install the 6 bolts.
- Torque:
- 30 N*m { 306 kgf*cm, 22 ft.*lbf }
-
Install the screw.
-
Connect the connector.
-
-
-
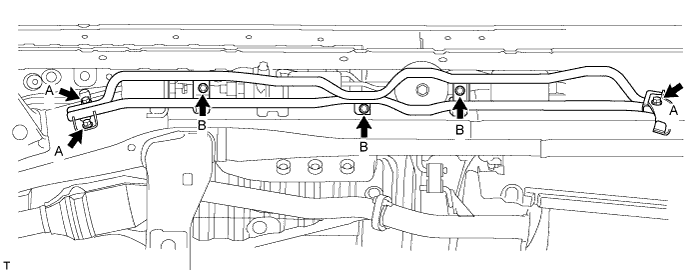
INSTALL HEIGHT CONTROL PROTECTOR PIPE
-
Install the protector pipe with the 6 bolts.
- Torque:
- for bolt A
- 31 N*m { 316 kgf*cm, 23 ft.*lbf }
- for bolt B
- 16 N*m { 163 kgf*cm, 12 ft.*lbf }
-
-
INSTALL FRONT FENDER MUDGUARD LH
-
Install the mudguard with the clip.
-
Using a T30 "TORX" socket, install the 4 screws.
-
-
INSTALL ENGINE ROOM SIDE COVER LH
-
Install the engine room side cover LH with the 7 clips.
-