TAIL GATE DISASSEMBLY

-
REMOVE ENGINE ROOM SIDE COVER LH
-
Remove the 7 clips and engine room side cover LH.
-
-
DISCONNECT CABLE FROM NEGATIVE BATTERY TERMINAL
Note
-
w/ Navigation System:
After the engine switch is turned off, the HDD navigation system requires approximately 6 minutes to record various types of memory and settings. As a result, after turning the engine switch off, wait 6 minutes or more before disconnecting the cable from the negative (-) battery terminal.
-
When disconnecting the cable, some systems need to be initialized after the cable is reconnected Click here.
-
-
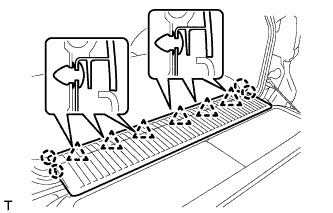
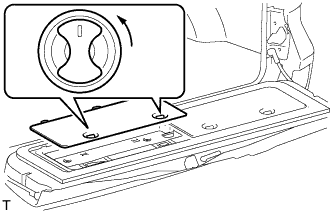
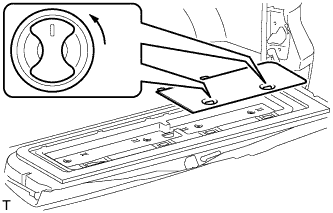
REMOVE REAR FLOOR MAT REAR SUPPORT PLATE
-
Detach the 6 clips and 4 claws, and remove the support plate.
-
-
REMOVE BACK DOOR TRIM COVER LH
-
Remove the back door trim cover LH as shown in the illustration.
-
-
REMOVE BACK DOOR TRIM COVER RH
-
Remove the back door trim cover RH as shown in the illustration.
-
-
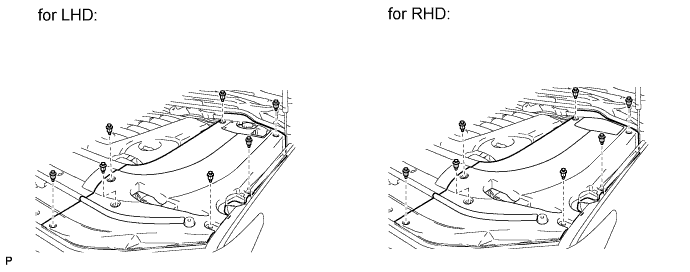
REMOVE BACK DOOR TRIM PANEL ASSEMBLY
-
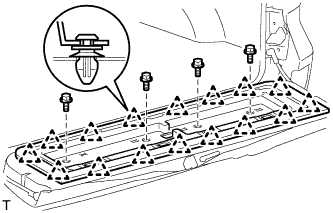
Remove the 4 bolts.
-
Detach the 16 clips and remove the back door trim panel.
-
-
REMOVE REAR BUMPER COVER
-
for Standard:
-
w/ Towing Hitch:
-
w/ Pintle Hook:
-
-
REMOVE SPARE TIRE
-
REMOVE LOWER BACK DOOR TORSION BAR ASSEMBLY
-
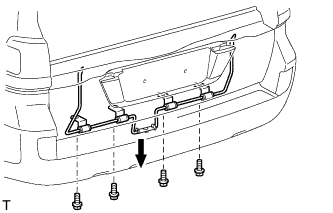
Remove the 4 bolts and lower back door torsion bar.
-
-
REMOVE BACK DOOR TORSION BAR GUIDE
-
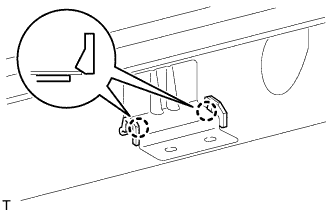
Detach the 2 claws and remove the back door torsion bar guide.
-
-
REMOVE BACK DOOR INSIDE HANDLE ASSEMBLY
-
Remove the screw and back door inside handle.
-
-
REMOVE BACK DOOR GARNISH
-

Detach the 4 clips and remove the back door garnish.
-
-
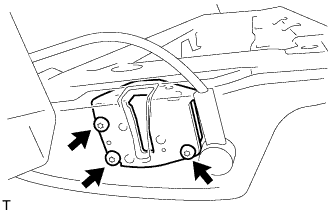
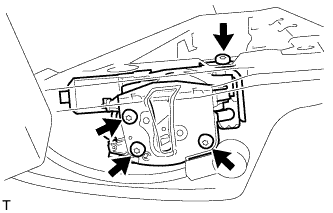
REMOVE LOWER TAIL GATE LOCK ASSEMBLY RH
-
w/o Power Back Door:
-
Using a T30 "TORX" wrench, remove the 3 screws and lower tail gate lock.
-
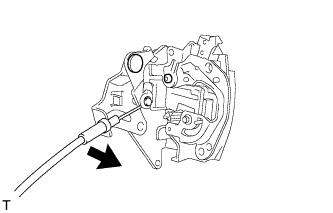
Disconnect the cable from the lower tail gate lock.
-
-
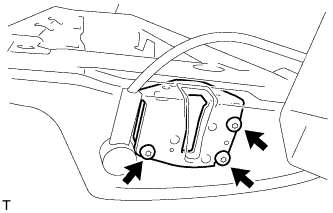
w/ Power Back Door:
-
Disconnect the connector.
-
Using a T30 "TORX" wrench, remove the 4 screws and lower tail gate lock.
-
-
-
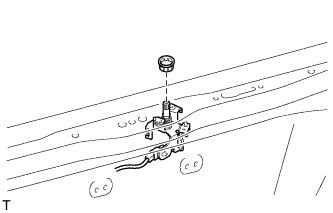
REMOVE BACK DOOR REMOTE CONTROL ASSEMBLY
-
w/o Power Back Door:
-
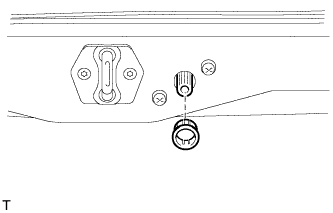
Remove the back door handle grommet.
-
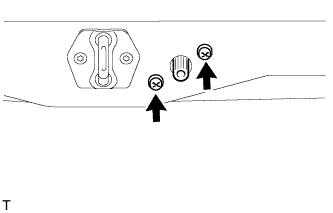
Remove the 2 screws.
-
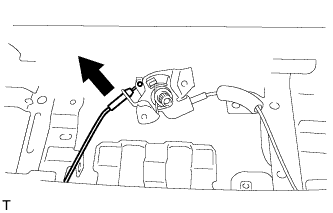
Disconnect the left side cable.
-
Remove the back door remote control.
-
-
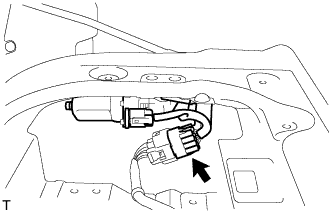
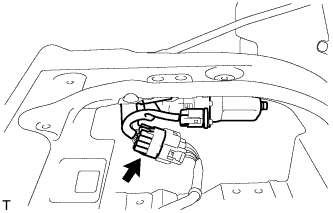
w/ Power Back Door:
-
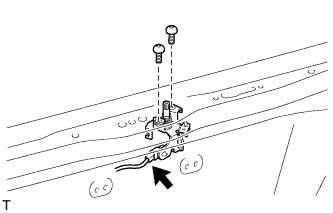
Disconnect the connector.
-
Remove the 2 screws and back door remote control.
-
Remove the back door handle grommet.
-
-
-
REMOVE LOWER TAIL GATE LOCK ASSEMBLY LH
-
w/o Power Back Door:
-
Using a T30 "TORX" wrench, remove the 3 screws and lower tail gate lock.
-
-
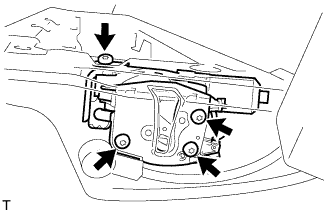
w/ Power Back Door:
-
Disconnect the connector.
-
Using a T30 "TORX" wrench, remove the 4 screws and lower tail gate lock.
-
-
-
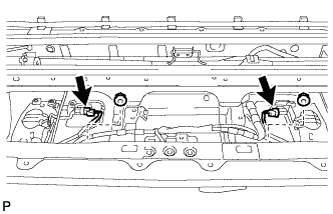
REMOVE NO. 2 BACK DOOR GARNISH SUB-ASSEMBLY OUTSIDE
-
Remove the 2 nuts and disconnect the 2 connectors.
-
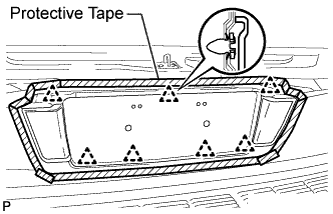
Put protective tape around the garnish.
-
Detach the 7 clips and remove the garnish.
Tech Tips
Detach the clips from the backside of the garnish.
-
-
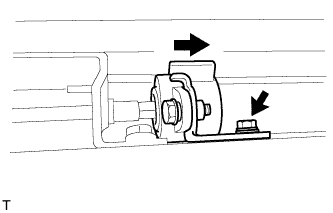
REMOVE TAIL GATE STAY SUB-ASSEMBLY LH
-
Using a T40 "TORX" socket, remove the 2 screws and tail gate stay.
-
-
REMOVE TAIL GATE STAY SUB-ASSEMBLY RH
Tech Tips
Use the same procedures described for the LH side.
-
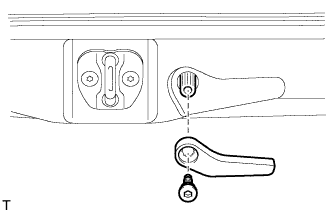
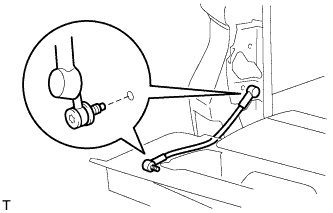
REMOVE BACK DOOR DAMPER ASSEMBLY
-
Remove the bolt and back door damper.
-