OIL PRESSURE SENSOR INSTALLATION

-
INSTALL OIL PRESSURE SENDER GAUGE ASSEMBLY
-
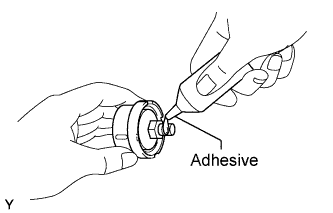
Apply adhesive to 2 or 3 threads of the oil pressure sender gauge.
Adhesive Toyota Genuine Adhesive 1344, Three Bond 1344 or equivalent Note
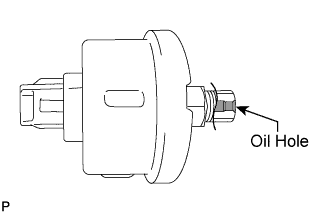
Do not allow adhesive to contact the oil hole.
-
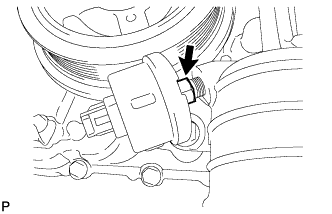
Install the oil pressure sender gauge.
- Torque:
- 15 N*m { 153 kgf*cm, 11 ft.*lbf }
Note
Do not start the engine within 1 hour after installation.
-
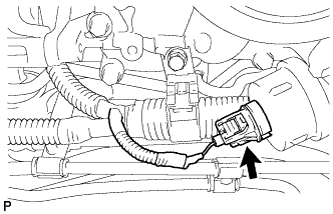
Connect the sender gauge connector.
-
-
ADD ENGINE OIL
-
Add fresh oil and install the oil filler cap.
Standard Oil Grade Oil Grade Oil Viscosity (SAE) API grade SL "Energy-Conserving", SM "Energy-Conserving", SN "Resource-Conserving" or ILSAC multigrade engine oil
API grade SL, SM or SN multigrade engine oil
0W-20
5W-20
5W-30
10W-30
15W-40
20W-50
Standard Oil Capacity Item Specified Condition Drain and refill with oil filter change 7.5 liters (7.9 US qts, 6.6 Imp. qts) Drain and refill without oil filter change 7.1 liters (7.5 US qts, 6.2 Imp. qts) Dry fill 9.3 liters (9.8 US qts, 8.2 Imp. qts)
-
-
INSPECT FOR OIL LEAK
-
Start the engine. Make sure that there are no oil leaks from the area that was worked on.
-
-
INSPECT ENGINE OIL LEVEL
-
Warm up the engine. Then stop the engine and wait for 5 minutes.
-
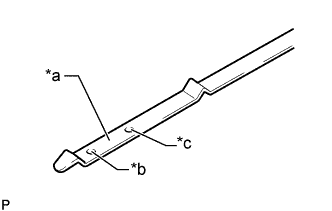
Text in Illustration *a Measuring Surface *b Low Level Mark *c Full Level Mark Check that the engine oil level is between the dipstick low level mark and full level mark.
If the level is low, check for leakage and add oil up to the full level mark.
Note
Do not fill engine oil above the full level mark.
Tech Tips
A certain amount of engine oil will be consumed while driving. In the following situations, oil consumption may increase, and engine oil may need to be refilled in between oil maintenance intervals.
-
When the engine is new, for example directly after purchasing the vehicle or after replacing the engine.
-
If low quality oil or oil of an inappropriate viscosity is used.
-
When driving at high engine speed or with a heavy load, (when towing, or), when driving while accelerating or decelerating frequently.
-
When leaving the idling for a long time, or when driving frequently through heavy traffic.
When judging the amount of oil consumption, keep in mind that the oil may have become diluted, making it difficult to judge the true level accurately.
-
-
-
INSTALL NO. 1 ENGINE UNDER COVER SUB-ASSEMBLY
-
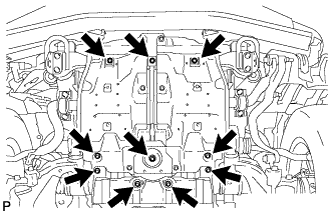
Install the No. 1 engine under cover with the 10 bolts.
- Torque:
- 29 N*m { 296 kgf*cm, 21 ft.*lbf }
-
-
INSTALL FRONT FENDER SPLASH SHIELD SUB-ASSEMBLY LH
-
Push in the clip to install the front fender splash shield sub-assembly LH.
-
Install the 3 bolts and 2 screws.
-
-
INSTALL FRONT FENDER SPLASH SHIELD SUB-ASSEMBLY RH
Tech Tips
Use the same procedure described for the LH side.