REAR AXLE SHAFT REMOVAL

Tech Tips
-
Use the same procedures for the LH side and RH side.
-
The procedures listed below are for the LH side.
-
DISCONNECT CABLE FROM NEGATIVE BATTERY TERMINAL
Note
When disconnecting the cable, some systems need to be initialized after the cable is reconnected Click here.
Note
w/ Navigation System:After the engine switch is turned off, the HDD navigation system requires approximately 6 minutes to record various types of memory and settings. As a result, after turning the engine switch off, wait 6 minutes or more before disconnecting the cable from the negative (-) battery terminal.
-
REMOVE REAR WHEEL LH
-
DRAIN BRAKE FLUID
Note
Wash off brake fluid immediately if it comes in contact with any painted surface.
-
DISCONNECT REAR BRAKE FLEXIBLE HOSE
-
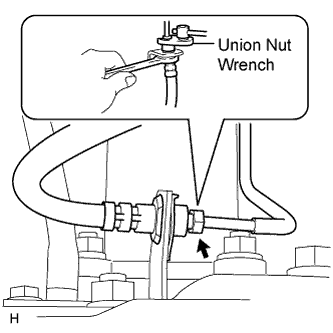
Disconnect the brake tube from the flexible hose with union nut wrench while holding the flexible hose with a wrench.
Note
-
Do not bend or damage the brake tube.
-
Do not allow any foreign matter such as dirt and dust to enter the brake tube from the connecting point.
-
-
Remove the clip.
-
-
DISCONNECT REAR DISC BRAKE CYLINDER ASSEMBLY LH
-
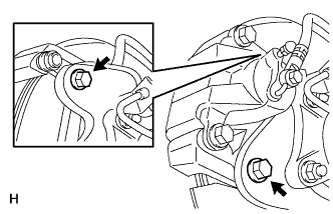
Remove the 2 bolts and disconnect the rear disc brake cylinder.
Note
-
Do not twist or bend the flexible hose.
-
Do not disconnect the flexible hose from the disc brake cylinder.
-
-
-
REMOVE REAR DISC LH
-
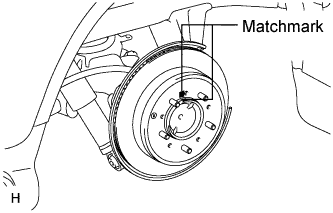
Put matchmarks on the rear disc and axle hub if planning to reuse the disc.
-

Turn the shoe adjuster as shown in the illustration until the disc turns freely, and then remove the disc.
-
-
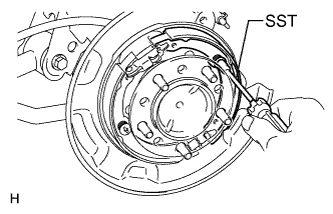
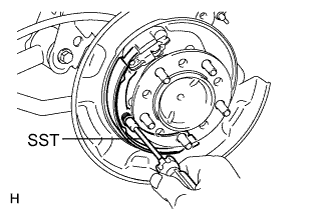
REMOVE PARKING BRAKE SHOE RETURN TENSION SPRING LH
-
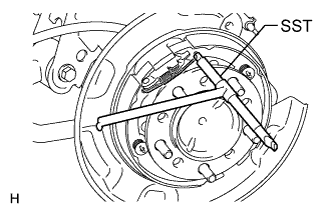
Using SST, remove the return spring.
- SST
- 09703-30011
-
-
REMOVE NO. 1 PARKING BRAKE SHOE ASSEMBLY LH
-
Using SST, remove the shoe hold down spring cup, compression spring and shoe hold down spring pin.
- SST
- 09718-00011
-
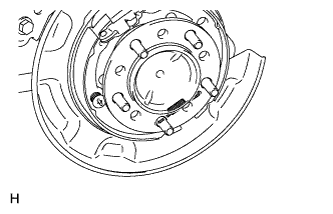
Disconnect the tension spring from the No. 1 parking brake shoe.
-
Remove the No. 1 parking brake shoe and shoe adjuster screw set.
-
-
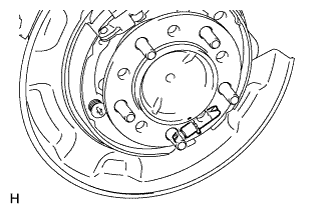
REMOVE NO. 2 PARKING BRAKE SHOE ASSEMBLY LH
-
Using SST, remove the shoe hold down spring cup, compression spring and shoe hold down spring pin.
- SST
- 09718-00011
-
Remove the No. 2 parking brake shoe.
-
-
REMOVE PARKING BRAKE SHOE LEVER SUB-ASSEMBLY LH
-

Disconnect the No. 3 parking brake cable from the parking brake shoe lever.
-
Remove the parking brake shoe lever.
-
-
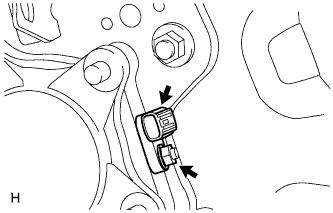
DISCONNECT NO. 3 PARKING BRAKE CABLE ASSEMBLY
-
Remove the bolt and No. 3 parking brake cable.
-
-
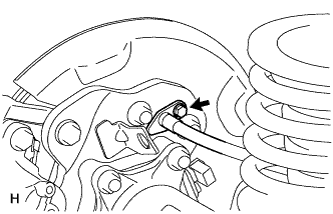
DISCONNECT REAR SPEED SENSOR LH
-
Remove the nut and speed sensor.
Note
Pull out the sensor while trying as much as possible not to rotate it.
-
-
REMOVE REAR AXLE SHAFT LH
-
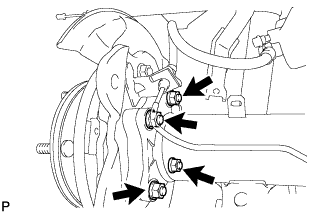
Remove the 4 nuts and rear axle shaft together with the parking brake plate.
-
Remove the O-ring.
-
-
REMOVE REAR AXLE SHAFT OIL SEAL LH
-
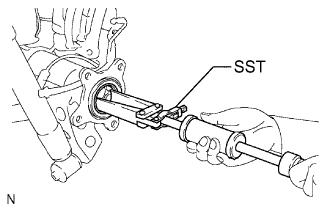
Using SST, tap out the oil seal.
- SST
- 09308-00010
Note
Be careful not to damage the axle housing hole.
-