SHIFT LEVER DISASSEMBLY

-
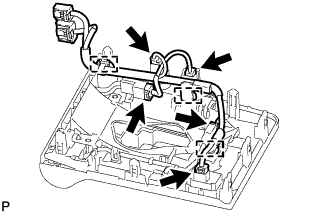
REMOVE SWITCH WIRE
-
Disconnect the 5 connectors, detach the 3 clamps and remove the wire from the position indicator housing.
-
-
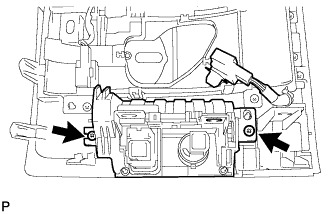
REMOVE CONSOLE BOX POCKET
-
Detach the integration control & panel connector.
-
Remove the 2 screws and console box pocket from the position indicator housing.
-
-
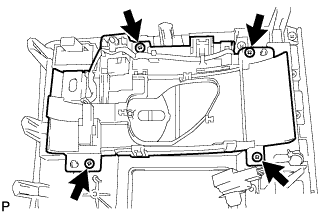
REMOVE LOWER POSITION INDICATOR HOUSING
-
Remove the 4 screws and lower position indicator housing from the position indicator housing.
-
-
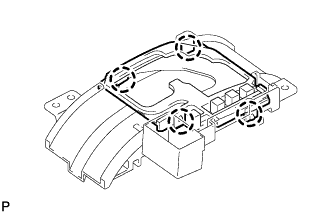
REMOVE POSITION INDICATOR LENS
-
Detach the 4 claws and remove the position indicator lens from the lower position indicator housing.
-
-
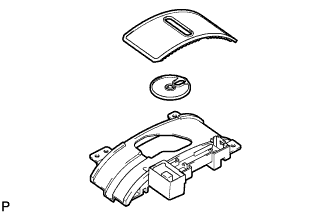
REMOVE POSITION INDICATOR SLIDE COVER
-
Remove the position indicator slide cover together with the No. 2 position indicator slide cover.
-
Remove the No. 2 position indicator slide cover from the position indicator slide cover.
-
-
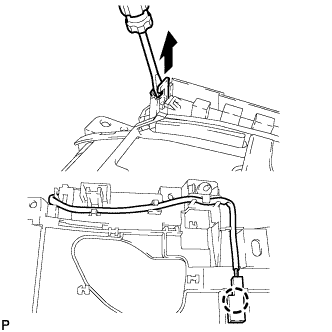
REMOVE INDICATOR LIGHT WIRE SUB-ASSEMBLY
-
Detach the indicator light wire connector.
-
Using a small screwdriver, detach the claw and pull out the indicator light wire from the lower position indicator housing.
-
-
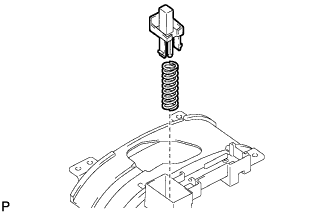
REMOVE SHIFT LOCK RELEASE BUTTON
-
Detach the 2 claws and remove the shift lock release button and spring from the lower position indicator housing.
-
-
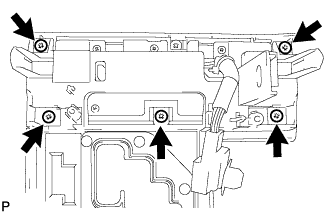
REMOVE INTEGRATION CONTROL & PANEL SUB-ASSEMBLY
-
Remove the 5 screws, and then remove the integration control & panel from the position indicator housing.
-
-
REMOVE NO. 1 PATTERN SELECT SWITCH ASSEMBLY
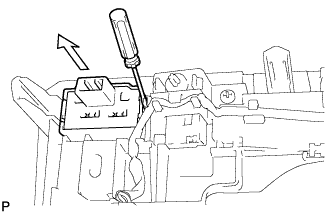
-
Using a small screwdriver, detach the 2 claws and remove the pattern select switch from the position indicator housing.
-
-
REMOVE SHIFT LOCK CONTROL ECU SUB-ASSEMBLY
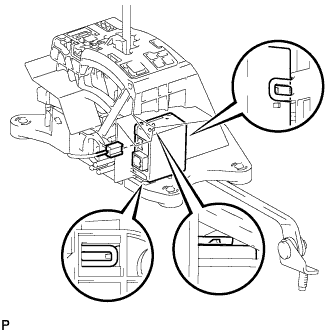
-
Disconnect the shift lock solenoid connector.
-
Detach the 3 claws and remove the ECU from the transmission floor shift.
-