НАСОС СИСТЕМЫ ОХЛАЖДЕНИЯ СНЯТИЕ
-
DISCONNECT CABLE FROM NEGATIVE BATTERY TERMINAL
Note
When disconnecting the cable, some systems need to be initialized after the cable is reconnected Click here.
-
DRAIN ENGINE COOLANT
CAUTION:
Не снимайте пробку расширительного бачка радиатора, пока двигатель и радиатор не остынут. Выброс горячей охлаждающей жидкости и пара под давлением может стать причиной серьезных ожогов.
-
Ослабьте пробку сливного крана радиатора.
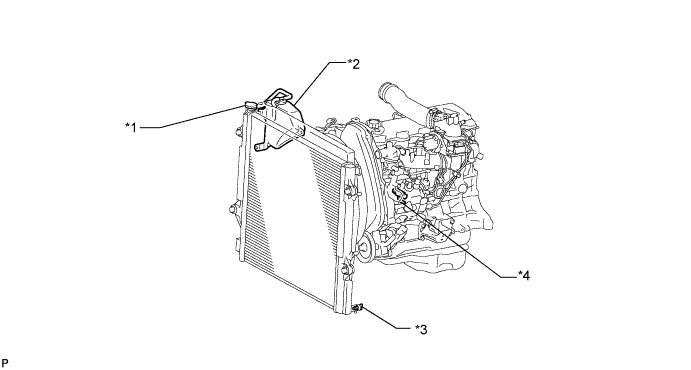
Обозначения на рисунке *1 Пробка радиатора *2 Бачок радиатора *3 Пробка сливного крана радиатора *4 Пробка сливного крана блока цилиндров Tech Tips
Слейте охлаждающую жидкость в контейнер и утилизируйте ее в соответствии с местными требованиями.
-
Слейте охлаждающую жидкость, сняв крышку радиатора.
-
Ослабьте пробку сливного крана блока цилиндров.
-
Ослабьте пробку сливного крана блока цилиндров и слейте охлаждающую жидкость из двигателя.
Note
Если охлаждающая жидкость не сливается через пробку сливного крана радиатора, пробки сливных кранов блока цилиндров и расширительный бачок радиатора, возможны засорение радиатора и утечка охлаждающей жидкости через уплотнение насоса системы охлаждения.
-
-
REMOVE UPPER RADIATOR SUPPORT SEAL
-
Освободите 13 фиксаторов и снимите верхнее уплотнение кронштейна радиатора.
-
-
REMOVE FRONT BUMPER COVER LOWER
-
Remove the clip, 5 bolts and front bumper cover lower.
-
-
REMOVE NO. 1 ENGINE UNDER COVER SUB-ASSEMBLY
-
Remove the 4 bolts.
-
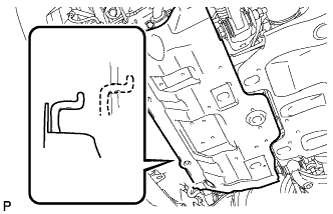
Unhook the engine under cover from the vehicle body as shown in the illustration.
-
-
REMOVE REAR ENGINE UNDER COVER ASSEMBLY
-
Remove the 4 bolts and rear engine under cover.
-
-
REMOVE RESONATOR WITH AIR CLEANER CAP
-
Disconnect the sensor connector.
-
Detach the wire harness clamp.
-
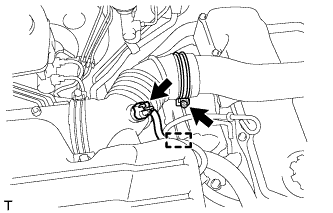
Loosen the hose clamp and remove the resonator with air cleaner cap.
-
Detach the 4 hook clamps, and then remove the air cleaner cap and resonator with air cleaner cap.
-
-
REMOVE NO. 1 RADIATOR HOSE
-

Detach the clamp and remove the No. 1 radiator hose.
-
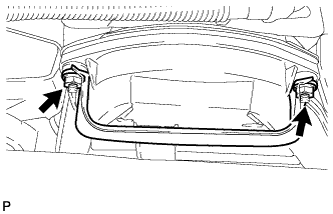
Remove the 2 nuts and hose clamp.
-
-
REMOVE NO. 2 RADIATOR HOSE
-
REMOVE RADIATOR RESERVOIR
-
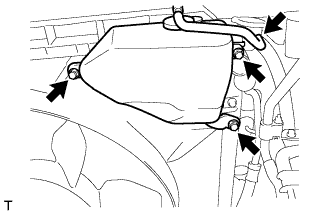
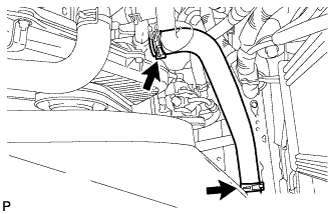
Disconnect the reservoir hose from the upper side of the radiator tank.
-
Remove the 3 bolts and radiator reservoir.
-
-
REMOVE FAN SHROUD
-
Loosen the 4 nuts holding the fluid coupling fan.
-
Remove the vane pump V belt and the fan and generator V belt Click here.
-
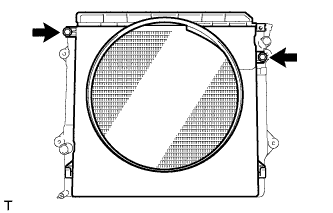
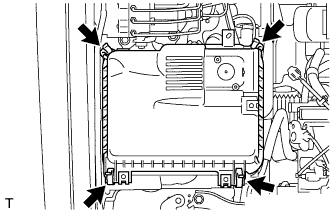
Remove the 2 bolts holding the fan shroud.
-
Remove the 4 nuts of the fluid coupling fan, and then remove the shroud together with the coupling fan.
Note
Be careful not to damage the radiator core.
-
Remove the fan pulley from the water pump.
-
-
DISCONNECT COMPRESSOR AND MAGNETIC CLUTCH
-
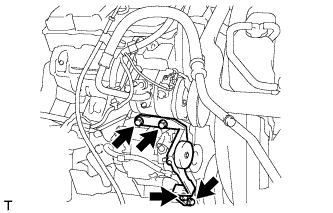
Remove the 4 bolts and idle pulley bracket.
-
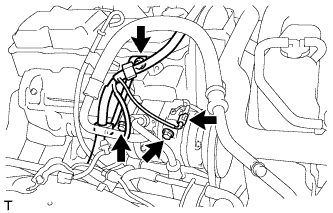
Disconnect the connector.
-
Remove the 3 bolts and disconnect the cooler compressor.
Tech Tips
It is not necessary to completely remove the cooler compressor. With the hoses connected to the compressor, hang the compressor on the vehicle body with a rope.
-
-
REMOVE NO. 2 IDLE PULLEY ASSEMBLY
-
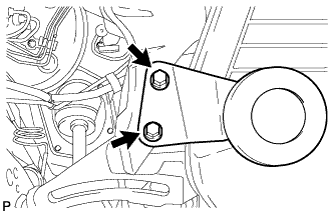
Remove the 2 bolts and Idle pulley bracket.
-
-
REMOVE TIMING BELT
-
Remove the timing belt Click here.
-
-
REMOVE WATER PUMP ASSEMBLY
-
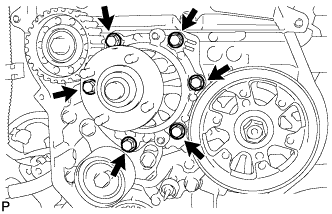
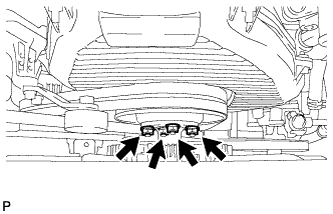
Remove the 6 bolts and tension spring bracket.
-
Remove the water pump and gasket.
-