RADIATOR GRILLE (for ALPHARD) REASSEMBLY

-
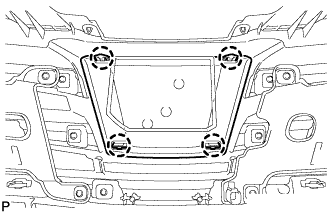
INSTALL LOWER NO. 2 RADIATOR GRILLE MOULDING
-
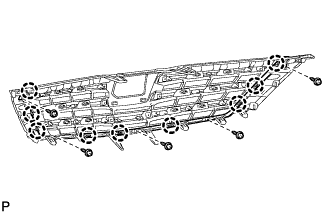
Engage the 9 claws.
-
Install the lower No. 2 radiator grille moulding with the 5 screws.
-
-
INSTALL LOWER NO. 1 RADIATOR GRILLE MOULDING
-
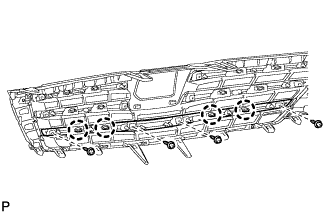
Engage the 4 claws.
-
Install the lower No. 1 radiator grille moulding with the 4 screws.
-
-
INSTALL UPPER RADIATOR GRILLE MOULDING LH
-
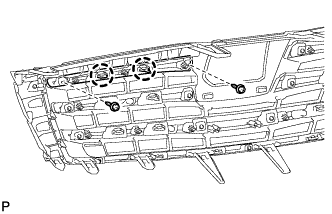
Engage the 2 claws.
-
Install the upper radiator grille moulding LH with the 2 screws.
-
-
INSTALL UPPER RADIATOR GRILLE MOULDING RH
Tech Tips
Use the same procedure as for the LH side.
-
INSTALL CENTER RADIATOR GRILLE MOULDING LH
Tech Tips
Use the same procedure as for the radiator grille upper moulding LH.
-
INSTALL CENTER RADIATOR GRILLE MOULDING RH
Tech Tips
Use the same procedure as for the LH side.
-
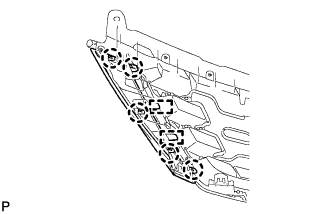
INSTALL RADIATOR GRILLE FINISH PLATE LH
-

Install the radiator grille finish plate LH with the 7 screws.
-
-
INSTALL RADIATOR GRILLE FINISH PLATE RH
-
Install the radiator grille finish plate RH with the 7 screws.
-
-
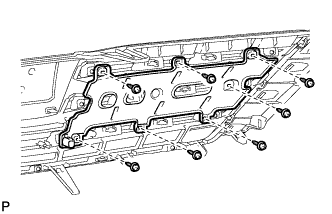
INSTALL RADIATOR SEAL SUB-ASSEMBLY LH
-
Engage the 2 clips to install the radiator seal sub-assembly LH.
-
-
INSTALL RADIATOR SEAL SUB-ASSEMBLY RH
Tech Tips
Use the same procedure as for the LH side.
-
INSTALL UPPER RADIATOR SEAL (for LH Side)
-
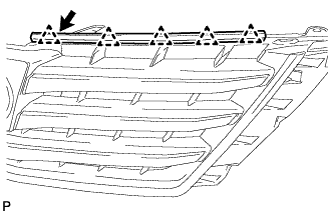
Engage the 5 clips to install the upper radiator seal.
Tech Tips
Align the alignment mark (white) on the seal with the position indicated by the arrow in the illustration.
-
-
INSTALL UPPER RADIATOR SEAL (for RH Side)
-
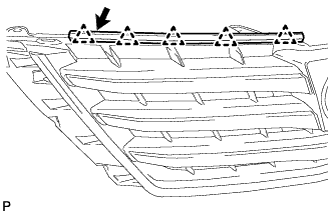
Engage the 5 clips to install the upper radiator seal.
Tech Tips
Align the alignment mark (white) on the seal with the position indicated by the arrow in the illustration.
-
-
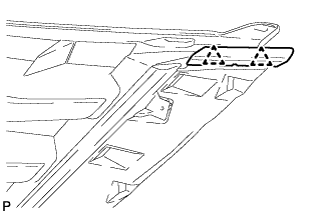
INSTALL HEADLIGHT COVER LH
-
Engage the 5 claws and 2 guides to install the headlight cover LH.
-
-
INSTALL HEADLIGHT COVER RH
Tech Tips
Use the same procedure as for the LH side.
-
INSTALL RADIATOR GRILLE (OR FRONT PANEL) EMBLEM
-
Engage the 4 claws to install the radiator grille (or front panel) emblem.
-