HEADLIGHT LEVELING ECU INSTALLATION

-
INSTALL HEADLIGHT LEVELING ECU ASSEMBLY
-
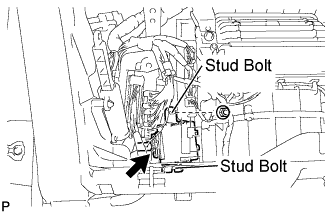
Connect the connector.
-
Engage the 2 stud bolts.
-
Install the headlight leveling ECU assembly with the nut.
-
-
INSTALL PASSENGER SIDE JUNCTION BLOCK
-
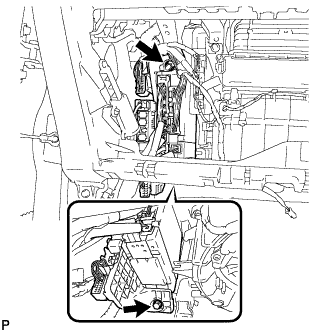
Install the passenger side junction block with the nut and bolt.
-
-
INSTALL GLOVE COMPARTMENT DOOR ASSEMBLY
-
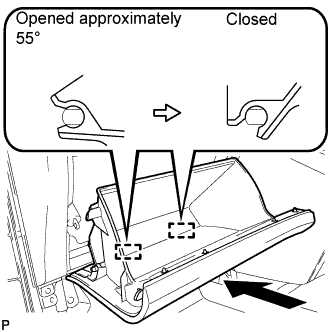
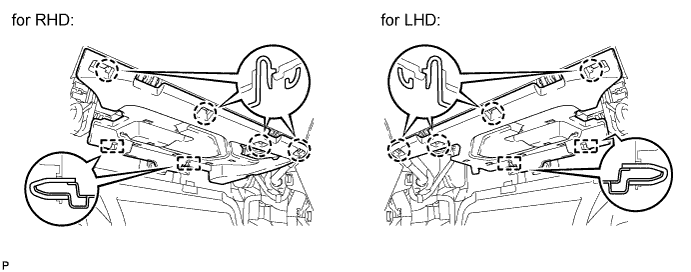
With the glove compartment door assembly opened approximately 55° from its closed position, engage the 2 hinges horizontally.
Note
Engaging the hinges from the top will deform the hinges. Be sure to install the glove compartment door assembly horizontally.
-
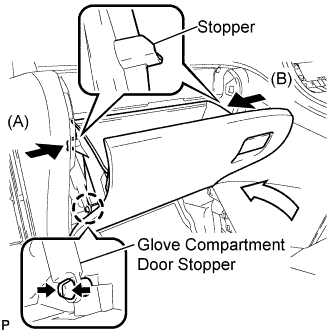
Slightly bend stoppers (A) and (B) in the directions indicated by the arrows in the illustration and engage the stoppers to install the glove compartment door assembly.
-
Engage the claw and connect the glove compartment door stopper.
-
-
INSTALL NO. 2 INSTRUMENT PANEL UNDER COVER SUB-ASSEMBLY
-
Connect the connector.
-
Engage the 2 guides.
-
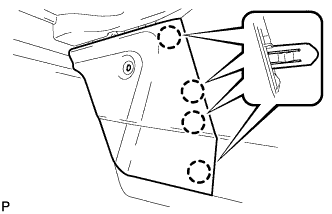
Engage the 4 claws to install the No. 2 instrument panel under cover sub-assembly.
Note
Make sure that the claws are fully engaged.
-
-
INSTALL CENTER FLOOR CARPET COVER LH (for RHD)
-
Engage the 4 claws.
-

Install the center floor carpet cover LH with the clip.
-
-
INSTALL CENTER FLOOR CARPET COVER RH (for LHD)
-
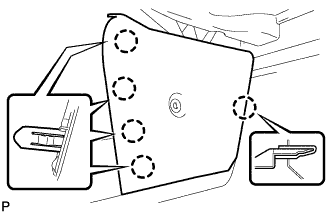
Engage the 5 claws.
-
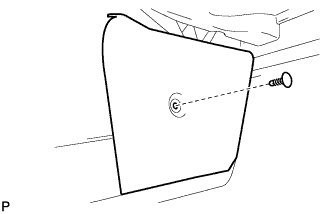
Install the center floor carpet cover RH with the clip.
-
-
HEIGHT CONTROL SENSOR SIGNAL INITIALIZATION
-
ADJUST HEADLIGHT AIMING