HEADLIGHT LEVELING ECU REMOVAL

-
REMOVE CENTER FLOOR CARPET COVER LH (for RHD)
-

Using a clip remover, remove the clip.
-
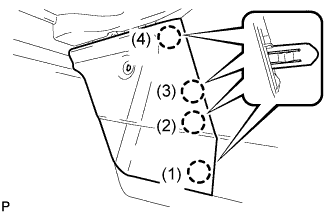
Disengage the 4 claws and remove the center floor carpet cover LH in the order shown in the illustration.
Tech Tips
Remove the center floor carpet cover LH while pushing on the instrument cluster finish panel.
-
-
REMOVE CENTER FLOOR CARPET COVER RH (for LHD)
-
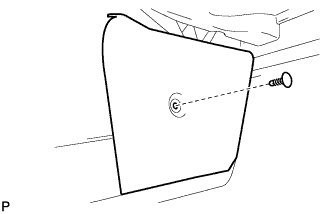
Using a clip remover, remove the clip.
-
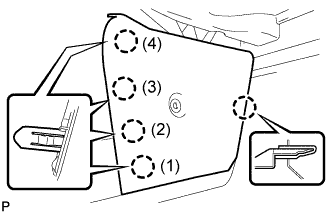
Disengage the 5 claws and remove the center floor carpet cover RH in the order shown in the illustration.
Tech Tips
Remove the center floor carpet cover RH while pushing on the instrument cluster finish panel.
-
-
REMOVE NO. 2 INSTRUMENT PANEL UNDER COVER SUB-ASSEMBLY
-
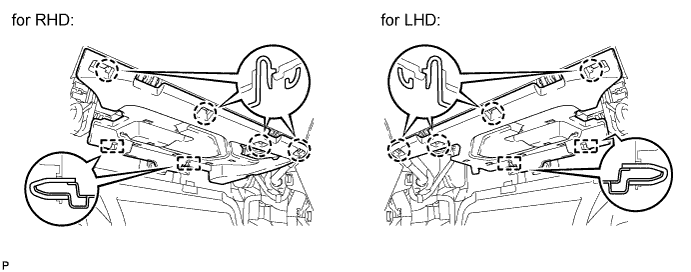
Disengage the 4 claws and 2 guides.
-
Disconnect the connector and remove the No. 2 instrument panel under cover sub-assembly.
-
-
REMOVE GLOVE COMPARTMENT DOOR ASSEMBLY
-
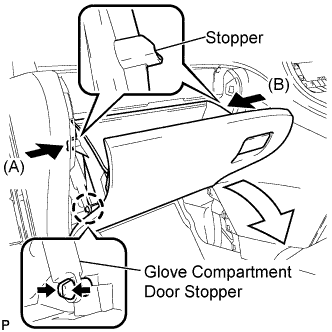
Disengage the claw and release the glove compartment door stopper.
-
Slightly bend stoppers (A) and (B) in the directions indicated by the arrows in the illustration and pull the glove compartment door assembly until the stoppers are released.
-

Open the glove compartment door assembly to approximately 55° from its closed position. Pull it horizontally toward the rear of the vehicle to disengage the 2 hinges and remove the glove compartment door assembly.
Note
Pulling the glove compartment door assembly upward to remove it causes the hinges to deform. Be sure to pull out the glove compartment door assembly horizontally.
-
-
SEPARATE PASSENGER SIDE JUNCTION BLOCK
-
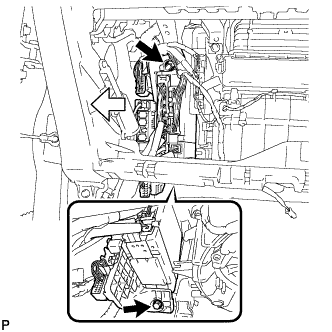
Remove the nut and bolt.
-
Move the passenger side junction block in the direction indicated in the illustration.
Note
Do not apply too much force to the wire harness when moving the junction block.
-
-
REMOVE HEADLIGHT LEVELING ECU ASSEMBLY
-
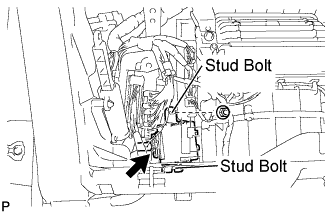
Remove the nut.
-
Disengage the 2 stud bolts.
-
Disconnect the connector and remove the headlight leveling ECU assembly.
-