STOP LIGHT SWITCH REMOVAL

-
REMOVE NO. 1 INSTRUMENT PANEL UNDER COVER SUB-ASSEMBLY (for RHD)
-
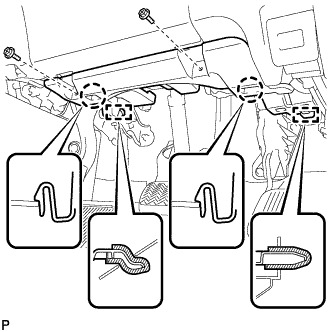
Remove the 2 screws <B>.
-
Disengage the 2 claws and 2 guides.
-
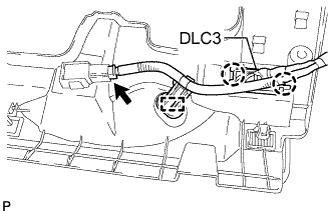
Disengage the 2 claws and disconnect the DLC3.
-
Disengage the clamp.
-
Disconnect each connector and remove the No. 1 instrument panel under cover sub-assembly.
-
-
REMOVE NO. 1 INSTRUMENT PANEL UNDER COVER SUB-ASSEMBLY (for LHD)
-
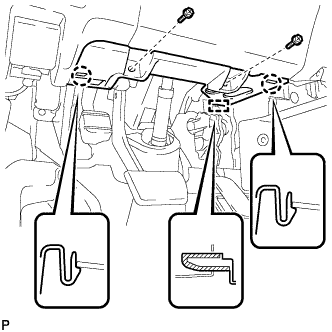
Remove the 2 screws <B>.
-
Disengage the 2 claws and guide.
-
Disengage the clamp.
-
Disconnect each connector and remove the No. 1 instrument panel under cover sub-assembly.
-
-
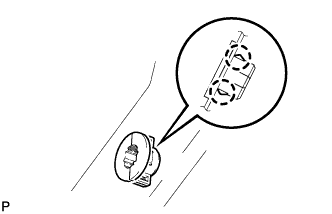
REMOVE STOP LIGHT SWITCH ASSEMBLY
-
Disconnect the connector.
-
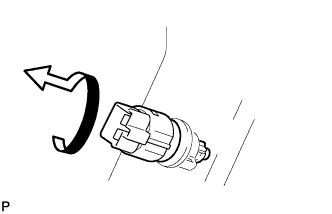
Turn the stop light switch assembly counterclockwise and remove the stop light switch assembly.
-
-
REMOVE STOP LIGHT SWITCH MOUNTING ADJUSTER
-
Disengage the 2 claws and remove the stop light switch mounting adjuster.
-