BACK DOOR REASSEMBLY

-
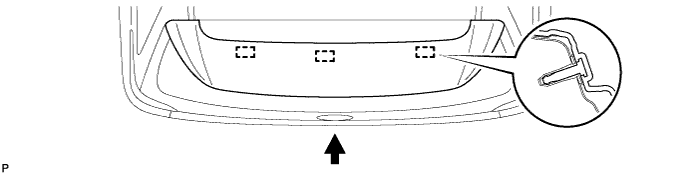
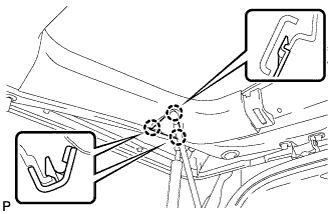
INSTALL REAR SPOILER ASSEMBLY
-
Engage the 3 pins to install the rear spoiler assembly.
-
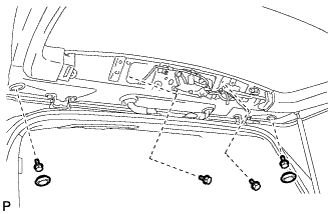
Install the 4 bolts.
-
Install the 2 hole plugs.
-
Connect the connector and washer hose.
-
-
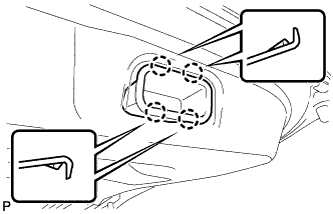
INSTALL LICENSE PLATE LIGHT ASSEMBLY
-
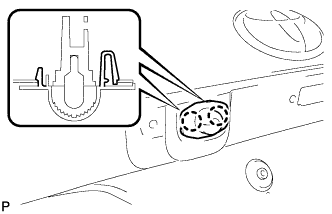
Engage the 2 claws to install the license plate light assembly.
-
Connect the connector.
-
-
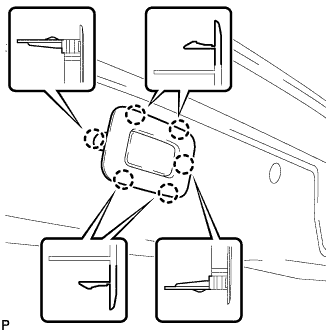
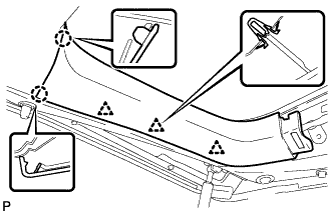
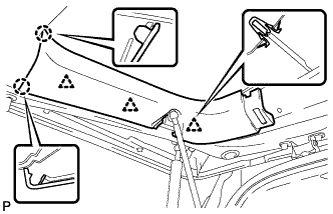
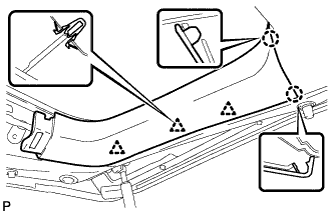
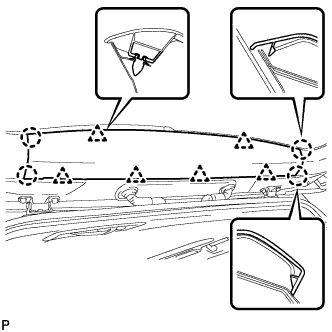
INSTALL BACK DOOR OUTSIDE GARNISH SUB-ASSEMBLY
-
Install 9 new clips (luggage compartment door moulding clip) and 2 new clips (back door outside garnish clip) to the back door outside garnish sub-assembly.
-
Engage the 11 clips to install the back door outside garnish sub-assembly.
-
Install the 2 nuts and connect the connector.
Tech Tips
Use the same procedure for the RH side and LH side.
-
-
INSTALL REAR LIGHT ASSEMBLY LH (for ALPHARD)
-
Install the clip to the rear light assembly.
-
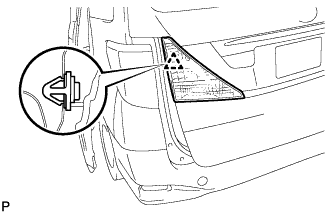
Engage the clip to install the rear light assembly.
-
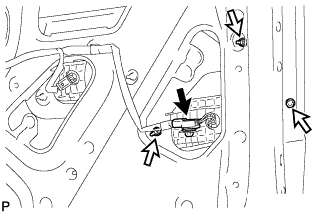
Install the 3 nuts.
- Torque:
- 1.7 N*m { 17 kgf*cm, 15 in.*lbf }
-
Connect the connector.
-
-
INSTALL REAR LIGHT ASSEMBLY RH (for ALPHARD)
Tech Tips
Use the same procedure for the RH side and LH side.
-
INSTALL REAR LIGHT ASSEMBLY WITH COVER LH (for VELLFIRE)
-
Install the clip to the rear light assembly.
-
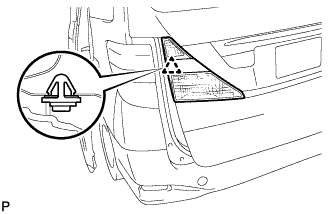
Engage the clip and install the rear light assembly with cover.
-
Install the 3 nuts.
- Torque:
- 1.7 N*m { 17 kgf*cm, 15 in.*lbf }
-
Connect the connector.
-
-
INSTALL REAR LIGHT ASSEMBLY WITH COVER RH (for VELLFIRE)
Tech Tips
Use the same procedure for the RH side and LH side.
-
INSTALL REAR WIPER MOTOR ASSEMBLY
-
Install the rear wiper motor assembly with the 3 bolts.
- Torque:
- 5.5 N*m { 56 kgf*cm, 49 in.*lbf }
-
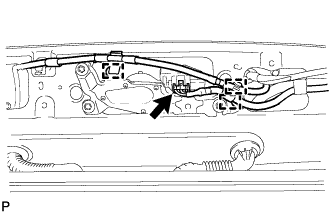
Connect the connector.
-
Engage the 3 clamps.
-
-
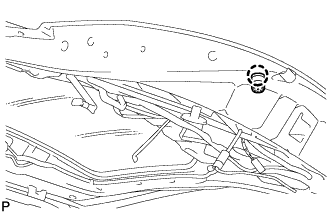
INSTALL REAR WIPER MOTOR GROMMET
-
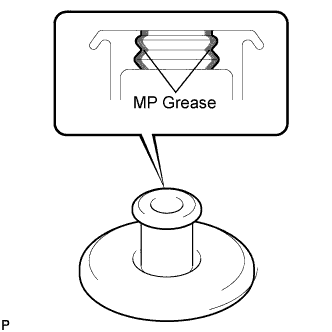
Apply MP grease to the entire surface of the wiper motor grommet lip.
Tech Tips
Make sure that the hole does not get clogged with grease and the grooves on the lip are filled with grease.
-
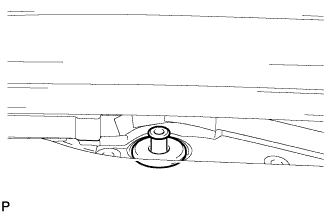
Install the wiper motor grommet.
-
-
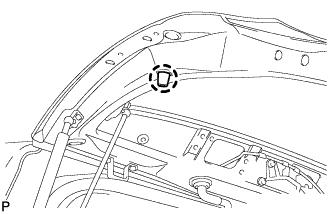
INSTALL NO. 1 REAR SPOILER COVER
-
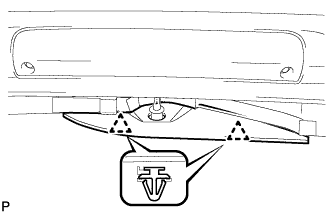
Engage the 2 clips to install the rear No. 1 spoiler cover.
-
-
INSTALL REAR WIPER ARM AND BLADE ASSEMBLY
-
Stop the wiper motor at the automatic stop position.
-
When reusing the rear wiper arm and blade assembly:
-
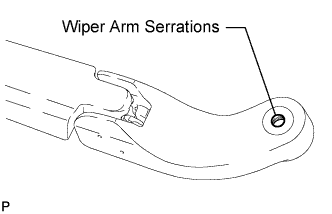
Clean the wiper arm serrations.
-
-
When reusing the rear wiper motor assembly:
-
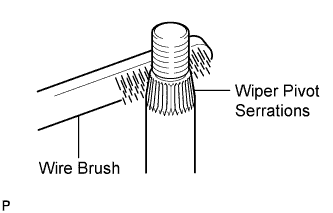
Clean the wiper pivot serrations with a wire brush.
-
-
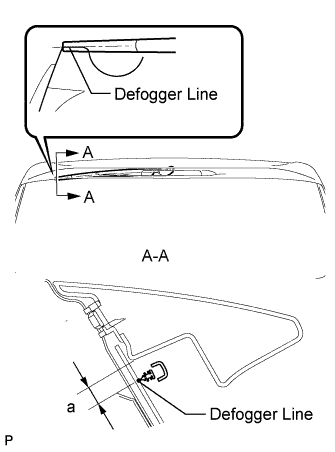
Install the rear wiper arm and blade assembly with the nut to the position shown in the illustration.
Standard Measurement Dimension Specified Condition a 16.0 mm (0.629 in.) - Torque:
- 8.5 N*m { 87 kgf*cm, 75 in.*lbf }
-
Operate the rear wiper while spraying washer fluid onto the back door glass. Make sure that the rear wiper functions properly and the wiper does not come into contact with the vehicle body.
-
-
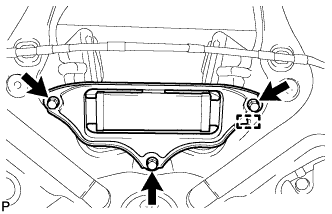
INSTALL TELEVISION CAMERA ASSEMBLY (w/ Parking Assist Monitor System)
-
Engage the 2 clamps and install the rear television camera assembly.
-
Install the 2 screws.
-
Connect the connector.
-
-
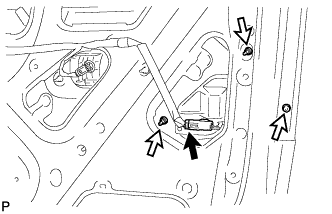
INSTALL BACK DOOR OPENER SWITCH ASSEMBLY
-
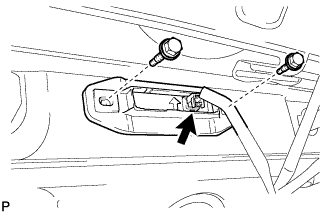
Install the back door opener switch with the 2 bolts.
-
Connect the connector.
-
-
INSTALL BACK DOOR PANEL CUSHION (for Lower Side)
-
Engage the claw and install the back door panel cushion.
Tech Tips
Use the same procedure for the RH side and LH side.
-
-
INSTALL BACK DOOR PANEL CUSHION (for Upper Side)
-
Engage the claw and install the back door panel cushion.
Tech Tips
Use the same procedure for the RH side and LH side.
-
-
INSTALL BACK DOOR WEIGHT
-
Engage the guide and install the back door weight.
-
Install the 3 bolts.
- Torque:
- 13 N*m { 133 kgf*cm, 10 ft.*lbf }
-
-
INSTALL POWER BACK DOOR TOUCH SENSOR ASSEMBLY LH (w/ Power Back Door)
-
Install the power back door touch sensor assembly with the 2 new power back door sensor clips.
-
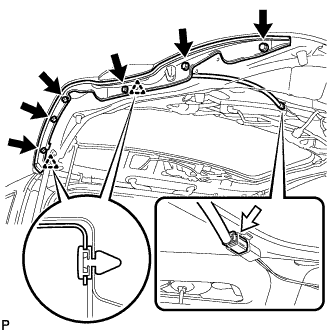
Install the 6 bolts.
-
Connect the connector.
-
-
INSTALL POWER BACK DOOR TOUCH SENSOR ASSEMBLY RH (w/ Power Back Door)
Tech Tips
Use the same procedure for the RH side and LH side.
-
INSTALL BACK DOOR SIDE MALE STOPPER LH
-

Install the back door side male stopper LH with the 2 bolts.
- Torque:
- 7.5 N*m { 77 kgf*cm, 66 in.*lbf }
-
-
INSTALL BACK DOOR SIDE MALE STOPPER RH
Tech Tips
Use the same procedure for the RH side and LH side.
-
CONNECT POWER BACK DOOR ROD (w/ Power Back Door)
-
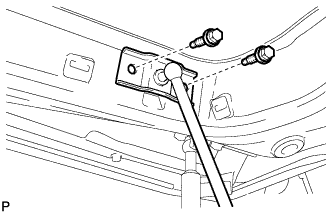
Install the power back door rod with the 2 bolts.
- Torque:
- 30 N*m { 306 kgf*cm, 22 ft.*lbf }
-
-
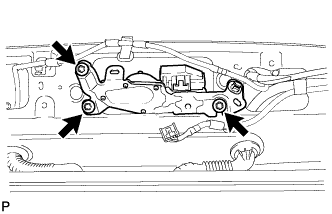
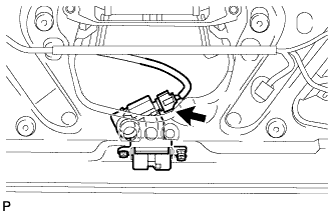
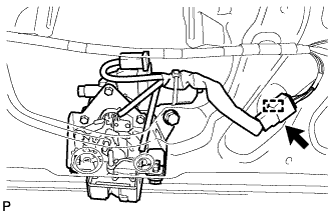
INSTALL POWER BACK DOOR CLOSER SWITCH ASSEMBLY (w/ Power Back Door)
-
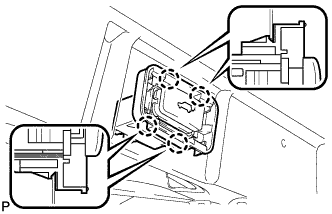
Engage the 4 claws and install the power back door closer switch assembly.
-
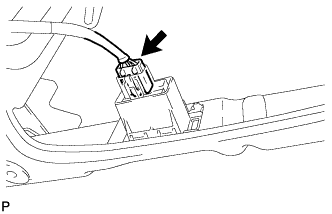
Connect the connector.
-
-
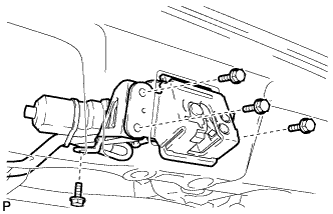
INSTALL BACK DOOR LOCK ASSEMBLY (w/o Easy Closer)
-
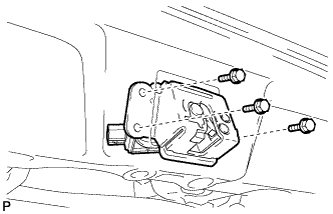
Install the back door lock assembly with the 3 bolts.
- Torque:
- 13 N*m { 133 kgf*cm, 10 ft.*lbf }
-
Connect the connector.
-
-
INSTALL BACK DOOR LOCK ASSEMBLY (w/ Easy Closer)
-
Install the back door lock assembly with the 4 bolts.
- Torque:
- 13 N*m { 133 kgf*cm, 10 ft.*lbf }
-
Connect the connector.
-
Engage the clamp.
-
-
INSTALL BACK DOOR TRIM BOARD ASSEMBLY
-
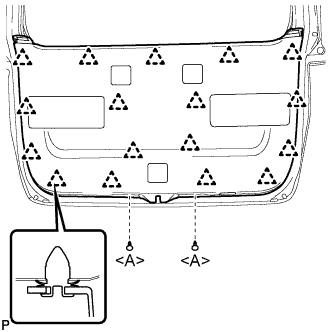
Engage the 17 clips and install the back door trim board assembly.
-
Install the 2 clips <A>.
-
-
INSTALL SWITCH BEZEL (w/ Power Back Door)
-
Engage the 6 claws to install the switch bezel.
-
-
INSTALL BACK DOOR INSIDE HANDLE
-
Engage the 4 claws to install the back door inside handle.
-
-
INSTALL REAR WINDOW SIDE GARNISH LH (w/o Power Back Door)
-
Engage the 3 clips and 2 claws to install the rear window side garnish LH.
-
-
INSTALL REAR WINDOW SIDE GARNISH LH (w/ Power Back Door)
-
Engage the 3 clips and 2 claws to install the rear window side garnish LH.
-
-
INSTALL BACK DOOR NO. 2 SERVICE HOLE COVER (w/ Power Back Door)
-
Engage the 3 claws to install the back door No. 2 service hole cover.
-
-
INSTALL REAR WINDOW SIDE GARNISH RH
-
Engage the 3 clips and 2 claws to install the rear window side garnish RH.
-
-
INSTALL BACK DOOR CENTER GARNISH
-
Engage the 6 clips and 4 claws to install the back door center garnish.
-
-
ADJUST TELEVISION CAMERA (w/ Parking Assist Monitor System)