SLIDE DOOR HALF OPEN STOPPER CONTROL ASSEMBLY REMOVAL

-
REMOVE REAR DOOR SCUFF PLATE LH
Tech Tips
Use the same procedure for the RH side and LH side Click here.
-
DISCONNECT NO. 1 SLIDE DOOR WEATHERSTRIP LH
-
REMOVE BACK DOOR STRIKER COVER
-
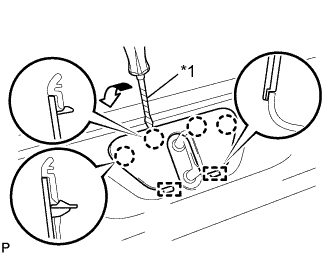
Text in Illustration *1 Protective Tape Using a screwdriver, disengage the 4 claws and 2 guides, and remove the back door striker cover.
Tech Tips
Tape the screwdriver tip before use.
-
-
REMOVE BACK DOOR SCUFF PLATE
-
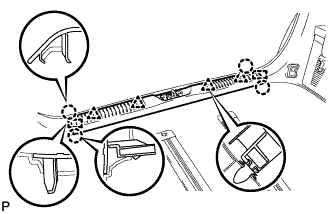
Remove the 4 claws, 4 clips and 2 guides, and remove the back door scuff plate.
-
-
ADJUST REAR NO. 2 SEAT ASSEMBLY LH
Tech Tips
Use the same procedure for the RH side and LH side Click here.
-
REMOVE RECLINING ADJUSTER RELEASE HANDLE LH
Tech Tips
Use the same procedure for the RH side and LH side Click here.
-
REMOVE UPPER SEAT TRACK RAIL COVER LH
Tech Tips
Use the same procedure for the RH side and LH side Click here.
-
REMOVE NO. 1 SEAT TRACK LOCK PLATE COVER
Tech Tips
Use the same procedure for the RH side and LH side Click here.
-
REMOVE REAR NO. 2 SEAT ASSEMBLY LH
Tech Tips
Use the same procedure for the RH side and LH side Click here.
-
REMOVE NO. 2 LUGGAGE COMPARTMENT TRIM HOOK
Tech Tips
Use the same procedure for the No. 2 luggage compartment trim hook and No. 1 luggage compartment trim hook Click here.
-
REMOVE ROPE HOOK ASSEMBLY
Tech Tips
Use the same procedure for the RH side and LH side Click here.
-
REMOVE LUGGAGE COMPARTMENT TRIM INNER COVER (for 60/40 Split Seat Type)
Tech Tips
Use the same procedure for the RH side and LH side Click here.
-
DISCONNECT REAR NO. 1 SEAT OUTER BELT ASSEMBLY (for 60/40 Split Seat Type)
Tech Tips
Use the same procedure for the RH side and LH side Click here.
-
REMOVE DECK SIDE GARNISH LH
-
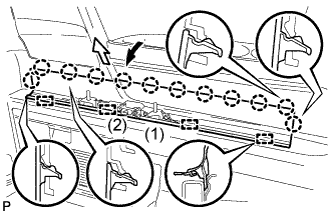
Disengage the 12 claws and 4 guides, and remove the deck side garnish LH as shown in the illustration.
-
-
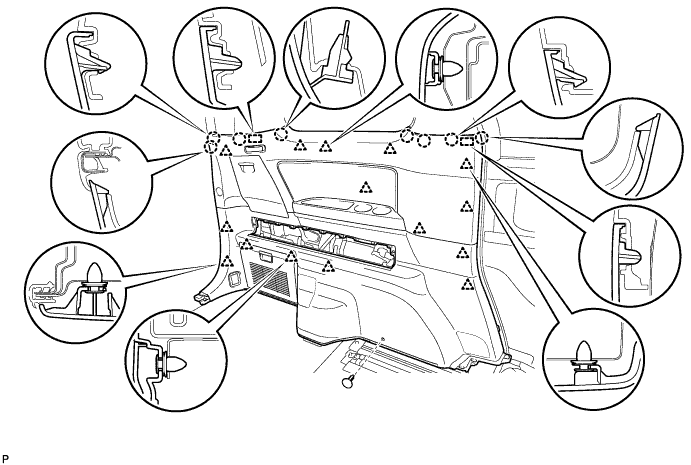
REMOVE REAR QUARTER TRIM PANEL ASSEMBLY LH
-
Remove the clip.
-
Disengage the 15 clips, 8 claws and 2 guides, and remove the rear quarter trim panel assembly LH.
-
-
REMOVE SLIDE DOOR HALF OPEN STOPPER CONTROL ASSEMBLY
-
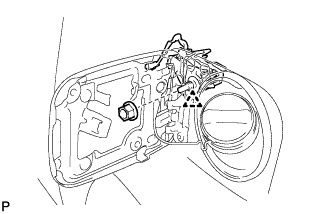
Remove the nut.
-
Disengage the clip.
-
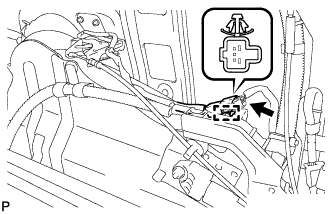
Disconnect the connector.
-
Disengage the clamp.
-
Disengage the slide door half open stopper control cable and remove the slide door half open stopper control assembly.
-